
As a homeowner, I’ve always believed that windows are more than just openings in the walls; they’re the eyes of a home, offering a glimpse into its soul. Over the years, I’ve come to realize that these “eyes” can become tired, inefficient, or even damaged. That’s when window replacement becomes a necessity.
In this comprehensive guide from Window Replacement Denton TX, I’ll take you through the process of window replacement step by step, sharing my personal journey and insights.
Step 1: Assess the Need for Replacement
The journey of window replacement starts with an honest assessment of your existing windows. Are they drafty, foggy, or damaged? Do you notice rising energy bills or difficulty in opening and closing them? If the answer is yes, it’s likely time for a replacement. In my case, I had to contend with aging, wooden frames that were increasingly difficult to maintain.
Step 2: Set a Budget
Once you’ve determined the need for replacement, the next step is to establish a budget. Replacement windows come in a wide range of styles and materials, each with its own cost implications. My family and I sat down to discuss our budgetary constraints and priorities. We wanted energy-efficient windows, so we were willing to invest a bit more upfront for long-term savings.
Step 3: Research Window Styles and Materials
Choosing the right window style and material can significantly impact the look, feel, and functionality of your home. We spent hours researching different window styles like casement, double-hung, and sliding windows. We also delved into materials such as vinyl, wood, and aluminum. Ultimately, we settled on energy-efficient vinyl windows for their durability and insulation properties.
Step 4: Find the Right Window Contractor
This step is crucial to the success of your window replacement project. After soliciting recommendations from friends and neighbors, we interviewed several window contractors. It’s essential to ask questions about their experience, licensing, insurance, and previous projects. We decided to go with a local contractor with a solid reputation, even though their quote was slightly higher than others. Quality and trustworthiness were non-negotiable for us.
Step 5: Schedule a Home Inspection
Once we had selected a contractor, they conducted a thorough inspection of our home to provide a detailed estimate. This included measuring the existing windows, assessing the condition of the frames, and identifying any potential structural issues. The inspection gave us confidence that we were on the right track with our decision to replace the windows.
Step 6: Choose the Right Glass
Selecting the right type of glass for your replacement windows is vital for energy efficiency and comfort. We decided to opt for double-pane windows with Low-E (low emissivity) coatings to reduce heat transfer and UV radiation. This choice would not only help us save on energy bills but also protect our furnishings from fading.
Step 7: Confirm Installation Details
Before the installation began, we reviewed all the installation details with our contractor. This included discussing the timeline, the number of workers involved, and any potential disruptions to our daily routine. It’s crucial to have a clear understanding of what to expect during the installation process.
Step 8: Prepare Your Home
To make the installation process smoother, we had to prepare our home. This meant removing curtains, blinds, and any fragile items near the windows. We also ensured that our pets were safely out of the way to prevent any accidents. The contractor appreciated our efforts to make their job easier.
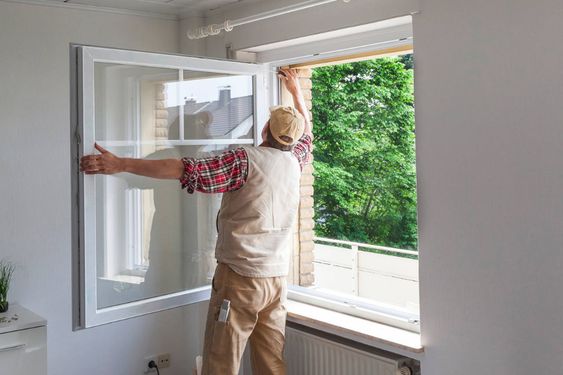
Step 9: Installation Day
The installation day was an exciting yet anxious time for us. Watching the old windows being removed and the new ones fitted into place was a transformative experience. We were impressed by the precision and skill of the installation crew. They took care to seal gaps and insulate the windows properly.
Step 10: Quality Assurance
Once the windows were in place, we conducted a thorough inspection with the contractor. We checked for any imperfections, gaps, or issues with the operation of the windows. Fortunately, everything was up to our satisfaction, and any minor adjustments were made promptly.
Step 11: Post-Installation Cleanup
After the installation was complete, the contractor ensured that our home was clean and free from debris. They disposed of the old windows responsibly and left our home looking better than when they arrived. It was a pleasant surprise and a testament to their professionalism.
Step 12: Enjoy Your New Windows
With the installation completed, it was time to enjoy the benefits of our new windows. We immediately noticed the difference in energy efficiency and comfort. The vinyl frames required minimal maintenance, and the enhanced insulation made our home cozier year-round.
Conclusion
In retrospect, by following Window Replacement Denton TX, our journey through window replacement was a rewarding one. It transformed our home, improved energy efficiency, and added value to our property. The key to success was careful planning, thorough research, and choosing the right contractor. If you’re considering window replacement, I hope this step-by-step guide provides you with the insights and confidence you need to embark on this exciting home improvement journey. It certainly made a significant difference in our lives, and I’m sure it will in yours too.
Denton Siding & Window Replacement
1429 Ridgecrest Cir, Denton, TX 76205, United States
940-283-7300