Local Businesses Blog in Texas

Tag: garage door repair san diego ca

How To Repair Genie Garage Door Opener – Garage Door Experts


Garage Door Repair San Diego CA can involve various troubleshooting steps, from addressing common issues like sensor misalignment to more complex repairs like replacing motor components. Below is a detailed guide on how to repair a Genie garage door opener effectively:

1. Troubleshooting Common Issues:

  • Check Power Supply: Ensure that the garage door opener is receiving power. Check the outlet and circuit breaker to confirm that there are no issues with the power supply.
  • Inspect Remote Batteries: If the remote control isn’t working, replace the batteries. Weak or dead batteries can prevent the remote from sending signals to the opener.
  • Clear Obstructions: Inspect the area around the garage door for any obstructions that may be preventing it from opening or closing properly. Remove any debris, objects, or obstacles blocking the door’s path.
  • Align Sensors: Genie garage door openers are equipped with safety sensors that prevent the door from closing if an object or person is in its path. Check the alignment of the sensors and ensure that they are clean and free of debris. Adjust the sensor alignment if necessary.
  • Check Door Balance: A garage door that is out of balance can strain the opener and cause it to malfunction. Disconnect the opener and manually open and close the door to check for balance issues. Adjust the tension or springs as needed to achieve proper balance.

2. Inspect and Clean Components:

  • Inspect Tracks and Rollers: Examine the tracks and rollers for any signs of wear, damage, or misalignment. Tighten loose bolts and lubricate moving parts with a silicone-based lubricant.
  • Check Chain or Belt: If your Genie garage door opener uses a chain or belt drive system, inspect it for signs of wear, stretching, or damage. Adjust the tension or replace the chain/belt if necessary.
  • Inspect Motor Gears: Open the motor housing and inspect the gears for signs of wear or damage. If you notice any worn or broken gears, replace them with compatible parts.

3. Reset and Reconfigure:

  • Reset Opener: Perform a factory reset on the Genie garage door opener to clear any stored settings or programming issues. Follow the instructions in the user manual to reset the opener to its default settings.
  • Reprogram Remotes: If the remote controls are not working properly, reprogram them to sync with the opener. Follow the instructions in the user manual to reprogram the remote controls.

4. Perform Advanced Repairs:

  • Replace Circuit Board: If the opener is not responding to commands or exhibiting erratic behavior, the circuit board may be faulty. Replace the circuit board with a compatible replacement part.
  • Replace Motor: If the motor is making unusual noises, struggling to lift the door, or not operating at all, it may need to be replaced. Purchase a new motor assembly and follow the manufacturer’s instructions to install it.

5. Regular Maintenance:

  • Lubricate Moving Parts: Apply lubricant to the rollers, tracks, hinges, and other moving parts of the garage door opener regularly to keep them operating smoothly and reduce wear and tear.
  • Inspect and Tighten Hardware: Periodically inspect the hardware, including bolts, screws, and fasteners, and tighten any loose connections to prevent issues with the opener’s operation.
  • Test Safety Features: Test the safety features of the Genie garage door opener, including the auto-reverse mechanism and safety sensors, to ensure they are functioning correctly and providing adequate protection.

6. Seek Professional Help:

  • If you encounter issues that you are unable to resolve or if the repairs require specialized knowledge or tools, consider seeking assistance from a professional garage door technician. They can diagnose the problem accurately and perform the necessary repairs safely and efficiently.

Garage Door Repair San Diego CA Remember to refer to the user manual for specific instructions and safety guidelines, and exercise caution when working with electrical components and moving parts.

Garage Door Experts

3921 Fourth Ave, San Diego, CA 92103, United States

1-619-828-3886

Garage Door Strut Installation: Strengthening Your Door – Ramona Valley Garage Door & Gates

As a homeowner who takes pride in maintaining the structural integrity of my property, I recently found myself exploring solutions to reinforce the stability of my garage door.

In reference to Garage Door Repair, the quest for enhanced durability and resistance to external forces led me to consider garage door strut installation—a strategic measure to fortify the structure against the challenges it faces daily. Join me on a journey through the process of garage door strut installation, exploring the reasons behind this enhancement, the steps involved, and the notable benefits it brings to the overall functionality of a garage door.

Understanding the Need for Garage Door Struts: Why Reinforce?

Before delving into the installation process, it’s crucial to understand the factors that make garage door strut installation a wise investment. Garage doors, over time, can experience various stresses and strains, particularly in larger or heavier models. Some of the primary reasons for considering strut installation include:

**1. Preventing Bowing and Sagging

As garage doors age, they may exhibit signs of bowing or sagging, especially in the center. This can compromise the overall structure and alignment, affecting the smooth operation of the door. Garage door struts provide additional support along the horizontal sections, preventing bowing and maintaining a level surface.

Why I Considered It: Noticing subtle signs of bowing in my garage door prompted me to explore solutions for reinforcing its structural integrity. Installing struts offered a targeted approach to address this issue, ensuring that my door maintained its original shape and function.

**2. Enhancing Wind Resistance

Garage doors, particularly those in regions prone to strong winds and storms, face the risk of damage due to wind forces. Struts act as braces, distributing wind pressure more evenly across the door. This added reinforcement reduces the likelihood of the door being forced off its tracks or sustaining damage during high winds.

Why I Considered It: Living in an area with occasional strong winds, the prospect of enhancing wind resistance was a compelling reason for garage door strut installation. It provided peace of mind, knowing that my door was fortified against the elements.

**3. Supporting Heavy Doors

Large or heavy garage doors, common in many homes, exert more stress on the horizontal sections and supporting hardware. Over time, this added weight can contribute to wear and tear. Garage door struts offer crucial support, distributing the weight evenly and reducing the strain on individual components.

Why I Considered It: My garage door, being on the heavier side, required additional support to ensure the longevity of its components. Installing struts was a proactive measure to address the potential wear and tear associated with the door’s weight.

The Garage Door Strut Installation Process: Step-by-Step Guide

Now that the rationale behind garage door strut installation is clear, let’s explore the step-by-step process to reinforce your door effectively. Keep in mind that this guide is a general overview, and specific instructions may vary based on the type and model of your garage door.

**1. Gather Necessary Tools and Materials

Before starting the installation, gather the tools and materials required for the job. Typically, you’ll need a ladder, a power drill with screwdriver bits, a tape measure, a level, and the garage door strut kit, which includes the struts and necessary hardware.

Why It Matters: Having all the tools and materials in place ensures a smooth and efficient installation process. It reduces interruptions and allows you to focus on the task at hand.

**2. Measure and Mark Strut Placement

Using a tape measure, identify the areas along the horizontal sections of the garage door where the struts will be installed. Mark these locations with a pencil or chalk, ensuring that the strut placement is even and symmetrically distributed.

Why It Matters: Accurate measurements and markings are crucial for achieving a balanced reinforcement. Properly placed struts contribute to the overall stability of the garage door.

**3. Secure the Struts to the Door Sections

Position the garage door struts on the marked locations and use the power drill to secure them to the horizontal door sections. Most strut kits come with self-tapping screws designed for this purpose. Ensure that the struts are level and tightly secured to the door.

Why It Matters: Proper alignment and secure attachment are essential for the struts to effectively distribute weight and resist forces. This step ensures a strong and reliable reinforcement.

**4. Attach the Center Support Strut

In cases where a garage door has a center section, it’s advisable to install a center support strut. This strut adds additional reinforcement to the middle of the door, preventing bowing and sagging. Follow the same process of measuring, marking, and securing the center support strut.

Why It Matters: The center support strut plays a crucial role in maintaining the structural integrity of the door. Its installation is particularly important for preventing bowing in larger doors.

**5. Check for Proper Alignment

After installing the garage door struts, carefully inspect the door for proper alignment. Open and close the door to ensure smooth operation. Use a level to confirm that the struts have not caused any misalignment issues.

Why It Matters: Checking for proper alignment is a critical step to avoid potential issues with the door’s operation. Struts should enhance stability without compromising the door’s ability to open and close smoothly.

**6. Test Wind Resistance

If wind resistance was a primary consideration for installing struts, take the opportunity to test the door’s resilience to wind forces. This can be done during periods of natural wind or by simulating wind conditions with the help of an assistant.

Why It Matters: Testing wind resistance ensures that the garage door struts effectively distribute pressure, reducing the risk of damage during windy conditions.

Benefits of Garage Door Strut Installation: Strengthening Your Investment

The installation of garage door struts brings a host of benefits that go beyond the immediate reinforcement of the door. Understanding these advantages can further solidify the decision to invest in this practical enhancement.

**1. Extended Lifespan of Door Components

By reducing the strain on individual components, garage door struts contribute to the extended lifespan of the door. The even distribution of weight minimizes wear and tear, resulting in less frequent repairs and replacements.

Why It Matters: Enhancing the durability of door components translates to long-term cost savings and ensures that the door continues to function reliably for years to come.

**2. Improved Structural Stability

Garage door struts enhance the overall structural stability of the door. By preventing bowing and sagging, they maintain a level surface and ensure that the door operates smoothly. This improvement in stability is particularly beneficial for larger doors.

Why It Matters: A structurally stable garage door not only functions better but also presents a safer environment for homeowners and their vehicles. It reduces the risk of accidents and malfunctions.

**3. Enhanced Wind and Weather Resistance

The reinforced structure provided by garage door struts enhances the door’s ability to resist external forces, including strong winds. This is particularly important in regions prone to severe weather conditions. Struts act as a safeguard, reducing the risk of damage during storms.

Why It Matters: Improved wind and weather resistance contribute to the overall longevity of the garage door, protecting it from potential damage and the need for extensive repairs.

**4. Prevention of Costly Repairs

Addressing potential issues before they escalate is a key advantage of garage door strut installation. By proactively reinforcing the door, homeowners can prevent costly repairs that may arise due to structural damage or component wear.

Why It Matters: Preventing costly repairs aligns with a proactive approach to home maintenance. Garage door strut installation acts as a preemptive measure, saving homeowners from unexpected expenses.

**5. Peace of Mind and Security

Knowing that your garage door is reinforced with struts provides peace of mind. The added stability not only enhances the security of your property but also eliminates concerns about the door malfunctioning or sustaining damage.

Why It Matters: Security is a top priority for homeowners, and a stable garage door contributes to the overall safety and protection of the home. Peace of mind is a valuable outcome of garage door strut installation.

Conclusion: Strengthening Your Garage Door Investment

In the quest for a home that stands the test of time, garage door strut installation emerges as a practical and impactful solution. By reinforcing the structural integrity of the garage door, homeowners can enjoy enhanced stability, extended lifespan of components, improved resistance to external forces, and the peace of mind that comes with a secure and reliable entrance to their homes.

As I navigated through the process of garage door strut installation, I discovered that this enhancement not only addressed existing concerns but also offered a proactive approach to maintaining the overall integrity of my property. The decision to reinforce my garage door became a valuable investment, contributing to the long-term durability and functionality of an essential component of my home.

Overall, as stated in Garage Door Repair, for homeowners considering ways to fortify their garage doors, garage door strut installation stands as a testament to the principle that preventive measures often yield the most significant rewards. Strengthening your garage door is not just an investment in its immediate function but a commitment to the enduring resilience of your home.

Ramona Valley Garage Door & Gates

842 B St #6, Ramona, CA 92065, United States

760-970-8367

Material Compatibility with Garage Door Openers: Ensuring Smooth Operation – Del Cerro Garage & Overhead Doors

As a meticulous homeowner who values the seamless functionality of my living space, I embarked on a journey to understand a critical aspect of garage door operation—material compatibility with garage door openers. The choice of garage door material is not merely an aesthetic consideration; it significantly influences the performance and longevity of the garage door opener.

In this exploration, I share my insights into the importance of material compatibility and the key considerations to ensure the smooth operation of garage doors according to Garage Door Repair.

The Unsung Hero: Garage Door Openers and Material Harmony

Before delving into the intricacies of material compatibility, it’s crucial to acknowledge the unsung hero of garage door operation—the garage door opener. This motorized device is the powerhouse behind the smooth and convenient movement of the garage door. However, for this synergy to flourish, it must be in harmony with the material of the garage door itself.

Material Matters: The Impact of Garage Door Material on Openers

The garage door is more than just a barrier; it’s a dynamic component that interacts intimately with the garage door opener. Different materials possess unique characteristics that can either enhance or impede the performance of the opener. As I explored this dynamic relationship, I uncovered several key factors that underscore the importance of material compatibility:

1. Weight Considerations: Balancing the Load

One of the primary factors influencing material compatibility is the weight of the garage door. Garage door openers are designed with specific lifting capacities, and the material of the door directly impacts its weight. Heavy materials, such as solid wood or certain metals, may require more powerful openers to ensure smooth and efficient operation.

2. Resistance to Wear: Prolonging Opener Lifespan

Different materials exhibit varying degrees of resistance to wear and friction. For example, steel and aluminum are known for their durability and resistance to rust, while wood may require more diligent maintenance. Material compatibility ensures that the constant interaction between the door and opener does not lead to premature wear, extending the lifespan of both components.

3. Insulation Properties: Impact on Energy Efficiency

Insulation is a key consideration for many homeowners, especially those with attached garages. The material of the garage door influences its insulation properties, and this can impact the energy efficiency of the entire space. Material compatibility ensures that the opener can effectively handle the additional weight of insulated doors, promoting both comfort and efficiency.

4. Flexibility and Rigidity: Adapting to Movement

The flexibility and rigidity of garage door materials play a crucial role in how they respond to the movement facilitated by the opener. Some materials, like steel, offer a balance of strength and flexibility, making them well-suited for various opener types. On the other hand, rigid materials may exert more stress on the opener mechanism, affecting its long-term performance.

5. Maintenance Requirements: Sustaining Operational Excellence

Every material comes with its own set of maintenance requirements. Wood, for instance, may demand regular sealing or painting to protect against the elements. Material compatibility ensures that the maintenance needs align with the capabilities and expectations of the garage door opener, creating a harmonious and sustainable system.

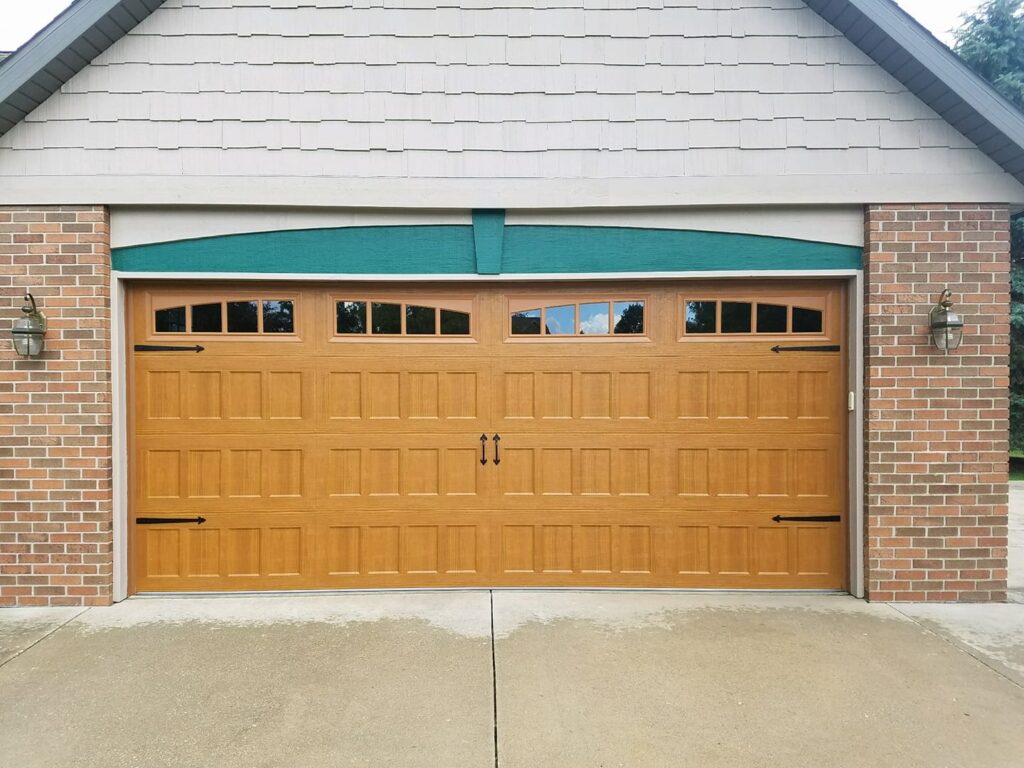
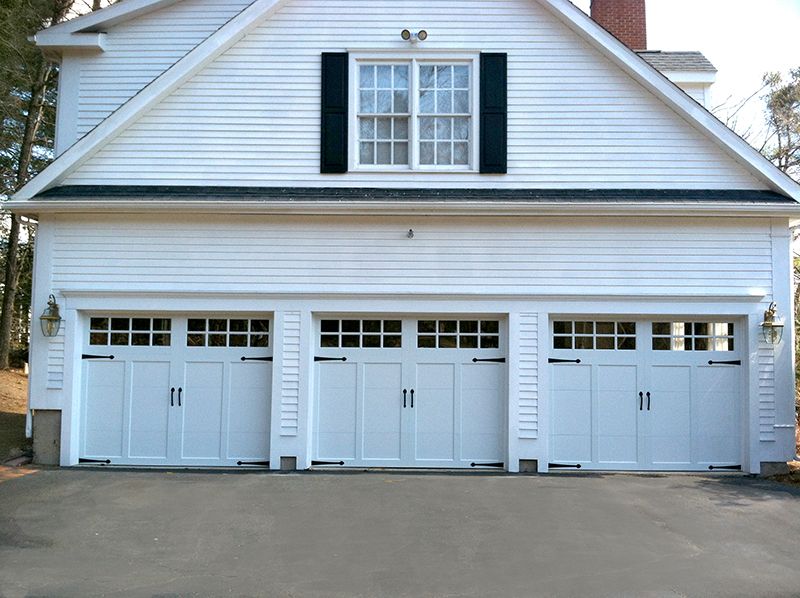
Wooden Doors: A Classic Choice with Considerations

Wooden garage doors, with their timeless appeal and natural aesthetics, remain a popular choice among homeowners. However, their compatibility with garage door openers requires careful consideration. As someone who opted for the classic charm of a wooden door, I delved into the nuances of material compatibility to ensure a harmonious partnership with the garage door opener.

1. Weight Challenges: Choosing the Right Opener

Wooden doors, particularly those made from solid wood, tend to be heavier than their counterparts. This poses a challenge in terms of weight compatibility with garage door openers. To address this, I selected a garage door opener with a higher lifting capacity to effortlessly handle the substantial weight of the wooden door.

2. Regular Maintenance: Preserving Opener Longevity

Wood, while exuding elegance, requires more diligent maintenance to protect against the effects of weather and aging. Regular sealing, painting, and addressing any signs of moisture are essential practices to ensure the longevity of both the wooden door and the garage door opener. This commitment to maintenance aligns with the principles of material compatibility.

3. Insulation Advantages: Enhancing Energy Efficiency

One of the advantages of wooden doors is their natural insulation properties. Wood provides a degree of thermal resistance, contributing to energy efficiency within the garage space. Material compatibility considerations factored in the insulation benefits, ensuring that the garage door opener could efficiently handle the added weight without compromising performance.

4. Aesthetic Appeal: Balancing Form and Function

The aesthetic appeal of wooden doors is unparalleled, adding a touch of warmth and sophistication to the home exterior. Material compatibility becomes a delicate dance between form and function, ensuring that the garage door opener not only lifts and lowers the door efficiently but also complements the overall aesthetic vision of the homeowner.

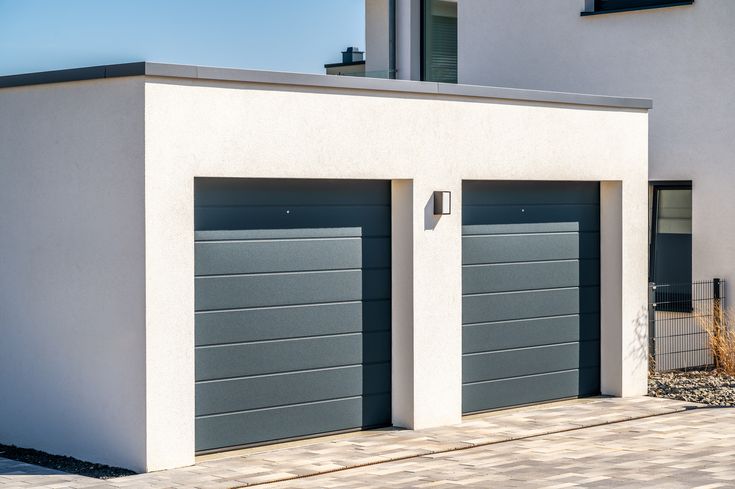
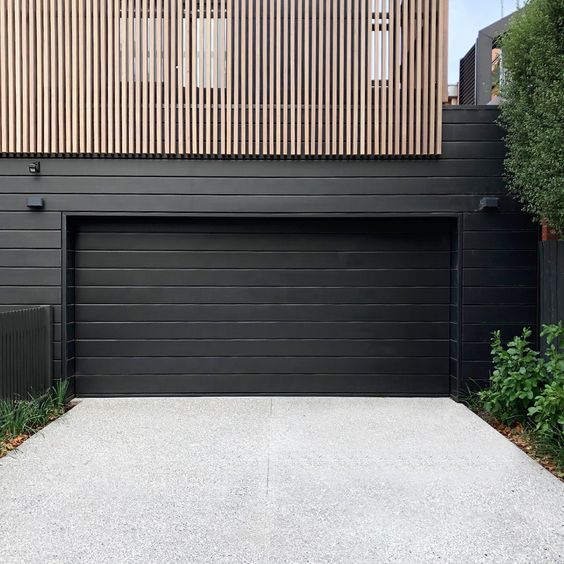
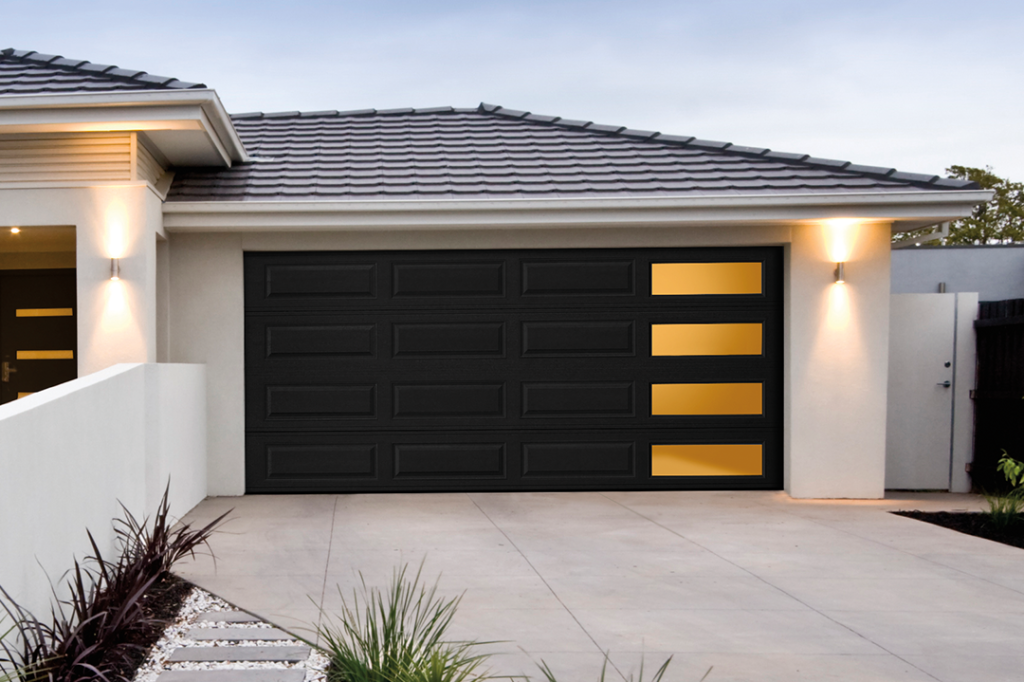
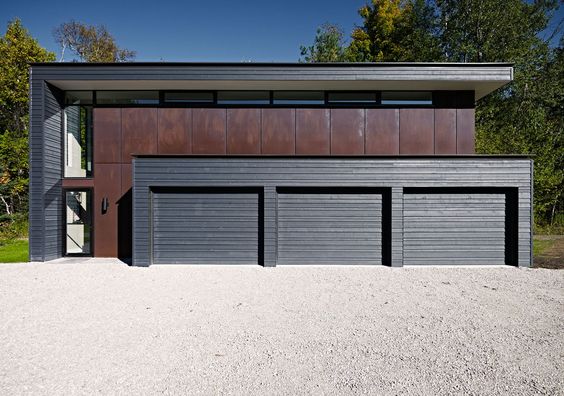
Metal Doors: Strength in Simplicity with Material Synergy

Metal garage doors, whether made of steel or aluminum, are prized for their strength, durability, and low maintenance requirements. Choosing a material with inherent compatibility with garage door openers, I explored the characteristics that make metal doors a popular and harmonious choice.

1. Weight Efficiency: Lighter, Yet Strong

Compared to solid wood, metal doors are often lighter while retaining impressive strength. This weight efficiency contributes to smoother operation and places less strain on the garage door opener. The compatibility between metal doors and openers is, therefore, more straightforward, as the weight is within the designed lifting capacity.

2. Low Maintenance: Sustaining Long-Term Performance

Metal doors boast low maintenance requirements, making them an attractive option for homeowners seeking durability with minimal upkeep. The inherent resistance of metals to rust and decay aligns seamlessly with the expectations of garage door openers, reducing the risk of premature wear and ensuring long-term operational excellence.

3. Insulation Options: Balancing Efficiency

Metal doors offer insulation options that can be customized to meet specific energy efficiency needs. Whether through the addition of insulation layers or choosing a door with inherent insulating properties, metal doors allow homeowners to strike a balance between operational efficiency and climate control within the garage space.

4. Design Versatility: Adapting to Preferences

Metal doors provide a versatile canvas for various designs, from sleek and modern to classic and ornate. The compatibility between metal doors and garage door openers extends beyond weight considerations to encompass the adaptability of the opener to different design styles. This flexibility ensures that homeowners can express their preferences without compromising functionality.

Composite and Fiberglass Doors: The Modern Blend of Form and Function

As modern innovations in garage door materials continue to evolve, composite and fiberglass doors have emerged as a contemporary blend of form and function. These materials offer a unique set of characteristics that demand a nuanced approach to material compatibility with garage door openers.

1. Weight Variability: Tailoring to Opener Capacities

Composite and fiberglass doors come in various compositions, resulting in variable weights. Material compatibility requires a careful assessment of the specific door’s weight and selecting a garage door opener with an appropriate lifting capacity. This ensures that the opener can handle the unique characteristics of these modern materials.

2. Weather Resistance: Preserving Opener Integrity

One of the notable advantages of composite and fiberglass doors is their resistance to weather elements. Material compatibility considerations encompass the potential exposure to moisture, sunlight, and temperature fluctuations. This inherent weather resistance aligns with the durability expectations of garage door openers, preserving their integrity over time.

3. Design Versatility: Exploring Contemporary Styles

Composite and fiberglass doors offer a contemporary aesthetic with a wide range of design possibilities. Material compatibility extends beyond weight considerations to embrace the design versatility of these modern materials. This compatibility ensures that garage door openers can smoothly operate doors of varying styles and compositions.

4. Insulation Innovations: Prioritizing Energy Efficiency

The insulation capabilities of composite and fiberglass doors contribute to energy efficiency. Material compatibility involves assessing the specific insulation features of the chosen door and ensuring that the garage door opener can accommodate the additional weight while maintaining efficient operation.

Ensuring Material Compatibility: A Holistic Approach

In my pursuit of material compatibility with garage door openers, I realized that ensuring a harmonious relationship involves a holistic approach. Here are key considerations that can guide homeowners in making informed decisions:

1. Consult Manufacturer Recommendations: Expert Guidance

Manufacturers provide specific recommendations regarding the compatible materials for their garage door openers. Consulting these guidelines offers valuable insights into the intended usage and limitations of the opener, helping homeowners make informed decisions.

2. Professional Installation: Ensuring Precision

Opting for professional installation ensures that both the garage door and opener are integrated with precision. Professional installers possess the expertise to assess material compatibility, make necessary adjustments, and guarantee optimal performance.

3. Regular Maintenance: Preserving Longevity

Regardless of the chosen material, regular maintenance is essential for both the garage door and opener. Lubricating moving parts, checking for signs of wear, and addressing any issues promptly contribute to the longevity of the entire system.

4. Upgrading Openers as Needed: Adapting to Changes

As technology evolves and garage door materials advance, homeowners may find it beneficial to upgrade their garage door openers. This proactive approach ensures that the opener remains compatible with contemporary materials, offering the latest features and lifting capacities.

5. Consider Future Changes: Anticipating Alterations

Anticipating future changes to the garage door or its material is a prudent step in ensuring ongoing material compatibility. Whether planning a renovation or considering a material switch, homeowners can make choices that align with the capabilities of their existing garage door opener or plan for a compatible upgrade.

Conclusion: A Symphony of Compatibility

By following Garage Door Repair, as I reflect on my journey of understanding material compatibility with garage door openers, I am reminded of the intricate dance between these two essential components. Like a symphony, where each instrument plays a crucial role, the garage door material and opener must harmonize to create a seamless and efficient operation.

Whether the timeless elegance of wood, the robust strength of metal, or the modern versatility of composite and fiberglass, each material brings its unique qualities to the ensemble. Material compatibility ensures that the garage door opener conducts this symphony with finesse, lifting and lowering the door with precision and reliability.

In the realm of home maintenance, where every decision contributes to the overall harmony of daily life, material compatibility with garage door openers stands as a testament to the art of thoughtful choices. It is a journey that underscores the importance of understanding the nuances of materials, embracing technological advancements, and ensuring that every component works in concert to create a living space that is both functional and harmoniously beautiful.

Del Cerro Garage & Overhead Doors

6210 Lambda Dr, San Diego, CA 92120, United States

619-492-3915

How To Replace Battery In Chamberlain Garage Door Opener – Del Cerro Garage & Overhead Doors

Replacing the battery in a Chamberlain Garage Door Repair San Diego CA is a straightforward process that ensures the continued smooth operation of your garage door.

Follow these detailed steps to guide you through the battery replacement:

: Identify the Battery Type Determine the type of battery used in your Chamberlain garage door opener. Commonly, Chamberlain garage door openers use a 3V lithium coin cell battery, such as a CR2032. Refer to your opener’s manual or check the existing battery to confirm the correct type.

: Gather Necessary Tools and Materials Collect the tools and materials needed for the battery replacement. You’ll typically need a small flathead screwdriver and a new battery of the correct type.

: Locate the Battery Compartment Locate the battery compartment on your Chamberlain garage door opener. The location varies depending on the model but is typically found on the back or side of the opener near the control panel. Refer to your opener’s manual for specific instructions.

: Disconnect Power Before opening the battery compartment, disconnect power to the garage door opener. This can usually be done by unplugging the opener or switching off the circuit breaker dedicated to the garage door.

: Open the Battery Compartment Use a small flathead screwdriver to carefully open the battery compartment. Insert the screwdriver into the designated slot or opening and gently pry the compartment open. Be cautious not to force it to avoid any damage.

: Remove the Old Battery Once the compartment is open, locate the old battery. Depending on the design, the battery may be held in place by a clip or a small holder. Release the clip or holder to remove the old battery.

: Check Battery Orientation Take note of the orientation of the old battery before removing it. Typically, the positive side faces up, but this may vary. Pay attention to any markings on the battery or in the compartment indicating the correct orientation.

: Insert the New Battery Insert the new battery into the compartment, ensuring that it is oriented correctly. Press the battery down to ensure it makes proper contact with the connectors in the compartment. If the battery is held in place by a clip or holder, secure it in position.

: Close the Battery Compartment Carefully close the battery compartment by pressing it shut until you hear a click or feel it securely in place. Ensure that the compartment is sealed properly to protect the battery.

: Reconnect Power Once the new battery is installed and the compartment is securely closed, reconnect power to the garage door opener. This can be done by plugging in the opener or turning on the circuit breaker.

: Test the Garage Door Opener Test the garage door opener by using the remote control or wall-mounted button. Confirm that the opener operates smoothly without any issues. If the battery replacement was successful, the opener should function as expected.

: Program or Sync Remote Controls In some cases, after a battery replacement, you may need to reprogram or sync your remote controls with the garage door opener. Follow the instructions in your opener’s manual for this process.

: Reset the Time and Date (if applicable) If your Chamberlain garage door opener includes a display with time and date settings, you may need to reset them after a battery replacement. Refer to the manual for instructions on resetting these settings.

: Regular Maintenance Consider implementing a regular maintenance schedule for your garage door opener, including periodic battery checks and replacements. This ensures that the opener continues to function reliably.

: Dispose of Old Battery Responsibly Dispose of the old battery in accordance with local regulations. Many communities have designated recycling centers or programs for the proper disposal of batteries. Avoid throwing batteries in the trash.

: Final Checks Perform a final check of the garage door opener to ensure that the new battery is functioning correctly. Confirm that the remote controls operate the opener and that the time and date settings, if applicable, are accurate.

By following these detailed steps, you should be able to successfully replace the battery in your Chamberlain Garage Door Repair San Diego CA. If you encounter any difficulties or are unsure about any step, consult the manufacturer’s manual or consider seeking professional assistance. Remember to prioritize safety throughout the entire battery replacement process.

Del Cerro Garage & Overhead Doors

6210 Lambda Dr, San Diego, CA 92120, United States

1-619-492-3915

What Horsepower Garage Door Opener Do I Need – Del Cerro Garage & Overhead Doors

Selecting the appropriate horsepower (HP) for your Garage Door Repair San Diego CA opener is crucial for ensuring the smooth and reliable operation of your garage door. The right horsepower will depend on various factors, including the size and weight of your garage door, the frequency of use, and any special features you desire. Choosing the right horsepower will not only ensure proper functionality but also extend the lifespan of your garage door opener.

Here’s a comprehensive guide to help you determine the horsepower you need for your garage door opener:

1. Evaluate the Size and Weight of Your Garage Door:
The size and weight of your garage door are significant factors in determining the appropriate horsepower for your opener. Heavier and larger doors require more horsepower to lift and lower effectively.

  • 1/2 HP: Suitable for single-car garage doors that are relatively lightweight and smaller in size.
  • 3/4 HP: Ideal for single-car or smaller double-car garage doors with moderate weight.
  • 1 HP: Recommended for heavy double-car garage doors or doors with added insulation or special materials.

2. Consider the Frequency of Use:
If your garage door sees frequent use, such as multiple times a day, a higher horsepower opener might be more suitable to handle the increased demand without excessive wear.

3. Account for Special Features and Additions:
If your garage door has special features or additions that add weight, such as insulation, windows, or decorative elements, you should consider a higher horsepower opener to accommodate the additional load.

4. Noise Considerations:
Higher horsepower openers can be more powerful and capable of lifting heavier doors, but they might generate more noise. If noise is a concern, consider openers with features like belt or screw drive systems, which tend to be quieter than chain drive systems.

5. Types of Garage Door Openers:
Different types of garage door openers have different horsepower options available:

  • Chain Drive: These openers are durable and cost-effective but can be noisy. They are available in various horsepower options to accommodate different door sizes and weights.
  • Belt Drive: Belt drive openers are known for their quiet operation. They are available in different horsepower options for various door sizes.
  • Screw Drive: Screw drive openers are known for their simplicity and low maintenance. They are often available in 1/2 or 3/4 HP options.
  • Direct Drive: Direct drive openers are known for their minimal moving parts and quiet operation. They are available in 3/4 or 1 HP options.

6. Seek Professional Advice:
If you’re unsure about the right horsepower for your garage door opener, consider consulting a professional. Garage door technicians can assess your door’s size, weight, and other factors to recommend the appropriate horsepower for your specific situation.

7. Safety Precautions:
When installing or replacing a garage door opener, prioritize safety:

  • Ensure proper installation following the manufacturer’s guidelines and local codes.
  • Use appropriate safety equipment and tools during installation.
  • Test the safety features of the opener, including auto-reverse and safety sensors, to ensure proper functionality.

Conclusion:
Selecting the right horsepower for your Garage Door Repair San Diego CA opener is essential for its proper operation, durability, and safety. Consider factors such as the size and weight of your garage door, the frequency of use, and any special features when determining the appropriate horsepower. Choosing the right horsepower will ensure that your garage door opener can lift and lower the door smoothly and efficiently. If you’re uncertain about the right choice, seek advice from professionals to ensure that your garage door opener meets your needs and provides reliable performance for years to come.

Del Cerro Garage & Overhead Doors

6210 Lambda Dr, San Diego, CA 92120, United States

1-619-492-3915

Garage Door Insulation for Summer: Blocking Heat and UV Rays – Del Cerro Garage & Overhead Doors

As a homeowner who has experienced the discomfort of scorching summer temperatures in my garage, I realized the importance of garage door insulation for blocking heat and UV rays. It was evident that my garage door was acting as a massive thermal barrier, allowing outdoor heat to infiltrate the space and making it unbearably hot inside. I knew that something had to be done to create a more comfortable environment and protect the items stored in my garage from potential damage.

As stated in Garage Door Repair, understanding the impact of summer heat on garages, I became aware of the need to prioritize insulation for my garage door. I knew that uninsulated garage doors were contributing to the excessive heat buildup, which not only made spending time in the garage uncomfortable but also had the potential to affect the overall temperature of the adjacent living spaces. Recognizing the significance of garage door insulation, I set out to explore the benefits it offered and various insulation options available to address this issue effectively.

The primary advantage that garage door insulation provided was a reduction in indoor temperatures. I understood that insulation would act as a barrier against external heat, preventing it from seeping into the garage. By blocking heat transfer, it would help maintain cooler temperatures inside, creating a much more comfortable environment for any activities or projects taking place in the garage. Moreover, this would alleviate the risk of potential damage to items stored in the garage, such as paint, chemicals, and certain materials, which were susceptible to the adverse effects of high temperatures.

Energy efficiency was another significant benefit I was eager to achieve through garage door insulation. With the insulation blocking heat gain in the garage, I knew that my cooling system inside the house would have to work less to maintain comfortable temperatures. This would lead to lower energy consumption, ultimately resulting in potential cost savings on my utility bills. The idea of reducing both my environmental footprint and monthly expenses motivated me to prioritize insulation for my garage door.

As I researched further, I discovered that insulation would not only block heat but also harmful UV rays from entering the garage. UV rays could cause damage to items such as car paint, woodwork, and plastics, leading to fading, discoloration, and degradation. With insulation preventing UV rays from penetrating the garage, I could preserve the condition and longevity of my stored belongings, saving me the hassle and expense of potential replacements.

In my pursuit of a suitable insulation option, I learned about various types available in the market. Reflective foil insulation, polystyrene insulation, polyurethane insulation, and batt insulation were some of the options that caught my attention. Reflective foil insulation, with its ability to reflect heat radiation, sounded like an effective solution for blocking radiant heat and UV rays. Polystyrene insulation, known for its thermal insulating properties, offered rigid panels that could be inserted into the garage door sections, providing a significant barrier against heat transfer.

I was particularly intrigued by polyurethane insulation, considered one of the most effective options for garage doors. Its high-density foam, when injected into the garage door sections, would expand to fill all gaps and voids, offering excellent thermal resistance. Additionally, polyurethane insulation would enhance the structural integrity of the door and provide superior noise reduction properties.

As I considered my options, I realized that while some types of insulation could be installed as DIY projects, others, such as polyurethane foam, might require professional installation. Understanding the importance of proper installation, I made sure to evaluate my insulation needs and, if necessary, seek the assistance of a professional to ensure that the chosen insulation was suitable for my specific garage door model.

In conclusion, based from Garage Door Repair, garage door insulation for the summer was a practical and necessary step to create a cooler and more comfortable environment in my garage. The benefits of reduced indoor temperatures, energy efficiency, UV ray protection, enhanced durability, and noise reduction were compelling reasons for me to invest in insulation. After careful consideration, I chose polyurethane insulation for its effectiveness and overall performance. With insulation in place, I could now enjoy a cooler garage space, protect my stored belongings, and contribute to a more energy-efficient and sustainable living environment.

Del Cerro Garage & Overhead Doors

6210 Lambda Dr, San Diego, CA 92120, United States

619-492-3915

Powered by WordPress & Theme by Anders Norén