Local Businesses Blog in Texas

Tag: garage door repair volo il

How Much Garage Door Installation Cost – EDM Garage Doors, LLC

The Garage Door Repair Volo IL can depend on factors such as the type of garage door, size and material, insulation, and additional features like windows and hardware.

Understanding these factors can help you estimate the total cost of your garage door installation project.

Factors Affecting the Cost

Several factors can influence the cost of garage door installation:
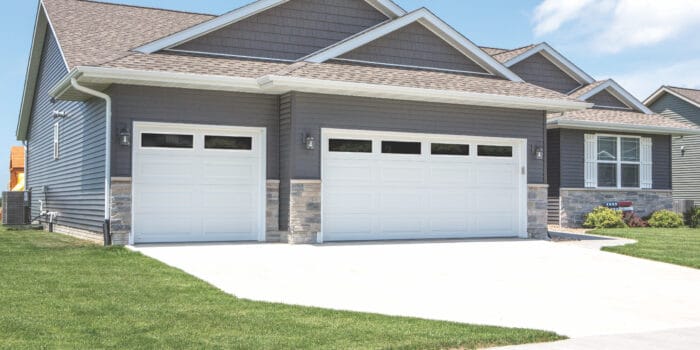
Type of Garage Door

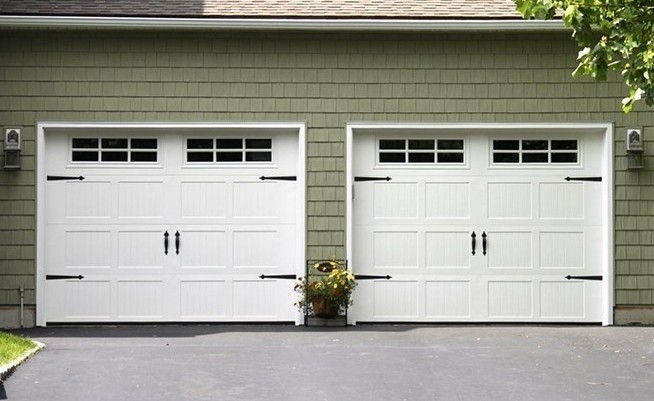
There are several types of garage doors to choose from, including sectional, roll-up, slide to the side, and tilt-up. The type of garage door you choose can affect the overall cost of installation.
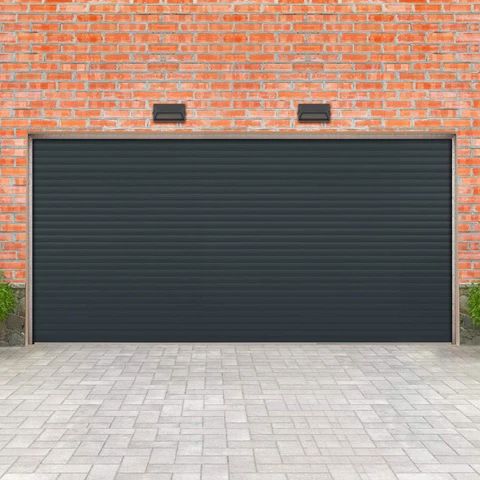
Size and Material

The size and material of the garage door can also impact the cost. Larger doors and doors made of premium materials like wood or steel tend to be more expensive than smaller doors or doors made of basic materials like aluminum.

Insulation

If you’re interested in an insulated garage door to improve energy efficiency and noise reduction, be prepared to pay a higher upfront cost for installation.

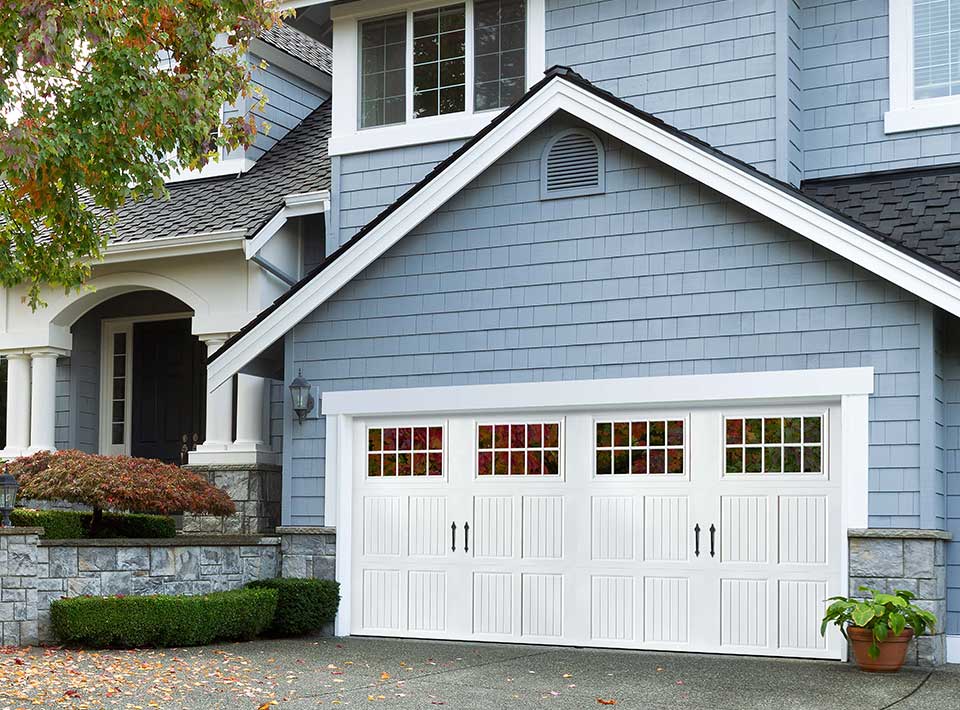
Windows and Hardware

Adding windows or decorative hardware to your garage door can also increase the cost of installation. However, these features can enhance the appearance of your garage door and add value to your home.

Average Cost Estimates

The average cost of garage door installation, including materials and labor, typically ranges from $500 to $1500. However, this cost can vary depending on factors such as the ones mentioned above and other considerations.

Additional Costs to Consider

In addition to the cost of the garage door itself and installation, there may be additional costs to consider:

Removal and Disposal of Old Door

If you’re replacing an existing garage door, you may need to factor in the cost of removing and disposing of the old door, especially if you’re hiring a professional installer.

Garage Door Opener

If you don’t already have a garage door opener or if you’re upgrading to a new one, you’ll need to consider the cost of purchasing and installing the opener as well.

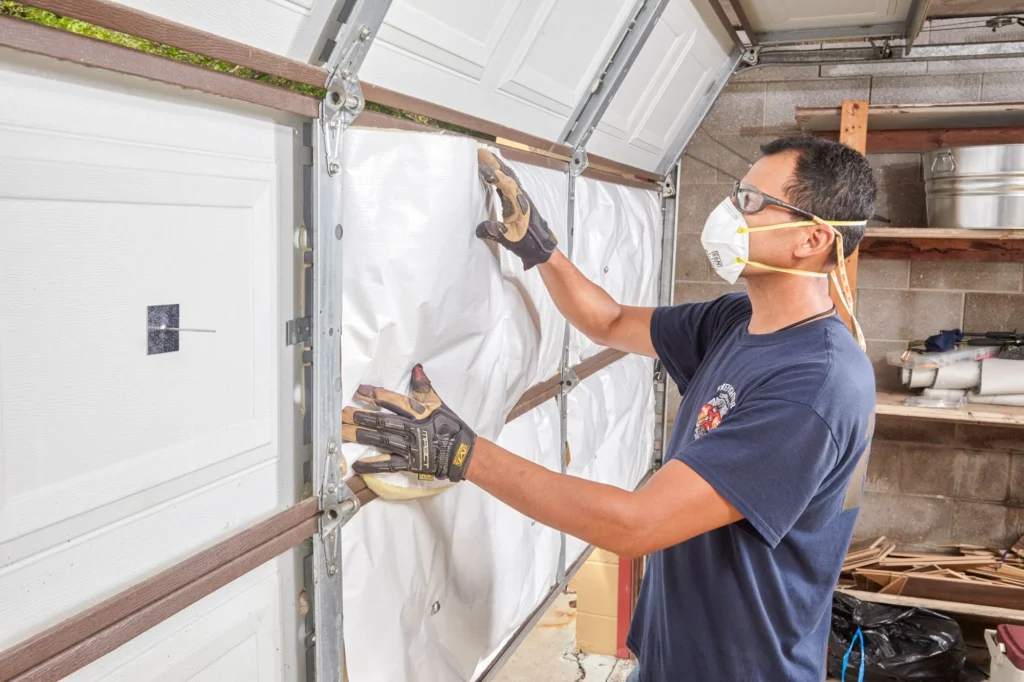
Professional Installation

While some homeowners may choose to install their garage door themselves to save money, hiring a professional installer can ensure proper installation and may be worth the additional cost for peace of mind.

Tips for Saving Money

To save money on your garage door installation, consider the following tips:

  • Shop around and compare prices from multiple garage door retailers and installers.
  • Opt for a basic garage door model without unnecessary features or upgrades.
  • Consider DIY installation if you have the necessary skills and tools, but be sure to follow all safety precautions.

Conclusion:

The cost of garage door installation can vary depending on factors such as the type of door, size and material, insulation, and additional features. By understanding these factors and considering additional costs, you can estimate the total cost of your garage door installation project and make an informed decision.

EDM Garage Doors, LLC

596 Richard Brown Blvd, Volo, IL 60073, United States

1-847-416-3036

How To Connect Your Garage Door Opener – EDM Garage Doors, LLC


Connecting your Garage Door Repair Volo IL involves several steps to ensure proper installation, functionality, and security. Whether you’re installing a new opener or replacing an existing one, it’s essential to follow manufacturer instructions and safety guidelines.
In this comprehensive guide, I’ll walk you through the process of connecting your garage door opener, from preparation to programming and testing.

Step 1: Gather Necessary Tools and Materials

  1. Garage Door Opener Kit: Ensure you have all components included in the garage door opener kit, including the opener unit, rail assembly, mounting hardware, remote controls, safety sensors, and keypad (if applicable).
  2. Power Drill and Screwdriver: You’ll need these tools for attaching the opener to the ceiling or wall and securing the rail assembly.
  3. Ladder: Use a sturdy ladder to access the ceiling or wall where the opener will be installed.
  4. Level: A level helps ensure that the opener and rail assembly are installed correctly and aligned properly.
  5. Wiring Supplies: Depending on the opener model, you may need electrical wiring, extension cords, wire nuts, and electrical tape for connecting the opener to power sources and accessories.

Step 2: Prepare the Installation Area

  1. Clear the Garage: Remove any obstructions or clutter from the garage area to provide ample space for installation and operation of the garage door opener.
  2. Check Ceiling or Wall: Inspect the ceiling or wall where the opener will be installed to ensure it is structurally sound and capable of supporting the weight of the opener unit and rail assembly.
  3. Locate Power Source: Identify the nearest power outlet or electrical junction box where you can connect the opener to power. Ensure the power source is compatible with the voltage requirements specified in the opener’s user manual.

Step 3: Install the Garage Door Opener

  1. Mount the Opener Unit: Attach the opener unit to the ceiling or wall using the provided mounting brackets and hardware. Use a power drill and screws to secure the opener in place, ensuring it is level and securely fastened.
  2. Install Rail Assembly: Assemble the rail components according to the manufacturer’s instructions and attach them to the opener unit. Secure the rail assembly to the ceiling or wall using the provided brackets and hardware.
  3. Connect the Drive Mechanism: Depending on the type of opener (chain, belt, or screw drive), connect the drive mechanism to the garage door’s trolley or carriage. Follow the manufacturer’s instructions for proper assembly and alignment.
  4. Install Safety Sensors: Mount the safety sensors on either side of the garage door opening, approximately 6 inches above the ground. Ensure the sensors are aligned properly and facing each other to detect obstacles in the door’s path.

Step 4: Wire the Opener

  1. Connect Power Supply: Run electrical wiring from the nearest power source to the opener unit. Use wire nuts and electrical tape to secure the connections and prevent exposed wires.
  2. Connect Accessories: If your opener includes additional accessories such as wall-mounted control panels, remote controls, or keypads, follow the manufacturer’s instructions for wiring and programming these devices.

Step 5: Program and Test the Opener

  1. Set Up Remote Controls: Program the remote controls included with the opener according to the manufacturer’s instructions. This typically involves pressing a sequence of buttons on the opener unit and remote control to synchronize them.
  2. Test Safety Features: Test the safety sensors by placing an object in the door’s path while closing it. The door should reverse direction immediately upon detecting the obstacle.
  3. Adjust Settings: Use the opener’s control panel or smartphone app to adjust settings such as travel limits, force sensitivity, and auto-close timer as needed.
  4. Test Operation: Open and close the garage door several times using both the remote controls and wall-mounted control panel to ensure smooth and reliable operation.

Step 6: Secure the Opener and Accessories

  1. Secure Wiring: Use cable clips or zip ties to secure electrical wiring and prevent it from hanging loose or becoming tangled.
  2. Lock Remote Controls: If your opener includes a keypad or smart home integration, enable security features such as password protection or encryption to prevent unauthorized access.
  3. Secure Opener Unit: Ensure the opener unit and rail assembly are securely fastened to the ceiling or wall to prevent them from coming loose or falling.

Conclusion:

If you encounter any difficulties or have questions during the installation process, consult a professional Garage Door Repair Volo IL  or contact the manufacturer’s customer support for assistance.

EDM Garage Doors, LLC

596 Richard Brown Blvd, Volo, IL 60073, United States

1-847-416-3036

https://maps.app.goo.gl/rfVASBCTvHNeKq7q9

How To Fix Garage Door Sensors – EDM Garage Doors, LLC

Fixing Garage Door Repair Volo IL is a common maintenance task that can resolve issues with the door not closing properly or reversing unexpectedly. Garage door sensors, also known as photoelectric sensors or safety sensors, are installed near the bottom of the door tracks and emit an invisible beam of light. When the beam is interrupted by an obstruction, such as a person, pet, or object, the sensors signal the door opener to stop or reverse its operation, preventing accidents or damage.

If your garage door sensors are malfunctioning, follow these steps to fix them:

1. Perform Visual Inspection:

Before making any adjustments, visually inspect the garage door sensors for any signs of damage, misalignment, or obstruction. Look for the following:

  • Dirt, dust, or debris on the sensor lenses that may be blocking the beam.
  • Misaligned sensors that are not facing each other directly.
  • Loose or damaged wiring connections at the sensors or the opener.

2. Clean Sensor Lenses:

Use a soft, dry cloth to gently clean the lenses of the garage door sensors. Remove any dirt, dust, or debris that may be obstructing the beam of light. Avoid using harsh chemicals or abrasive materials, as these can damage the sensor lenses.

3. Check Sensor Alignment:

Ensure that the garage door sensors are properly aligned and facing each other directly. Follow these steps to adjust the sensor alignment:

  • Loosen the mounting screws on the sensor brackets to allow for adjustment.
  • Use a level to ensure that each sensor is positioned vertically and parallel to the ground.
  • Adjust the sensors horizontally until the indicator lights on both sensors are illuminated, indicating that the beam is unobstructed.
  • Tighten the mounting screws securely once the sensors are properly aligned.

4. Verify Power Supply:

Check the power supply to the garage door sensors to ensure that they’re receiving electricity. Look for the following:

  • Check the power cord and plug for any damage or loose connections.
  • Verify that the outlet supplying power to the sensors is functioning properly.
  • Inspect the wiring connections at the sensors and the opener for any signs of damage or corrosion.

5. Test Sensor Operation:

Once the sensors are cleaned and aligned, test their operation to verify that they’re functioning correctly. Follow these steps to test the sensors:

  • Press the wall-mounted control button or use the remote control to close the garage door.
  • Place an object, such as a cardboard box or broomstick, in the path of the door while it’s closing to interrupt the sensor beam.
  • Observe the garage door’s response. It should stop or reverse its operation immediately when the sensor beam is interrupted.

6. Adjust Sensor Range:

If the garage door does not respond to the obstruction or reverses unexpectedly, adjust the sensor range settings on the opener. Follow these steps to adjust the sensor range:

  • Locate the adjustment knobs or dials on the opener that control the sensor range settings.
  • Turn the adjustment knobs or dials clockwise to increase the sensor range or counterclockwise to decrease it.
  • Test the garage door’s operation again to verify that the sensors are now functioning correctly.

7. Replace Faulty Sensors:

If the garage door sensors are still not working properly after cleaning, aligning, and adjusting them, they may be faulty and need to be replaced. Follow these steps to replace the sensors:

  • Purchase a new set of garage door sensors that are compatible with your opener model.
  • Disconnect power to the opener and remove the old sensors from their mounting brackets.
  • Install the new sensors by attaching them to the mounting brackets and securing them with the mounting screws.
  • Follow the manufacturer’s instructions for wiring the new sensors to the opener.
  • Test the garage door’s operation to ensure that the new sensors are functioning correctly.

Important Safety Precautions:

  • Always disconnect power to the garage door opener before performing any maintenance or repairs to prevent electrical shock or injury.
  • Use caution when working with moving parts and heavy machinery. Avoid placing hands or fingers near the door tracks, springs, or cables to prevent accidents.
  • If you’re unsure or uncomfortable with fixing the garage door sensors yourself, it’s best to seek assistance from a qualified technician or garage door repair professional.

Conclusion:

Fixing Garage Door Repair Volo IL involves basic maintenance tasks such as cleaning, aligning, adjusting, and testing. By following these steps and exercising caution, you can resolve common issues with your garage door sensors and ensure their proper operation. Regular maintenance and timely repairs help prevent accidents and ensure the safety and reliability of your garage door system. If you encounter any difficulties or need further assistance, don’t hesitate to seek professional help.

EDM Garage Doors, LLC

596 Richard Brown Blvd, Volo, IL 60073, United States

1-847-416-3036

How To Open Garage Door Manually From Outside With Key – EDM Garage Doors, LLC

Opening a Volo Garage Door Repair using a key involves a different mechanism than the standard electric garage door openers.

In this comprehensive guide, we will explore the steps to manually open a garage door with a key, providing you with the knowledge to access your garage even when facing power outages or issues with automatic openers.

1. Identify the Type of Garage Door Lock: Before attempting to open the garage door manually with a key, it’s crucial to understand the type of locking mechanism your door uses. Common types include T-handle locks, cylinder locks, and deadbolts.

2. Locate the Key Access Point: a. T-Handle Locks: If your garage door has a T-handle lock, the key access point is typically located on the exterior side of the door, near the center. The T-handle is a handle shaped like a “T” that turns to lock or unlock the door.

b. Cylinder Locks: For garage doors with cylinder locks, the key access point is usually on the exterior face of the door, near the center or bottom. The key is inserted into the cylinder to unlock the door.

c. Deadbolts: Some garage doors have deadbolts that require a key for manual operation. Locate the key access point on the exterior side of the door, typically near the center or bottom.

3. Insert the Key: a. T-Handle Locks: Insert the key into the keyhole of the T-handle lock. Turn the key clockwise to unlock the handle.

b. Cylinder Locks: Insert the key into the keyhole of the cylinder lock. Turn the key in the direction indicated by the lock manufacturer to unlock the door.

c. Deadbolts: Insert the key into the keyhole of the deadbolt lock. Turn the key in the direction specified by the lock to unlock the door.

4. Operate the Manual Release Mechanism (if applicable): Some garage doors have a manual release mechanism in addition to the key-operated lock. This mechanism allows you to disengage the door from the automatic opener for manual operation.

a. Locate the Manual Release Mechanism: Look for a manual release cord or lever near the garage door opener. This is often a red cord hanging from the opener rail.

b. Pull the Manual Release Cord or Operate the Lever: Pull the manual release cord or operate the lever as per the manufacturer’s instructions. This action disengages the door from the automatic opener, allowing manual operation.

5. Lift the Garage Door Manually: a. Grasp the Door: Stand facing the garage door and grasp the bottom edge firmly.

b. Lift with Care: Lift the door upward, guiding it along the tracks. Be cautious of the door’s weight, and lift with your legs to avoid strain.

c. Secure the Door in the Open Position: Once the door is fully open, ensure it is securely in place. If your door has a manual locking mechanism, engage it to prevent unintentional closing.

6. Check for Obstructions: Before attempting to manually open the door, inspect the tracks and rollers for any obstructions. Clear away debris or objects that may impede the door’s movement.

7. Close and Lock the Door (if needed): To close and secure the door manually after use, follow the steps in reverse. Lower the door carefully and engage the manual lock or key-operated lock as necessary.

8. Preventive Measures: a. Regular Maintenance: Implement a routine maintenance schedule for your garage door. Lubricate moving parts, inspect for wear, and address issues promptly to prevent future problems.

b. Upgrade Locking Mechanisms: Consider upgrading your garage door locking mechanisms for enhanced security. Modern locks may provide better resistance to tampering and improved durability.

9. Seek Professional Assistance: If you encounter difficulties with the manual operation of your garage door, or if the key-operated lock is malfunctioning, it’s advisable to seek professional assistance. Garage door technicians can diagnose and repair issues to ensure proper functionality.

Conclusion:

Knowing how to manually open your Volo Garage Door Repair with a key is a valuable skill for situations where automatic openers are unavailable or malfunctioning. By understanding the type of lock your door uses, locating the key access point, and following the proper steps, you can confidently access your garage when needed. Regular maintenance and potential upgrades to your locking mechanisms contribute to the overall security and functionality of your garage door.

EDM Garage Doors, LLC

596 Richard Brown Blvd, Volo, IL 60073, United States

1-847-416-3036

Troubleshooting Uneven Garage Door Closing – EDM Garage Doors, LLC

As a homeowner who has experienced the vexing issue of an uneven garage door descent, I understand the frustration that comes with a seemingly unbalanced entry point to our homes.

I’ll share insights gained through my own troubleshooting journey and expert advice, providing a comprehensive guide to identify and resolve the root causes of uneven garage door closing for a seamless and balanced descent as stated in Garage Door Repair.

Introduction: The Unsettling Descent

The garage door, a silent sentinel in our homes, plays a pivotal role in securing our spaces. However, when this guardian descends unevenly, it not only mars the aesthetic appeal but also raises concerns about potential issues lurking beneath the surface. As I delved into troubleshooting the uneven closing of my garage door, I discovered a myriad of factors that contribute to this imbalance.

1. Track Misalignment: The Foundation of Balance

Insights:

The tracks along which the garage door travels are the backbone of its smooth operation. Misalignments in these tracks can disrupt the balance of the door, leading to an uneven descent.

Practical Tips:

Guide homeowners on visually inspecting the tracks for misalignments. Explain the importance of ensuring that the tracks are parallel and level. Provide step-by-step instructions for adjusting the tracks using basic tools.

2. Roller Issues: The Wheels of Stability

Insights:

The rollers, those often-overlooked wheels attached to the sides of the door, play a crucial role in its smooth movement. Worn-out or damaged rollers can lead to uneven closing.

Practical Tips:

Encourage homeowners to inspect the rollers for signs of wear, such as cracks or flat spots. Demonstrate the process of replacing damaged rollers and emphasize the importance of using the right size and type for their specific door.

3. Spring Tension: The Balancing Act

Insights:

Garage door springs counterbalance the weight of the door, ensuring a controlled descent. Issues with spring tension, whether too tight or too loose, can result in uneven closing.

Practical Tips:

Educate homeowners on the signs of spring tension issues, such as a door that slams shut or struggles to close. Guide them on adjusting spring tension but emphasize the potential dangers involved, encouraging professional intervention if needed.

4. Cable Concerns: Supporting the Load

Insights:

Cables work in tandem with the springs to support the weight of the door. Frayed or damaged cables can compromise the balance of the door, leading to uneven closing.

Practical Tips:

Instruct homeowners on inspecting the cables for any signs of wear, fraying, or damage. Emphasize the need for immediate replacement if issues are detected and guide them on the correct procedure for cable replacement.

5. Lubrication Lapses: Smoothing the Descent

Insights:

Proper lubrication of moving parts is essential for a garage door’s smooth operation. Lack of lubrication can result in increased friction, hindering the even descent of the door.

Practical Tips:

Stress the importance of regular lubrication for hinges, rollers, and other moving parts. Provide guidance on selecting the right lubricant and demonstrate the correct application process to ensure optimal performance.

6. Balance Testing: Ensuring Equilibrium

Insights:

A garage door should be properly balanced to ensure an even descent. Performing a simple balance test can reveal whether the door is properly adjusted.

Practical Tips:

Walk homeowners through the process of conducting a balance test. Explain that an imbalanced door will either slam shut or struggle to stay open. Share insights into adjusting the balance using the door’s built-in adjustment mechanism.

Conclusion: A Harmonious Descent

Overall, based from Garage Door Repair, the journey to troubleshooting uneven garage door closing is a process of discovery and intervention. As a homeowner invested in the functionality and aesthetic appeal of my living space, I found solace in understanding the nuances of garage door operation. By addressing track misalignments, roller issues, spring tension, cable concerns, lubrication lapses, and conducting balance tests, homeowners can embark on a proactive approach to maintaining the equilibrium of their garage doors.

In the landscape of 2023, where homeowners seek not just functionality but also the empowerment to troubleshoot and address issues, this guide serves as a roadmap to a harmonious descent. By embracing a DIY spirit while recognizing the importance of professional intervention when needed, homeowners can ensure that their garage doors descend evenly, not only enhancing the visual appeal of their homes but also contributing to the longevity of this essential entry point.

EDM Garage Doors, LLC

596 Richard Brown Blvd, Volo, IL 60073, United States

847-416-3036

How Long Do Garage Door Springs Last? – EDM Garage Doors, LLC

Having dealt with garage door springs and their lifespan, I can share my firsthand knowledge on the subject. Garage door springs typically last between 7 to 12 years, depending on various factors. It’s important to note that these estimates are based on average usage and general conditions, and individual experiences may vary.

Based from Garage Door Repair Services, the type of spring used in your garage door can significantly impact its lifespan. Torsion springs, which are typically mounted above the door, tend to have a longer lifespan compared to extension springs. Torsion springs are designed to handle heavier loads and endure fewer cycles, making them more durable and capable of lasting longer.

The number of cycles your garage door goes through plays a crucial role in determining the lifespan of the springs. A cycle refers to one complete opening and closing of the garage door. The more frequently you use your garage door, the more cycles the springs undergo, and consequently, their lifespan may be shortened. On average, a torsion spring is rated for around 10,000 cycles, while extension springs typically last between 5,000 to 7,000 cycles.

The quality of the springs also affects their lifespan. Investing in high-quality springs made from strong and durable materials can increase their longevity. Quality springs are usually manufactured with precision and undergo stringent testing to ensure reliability. It’s advisable to purchase springs from reputable manufacturers or consult with professionals to ensure you get reliable and long-lasting springs for your garage door.

Regular maintenance is essential for extending the lifespan of garage door springs. Conduct periodic inspections to check for signs of wear or damage, such as rust, gaps, or elongation. Lubricating the springs and other moving parts with a silicone-based lubricant can help reduce friction and prevent premature wear. Keeping the garage door properly balanced and adjusted can also alleviate stress on the springs, prolonging their lifespan.

Climate conditions can also impact the lifespan of garage door springs. Extreme temperatures, humidity, and exposure to harsh elements can lead to faster deterioration of the springs. If you live in an area with severe weather conditions, consider taking preventive measures like insulating your garage or using weatherstripping to minimize the effects of extreme weather on the springs.

Seeking professional maintenance and care for your garage door springs is highly recommended. Garage door technicians have the expertise to perform thorough inspections, identify any signs of wear or damage, and provide necessary adjustments or replacements. Regular professional maintenance can help ensure optimal performance and maximize the lifespan of the springs.

Keep an eye out for warning signs that indicate the springs may be reaching the end of their lifespan. These signs may include visible gaps in the spring coils, uneven or jerky door movements, excessive noise during operation, or difficulty in manually lifting the door. If you notice any of these signs, it’s crucial to address the issue promptly to prevent spring failure, which can pose safety hazards and potentially damage your garage door system.

In summary, according to Garage Door Repair Services, the lifespan of garage door springs typically ranges from 7 to 12 years. Factors such as the type of spring, number of cycles, quality, maintenance, climate conditions, and professional care all influence the longevity of the springs. By investing in quality springs, conducting regular maintenance, and seeking professional assistance, you can ensure that your garage door springs operate efficiently and last as long as possible. Stay vigilant for any signs of wear or failure and take necessary actions to maintain the safety and functionality of your garage door system.

EDM Garage Doors, LLC

596 Richard Brown Blvd, Volo, IL 60073, United States

847-416-3036

Powered by WordPress & Theme by Anders Norén