Local Businesses Blog in Texas

Tag: Garage Door Repair Alpharetta GA

How Much Does It Cost To Replace Garage Door Springs – Pieper O’Brien Herr Architects

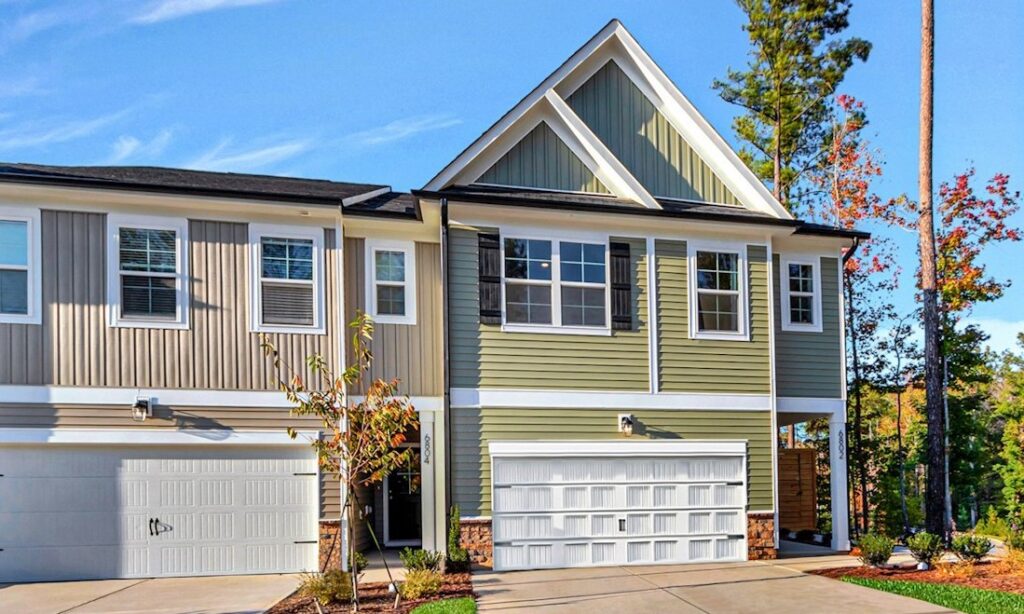
Garage Door Repair Alpharetta GA play a crucial role in the operation of your garage door, counterbalancing its weight and enabling smooth opening and closing.

When springs break or wear out over time, they need to be replaced promptly to ensure the continued functionality and safety of your garage door. In this guide, we’ll explore the factors that influence the cost of replacing garage door springs, as well as provide an overview of the average expenses involved in the process.

Factors Affecting Cost

  1. Type of Springs: Garage doors typically use either torsion springs or extension springs. Torsion springs are mounted above the door and are typically more expensive to replace due to their complexity and higher quality. Extension springs, located on the sides of the door, are generally less expensive but may require additional parts for installation.
  2. Size and Weight of the Door: The size and weight of the garage door determine the size and strength of the springs needed for proper operation. Larger and heavier doors require stronger springs, which may cost more to replace.
  3. Quality of Materials: The quality of the springs and accompanying hardware, such as cables, pulleys, and winding bars, can vary significantly in terms of durability and lifespan. Higher-quality materials may come with a higher price tag but offer better performance and longevity.
  4. Professional Installation: While it’s possible to replace garage door springs yourself, professional installation is recommended for safety and proper functionality. Hiring a professional garage door technician adds to the overall cost but ensures the job is done correctly and safely.
  5. Location and Labor Rates: Labor rates vary depending on the location and local market conditions. In areas with higher living costs or higher demand for garage door services, labor rates may be higher, resulting in increased overall expenses.

Average Cost Breakdown

The cost to replace garage door springs typically includes the following components:

  1. Cost of Springs: Torsion springs typically cost between $50 and $150 each, depending on the size, weight, and quality of the springs. Extension springs are usually cheaper, ranging from $20 to $50 each. Most garage doors require two springs for proper balance and operation.
  2. Additional Hardware: In addition to the springs themselves, you may need to purchase additional hardware such as cables, pulleys, and winding bars, which can add $20 to $50 or more to the total cost, depending on the quality and quantity of the components needed.
  3. Professional Installation: Professional installation costs range from $100 to $300 or more per spring, depending on factors such as labor rates, complexity of the job, and any additional services required. Some technicians may offer discounts for replacing multiple springs or performing other maintenance tasks simultaneously.
  4. Travel Fees and Service Charges: Some garage door companies may charge additional fees for travel expenses, service calls, or emergency repairs. These fees can vary depending on the distance traveled and the urgency of the service request.

Conclusion:

The cost to Garage Door Repair Alpharetta GA varies depending on factors such as the type of springs, size and weight of the door, quality of materials, professional installation, and location. By understanding these factors and obtaining multiple quotes from reputable garage door companies, you can make an informed decision and budget effectively for this necessary maintenance task.

Pieper O’Brien Herr Architects

3000 Royal Blvd S # A, Alpharetta, GA 30022, United States

1-770-569-1706

How To Program Chamberlain Garage Door Remote – Jenco Companies

Programming a Garage Door Repair Alpharetta GA allows you to conveniently open and close your garage door with the touch of a button.

Whether you’re replacing an old remote or adding a new one to your system, the process is simple and can be completed in just a few steps. In this guide, we’ll walk you through the step-by-step process of programming a Chamberlain garage door remote, ensuring smooth and hassle-free operation.

: Determine Compatibility

Before programming the remote, ensure that it is compatible with your Chamberlain garage door opener model. Check the manufacturer’s instructions or website for a list of compatible remotes. If you’re unsure, you can also consult with Chamberlain customer support for assistance.

: Access the Programming Button

Locate the “Learn” or “Program” button on your Chamberlain garage door opener motor unit. This button is typically located near the antenna wire and may be labeled as such. Press and release the “Learn” button to put the opener into programming mode.

: Choose a Button on the Remote

Decide which button on the remote you would like to use to operate the garage door. Most Chamberlain remotes have multiple buttons, allowing you to control multiple doors or functions. Once you’ve chosen a button, hold it down until the LED light on the remote begins to blink.

: Press the Program Button

While holding down the selected button on the remote, press and release the “Learn” or “Program” button on the garage door opener motor unit. The LED light on the motor unit will blink to indicate that it is ready to receive the programming signal from the remote.

: Transmit the Code

With both the remote and the motor unit in programming mode, press the button on the remote that you wish to program to the garage door opener. Hold the button down until the LED light on the motor unit flashes, indicating that the programming was successful.

: Test the Remote

To ensure that the programming was successful, test the remote by pressing the programmed button. The garage door should open or close depending on its current position. If the door operates correctly, the programming process is complete.

: Additional Remotes (Optional)

If you have additional Chamberlain garage door remotes that you would like to program, repeat the above steps for each remote, choosing a different button for each one. This allows you to control multiple doors or functions with a single remote.

: Troubleshooting

If you encounter any issues during the programming process, refer to the troubleshooting section of the user manual or contact Chamberlain customer support for assistance. Common issues may include interference from nearby electronics, low battery in the remote, or incorrect programming sequence.

Conclusion:

Programming a Garage Door Repair Alpharetta GA is a straightforward process that can be completed in just a few simple steps. By following this guide, you can enjoy the convenience and ease of remote-controlled access to your garage, enhancing the security and functionality of your home. If you have any questions or need further assistance, don’t hesitate to reach out to Chamberlain customer support for expert guidance.

Breaux & Associates Architects

5955 Shiloh Rd E #200, Alpharetta, GA 30005, United States

1-678-585-4508

How Do Garage Door Sensors Work? – Presto Garage Door of Atlanta

As a homeowner with a garage door, I’ve always been curious about how the garage door sensors actually work. Recently, I decided to dig deeper into the mechanics of these sensors to gain a better understanding.

Let me share what I’ve learned from Atlanta Garage Door so far:

Garage door sensors are essential safety devices that prevent the door from closing if there’s an object, person, or pet in its path. They consist of two main types: safety sensors (or photoelectric sensors) and mechanical sensors.

The safety sensors, which are typically located near the floor on both sides of the garage door, work by emitting an invisible infrared beam. One sensor unit emits the beam, while the other receives it. When the door is in the closing cycle, and the beam between the sensors is uninterrupted, it indicates that the pathway is clear for the door to close safely. However, if something breaks the beam, such as an object or a person, the sensors detect the interruption and send a signal to the garage door opener to stop or reverse the door’s movement.

On the other hand, mechanical sensors, also known as pressure or contact sensors, are typically positioned on the bottom of the garage door. These sensors are designed to detect physical contact or resistance when the door encounters an object. When pressure is exerted on the mechanical sensor, it triggers a mechanism that signals the garage door opener to stop or reverse the door’s motion. This prevents the door from closing forcefully on any obstruction.

Understanding the alignment of the sensors is crucial for their proper operation. To ensure accurate detection, the sensors must face each other directly and maintain perfect alignment. Misalignment can result in false detections or the door failing to respond appropriately. That’s why it’s important to regularly check and adjust the sensors if necessary to maintain their proper alignment.

Garage door sensors are powered by low-voltage electrical circuits and are usually connected to the same power source as the garage door opener. It’s important to ensure a reliable power supply to the sensors by checking the power connections periodically. Making sure they are secure and free from any damage or corrosion will help maintain their continuous operation.

To ensure the sensors are functioning correctly, it’s crucial to perform regular testing and maintenance. Most garage door openers have a test mode or a safety feature specifically designed for this purpose. By activating the test mode or safety feature, I can close the door using the remote or wall button and observe the sensor response. To simulate an obstruction, I can introduce an object, such as a broomstick or a cardboard box, into the path of the closing door, blocking the sensors’ beam. The sensors should detect the obstruction and cause the door to stop or reverse its movement, ensuring the safety of anyone or anything in its path.

In conclusion, based from Atlanta Garage Door, garage door sensors are crucial safety devices that prevent accidents and damage by detecting objects or obstructions in the door’s path. Whether it’s the safety sensors using infrared beams or the mechanical sensors relying on physical contact or resistance, they work together with the garage door opener to ensure the safe and proper operation of the garage door. Regular testing, maintenance, and ensuring proper alignment are key to keeping these sensors functioning reliably and effectively.

Presto Garage Door of Atlanta

535 Means St NW, Atlanta, GA 30318, United States

470-281-3823

How Tight Should Garage Door Chain Be? – Alpharetta Garage Door Repair

As a homeowner with a garage door opener, I understand the importance of maintaining the proper tension in the garage door chain. It plays a crucial role in the smooth and efficient operation of the garage door. So, let me share some insights based on my experience and knowledge.

According to Alpharetta Garage Door, to ensure that the garage door chain is properly tensioned, it’s essential to follow the guidelines provided by the manufacturer of your specific garage door opener model. The manufacturer’s instructions will offer the most accurate and specific information tailored to your particular opener.

In general, the garage door chain should have the right amount of tension. If the chain is too loose, it may result in the door sagging or becoming unbalanced during operation. On the other hand, if the chain is overly tight, it can place excessive strain on the opener mechanism, leading to premature wear and potential damage.

To test the tension of the garage door chain, I would begin by disconnecting the opener from the power source and ensuring that the door is fully closed. Then, I would manually lift the door a few inches off the ground and observe the chain.

Ideally, the chain should exhibit a slight amount of sag or slack. It should be tight enough to appear straight and parallel to the rail, but not overly tight. The chain should have enough flexibility to move smoothly along the sprocket without binding or causing excessive resistance during the door’s operation.

If I find that the chain is too loose, I would consult the owner’s manual to locate the adjustment mechanism for the chain tension. Typically, there would be an adjustment bolt or nut near the opener’s motor or along the rail.

Using the appropriate wrench or tool, I would make small adjustments to the tension, usually in quarter-turn increments, as per the manufacturer’s instructions. After each adjustment, I would test the tension by opening and closing the door a few times to ensure that it moves smoothly and remains balanced.

It’s important not to over-tighten the chain, as this can lead to unnecessary stress on the opener and other components. I would make incremental adjustments and carefully observe the door’s operation to find the optimal tension.

Regular maintenance is crucial for the garage door opener, including checking the chain tension periodically. Over time, the chain may naturally loosen due to normal wear and vibrations. Therefore, it’s a good practice to inspect the chain periodically for any signs of excessive wear or damage.

If I notice any significant wear, stretched links, or visible damage, I would consider replacing the chain to maintain the proper functionality of the garage door opener.

In cases where I feel uncertain or uncomfortable performing the adjustments myself, I would seek the assistance of a professional garage door technician. Their expertise and experience would ensure that the chain tension is adjusted correctly, providing safe and reliable operation of the garage door.

Remember, based from Alpharetta Garage Door, the specific guidelines for chain tension may vary depending on the manufacturer and model of the garage door opener. Always consult the manufacturer’s instructions to ensure that you achieve the correct tension for your particular opener, promoting optimal performance and extending the lifespan of the opener.

Alpharetta Garage Door Repair

5200 Avalon Blvd building 5000, Alpharetta, GA 30009, United States

678-379-5834

How Many Turns on a 16×7 Garage Door Spring? – Southern Home Garage Doors & Openers

When it came time to replace the spring on my 16×7 garage door, I was faced with the task of determining the appropriate number of turns. I knew that this was an important step to ensure the proper tensioning of the spring and the smooth operation of the door. While I didn’t have extensive experience in this area, I was determined to approach the task with caution and attention to detail.

According to Alpharetta Garage Door, I began by researching the different types of springs commonly used in garage doors. I learned that for my 16×7 door, torsion springs were the recommended choice. These springs are mounted horizontally above the door and wind or unwind to create the necessary tension. Understanding this basic principle gave me a foundation to build upon.

Next, I realized that determining the number of turns required for the spring was not a simple one-size-fits-all calculation. It depended on several factors, such as the weight of the door, the drum radius, and the spring rate. In my case, the weight of my 16×7 garage door could vary depending on factors such as the material and insulation.

To calculate the number of turns, I turned to online resources and formulas specifically designed for this purpose. These formulas took into account the weight of the door, the drum radius, and the spring rate. By plugging in the appropriate values, I obtained an estimate of the initial tension needed for the spring to effectively counterbalance the door’s weight.

While I was able to calculate a number of turns based on these formulas, I understood that this was a crucial step that required precision and accuracy. Working with garage door springs can be dangerous due to the high tension involved, and any miscalculation could lead to injuries or damage to the door. With this in mind, I decided to seek professional advice to ensure the safety and proper functioning of my garage door.

I reached out to a reputable garage door technician who had experience with spring installations. They visited my home and carefully assessed the specifics of my garage door. They took into consideration the weight of the door, its construction, and any other relevant factors. Based on their expertise and knowledge, they determined the appropriate number of turns for the spring, ensuring that it would provide the necessary tension and balance for the door.

Although I had initially attempted to calculate the turns myself, I realized the importance of consulting a professional. Their expertise and experience not only ensured the safety of the installation process but also gave me peace of mind knowing that the spring was properly tensioned.

In conclusion, based from Alpharetta Garage Door, determining the number of turns on a 16×7 garage door spring required research, calculations, and ultimately seeking professional advice. By combining my own efforts with the expertise of a garage door technician, I was able to ensure the proper tensioning of the spring and the smooth operation of my garage door.

Southern Home Garage Doors & Openers

3000 Royal Blvd S # A, Alpharetta, GA 30022, United Statesv

678-929-5982

How to Program a Garage Door Opener-Alpharetta Garage Door Repair

Programming a Garage Door Repair Alpharetta GA opener involves a series of steps to ensure that the opener is synchronized with the remote control or keypad.

Below, I will outline the process in detail, providing explanations for each step. Please note that the specific steps may vary depending on the brand and model of your garage door opener.

  1. Read the Manual: Before starting the programming process, it is crucial to read the manual that came with your garage door opener. Different models have specific instructions and unique features, so familiarizing yourself with the manual will provide you with the necessary information for successful programming.
  2. Clear the Memory: If you are programming a new remote control or keypad, or if you want to reprogram an existing one, you may need to clear the memory of the garage door opener. This step ensures that the opener is ready to accept new programming instructions. Refer to your manual for instructions on how to clear the memory, as the process can vary.
  3. Locate the Programming Button: Most garage door openers have a programming button located on the main unit or on the motor housing. This button is typically small and may be labeled “Learn” or “Program.” Find this button and make sure it is easily accessible.
  4. Access the Programming Mode: To enter the programming mode, press and hold the programming button until a light or indicator on the garage door opener flashes or turns on. The specific duration for holding the button may vary, so consult your manual for precise instructions.
  5. Prepare the Remote Control or Keypad: If you are programming a remote control, make sure it has fresh batteries. For keypads, ensure they are connected to a power source or have functioning batteries.
  6. Select a PIN or Frequency: For keypads, you may need to select a personal identification number (PIN) that you will use to operate the garage door. The process for selecting a PIN will be outlined in your manual. Some openers may require you to choose a specific frequency for the remote control or keypad.
  7. Program the Remote Control or Keypad: Once the garage door opener is in programming mode and you have prepared the remote control or keypad, follow the steps outlined in the manual to pair the devices. This typically involves pressing specific buttons in a particular sequence or entering the PIN on the keypad. The garage door opener will respond to confirm successful programming.
  8. Test the Remote Control or Keypad: After programming, it is essential to test the functionality of the remote control or keypad. Stand at a reasonable distance from the garage door and press the designated button or enter the PIN on the keypad to open or close the door. Ensure that the garage door responds as intended.
  9. Repeat for Additional Devices: If you have multiple remote controls or keypads that you want to program, repeat the previous steps for each device. Make sure to follow the specific instructions in your manual to ensure proper synchronization with the garage door opener.
  10. Exit Programming Mode: Once you have programmed all the desired devices, exit the programming mode on the garage door opener. This step is usually accomplished by pressing the programming button again or by waiting for a specific period without any input. The garage door opener will indicate that it has exited programming mode.
  11. Final Checks: To ensure everything is working correctly, test all the remote controls and keypads again. Confirm that they can open and close the garage door smoothly. If any issues arise, consult the troubleshooting section of your manual or contact the manufacturer for assistance.

It is important to note that the above steps provide a general guide for programming a Garage Door Repair Alpharetta GA opener. However, it is always recommended to refer to the specific instructions provided by the manufacturer in your manual. Following the manufacturer’s guidelines will ensure accurate programming and avoid potential complications.

Alpharetta Garage Door Repair

5200 Avalon Blvd building 5000, Alpharetta, GA 30009

1-678-379-5834

How Many Amps Does a Garage Door Opener Use? – Southern Home Garage Door Alpharetta

The amperage usage of a garage door opener can vary depending on several factors. On average, a garage door opener consumes around 2-4 amps of current during regular operation. However, it’s important to note that the actual amperage may differ based on factors such as the motor’s horsepower, the design of the opener, and the specific model being used.

In some instances, based from Alpharetta Garage Door, the amperage can peak at around 10 amps, particularly during moments of high power demand, such as when the garage door is starting or changing direction. This temporary increase in amperage allows the motor to generate enough power to initiate movement or overcome resistance.

Determining the precise amperage of your garage door opener is essential for proper electrical planning and safety. To find this information, you can refer to the documentation provided with your opener, inspect the motor plate, or consult the manufacturer’s specifications.

It’s crucial to ensure that the electrical circuit supplying power to your garage door opener is appropriately sized to handle the amperage requirements. This includes selecting the right circuit breaker size and using the correct wire gauge. In most residential settings, a dedicated 15-amp circuit is sufficient for a standard garage door opener. However, if you have a heavier-duty opener or multiple openers sharing the same circuit, you may need to use a 20-amp circuit.

To calculate the power consumption in watts, you can multiply the amperage by the voltage of your electrical system. For example, if your garage door opener draws 3 amps from a 120-volt system, the power consumption would be approximately 360 watts (3 amps x 120 volts = 360 watts).

Keep in mind that these values are general estimates, and it’s always best to consult the specific documentation or manufacturer’s specifications for accurate information regarding the amperage requirements of your particular garage door opener.

If you have any concerns or uncertainties regarding electrical work, it’s highly recommended to consult a qualified electrician. They can ensure that your garage door opener is properly installed and powered, adhering to safety regulations and providing you with peace of mind.

Remember, according to Alpharetta Garage Door, electrical work should always be approached with caution, and it’s essential to follow local electrical codes and guidelines to ensure a safe and reliable installation.

Southern Home Garage Door Alpharetta

5955 Shiloh Rd E, Alpharetta, GA 30005, United States

678-562-7963

How to Program BMW Garage Door Opener-Southern Home Garage Doors & Openers

Programming your BMW Garage Door Repair Alpharetta GA opener allows you to conveniently open and close your garage door using the built-in buttons in your vehicle.

This guide will provide you with step-by-step instructions on how to program your BMW garage door opener. Please note that the process may vary slightly depending on the model and year of your BMW.

Step 1: Clear Existing Codes Before programming a new garage door opener code, it’s essential to clear any existing codes stored in your BMW’s system. This ensures a fresh start for programming the new code. To clear existing codes, follow these steps:

  1. Turn on your vehicle’s ignition.
  2. Locate the three buttons on your rearview mirror or overhead console that control the garage door opener.
  3. Press and hold the first and third buttons simultaneously for about 20 seconds until the LED light on the mirror starts flashing rapidly.
  4. Release the buttons to complete the clearing process.

Step 2: Obtain Garage Door Opener Information To program your BMW garage door opener, you’ll need to gather specific information about your garage door opener, such as the manufacturer, model number, and frequency. This information is usually available in the owner’s manual of your garage door opener or on the manufacturer’s website. Make sure to have this information handy before proceeding to the next step.

Step 3: Enter Learning Mode Now, you need to put your BMW’s garage door opener into “learning mode” to receive the new code. Follow these steps:

  1. Start your vehicle’s ignition.
  2. Press and hold the button you wish to program (usually located on the rearview mirror or overhead console). Hold it until the LED light begins to flash slowly.
  3. Release the button momentarily and then press and hold it again. This time, the LED light should flash rapidly, indicating that the learning mode has been activated.

Step 4: Program the New Garage Door Opener Code With your BMW in learning mode, you can now program the new code using the information you gathered in Step 2. The programming process typically involves the following steps:

  1. Enter the manufacturer’s code. Consult your BMW’s owner’s manual for the specific code associated with your garage door opener’s manufacturer. Use the appropriate button on the rearview mirror or overhead console to enter the code.
  2. Enter the garage door opener’s specific code. This code is usually a combination of numbers and/or letters provided by the manufacturer. Follow the same procedure as in the previous step to enter this code using the corresponding buttons.
  3. Test the new code. Once you have entered the manufacturer’s and specific codes, test the new code by pressing the programmed button on your rearview mirror or overhead console. The garage door should respond by opening or closing.

Step 5: Save the Programmed Code After successfully programming the new garage door opener code, it is essential to save the changes in your BMW’s system. Follow these steps:

  1. Press and hold the programmed button on your rearview mirror or overhead console for about 10 seconds.
  2. Release the button when the LED light on the mirror or console starts flashing rapidly. This indicates that the new code has been saved.

Conclusion: By following these step-by-step instructions, you can program your BMW’s Garage Door Repair Alpharetta GA opener and enjoy the convenience of operating your garage door directly from your vehicle. Remember to consult your BMW’s owner’s manual or contact your local dealership for any specific instructions or troubleshooting steps related to your particular BMW model.

Southern Home Garage Doors & Openers

3000 Royal Blvd S # A, Alpharetta, GA 30022

1-6789295982

How Much Are New Garage Doors-Southern Home Garage Door Alpharetta

New Garage Door Repair Alpharetta GA prices can vary depending on several factors, including the type of door, materials used, size, and additional features.

While I can provide you with a general idea, it’s important to note that these prices are subject to change and may vary based on your location and specific requirements. With that said, let’s explore the different types of garage doors and their estimated costs.

  1. Single-layer steel garage doors: These doors are typically the most affordable option. Prices can range from around $400 to $700, depending on the size and design.
  2. Double-layer steel garage doors: These doors have a layer of insulation between two layers of steel. They offer better durability and insulation compared to single-layer doors. Prices for double-layer steel doors can start at around $800 and go up to $1,500, depending on the size and design.
  3. Triple-layer steel garage doors: These doors provide the highest level of insulation and strength. They have an additional layer of steel and insulation material, making them more energy-efficient and sturdy. Prices for triple-layer steel doors usually start around $1,000 and can go up to $2,500 or more, depending on the size and design.
  4. Wood garage doors: Wood doors are known for their aesthetic appeal and can add a touch of elegance to your home. However, they tend to be more expensive than steel doors. Prices for wood garage doors can range from $1,200 to $4,000 or more, depending on the type of wood, size, and design.
  5. Aluminum garage doors: Aluminum doors are lightweight and resistant to rust, making them a popular choice. They are generally more affordable than wood doors but slightly more expensive than steel doors. Prices for aluminum garage doors can start at around $600 and go up to $2,000 or more, depending on the size and design.
  6. Customized or high-end garage doors: If you’re looking for unique designs, special features, or high-end materials, the prices can vary significantly. Customized or high-end garage doors can range from $3,000 to $10,000 or more, depending on your specific requirements.

Remember that these prices are estimates, and additional factors such as installation costs, hardware, windows, and insulation options can also affect the overall price of a new Garage Door Repair Alpharetta GA. It’s recommended to contact local garage door suppliers or professionals to get accurate pricing information for your specific needs

Southern Home Garage Door Alpharetta

5955 Shiloh Rd E, Alpharetta, GA 30005

1-678-562-7963

Powered by WordPress & Theme by Anders Norén