East Side Fort Worth Business Directories

Local Businesses Blog in Texas

What Are The Health Risks Associated With Mold Exposure In Houston? – Mold Testing Houston

Mold Testing Services Houston TX, where the hot and humid climate creates the perfect breeding ground for mold growth.

While mold may seem like a harmless nuisance, it can pose significant health risks to individuals exposed to it. In this article, we will explore the various health risks associated with mold exposure in Houston and discuss ways to mitigate these risks.

What is Mold?

Mold is a type of fungus that thrives in damp and humid environments. It reproduces by releasing spores into the air, which can then settle on surfaces and begin to grow under the right conditions. Common indoor molds include Aspergillus, Penicillium, and Stachybotrys chartarum (black mold).

Health Risks of Mold Exposure

Exposure to mold can have a range of adverse health effects, particularly for individuals with allergies, asthma, or weakened immune systems. Some of the health risks associated with mold exposure in Houston include:

Respiratory Issues

Mold spores can trigger allergic reactions in susceptible individuals, leading to symptoms such as coughing, wheezing, sneezing, and shortness of breath. Prolonged exposure to mold can exacerbate respiratory conditions such as asthma and bronchitis, making it difficult for individuals to breathe comfortably.

Allergic Reactions

In addition to respiratory symptoms, mold exposure can also cause allergic reactions such as skin rashes, itching, and redness. These reactions occur when the immune system overreacts to mold spores, leading to inflammation and irritation of the skin.

Sinus Infections

Exposure to mold can irritate the nasal passages and sinuses, increasing the risk of sinus infections. Symptoms of sinus infections may include facial pain, pressure, congestion, and nasal discharge. Individuals with chronic sinusitis may experience recurrent infections due to mold exposure.

Asthma Attacks

For individuals with asthma, exposure to mold can trigger asthma attacks and worsen existing symptoms. Mold spores can irritate the airways, leading to inflammation and constriction of the bronchial tubes. This can result in coughing, wheezing, chest tightness, and difficulty breathing, requiring immediate medical attention.

Fungal Infections

In rare cases, mold exposure can lead to fungal infections in the lungs or other parts of the body. Immunocompromised individuals, such as those with HIV/AIDS or undergoing chemotherapy, are particularly vulnerable to fungal infections. These infections can be serious and may require intensive medical treatment.

Vulnerable Populations

While mold exposure can affect anyone, certain populations are at higher risk of experiencing severe health effects. These include:

  • Children: Children have developing immune systems and may be more susceptible to the effects of mold exposure.
  • Elderly Individuals: Elderly individuals may have weakened immune systems and underlying health conditions that make them more vulnerable to mold-related health issues.
  • Pregnant Women: Pregnant women are more prone to respiratory infections and may experience complications if exposed to mold during pregnancy.
  • Immunocompromised Individuals: Individuals with weakened immune systems, such as those with HIV/AIDS or undergoing immunosuppressive therapy, are at increased risk of fungal infections and other health complications from mold exposure.

Mitigating Health Risks

While mold exposure can be concerning, there are steps that individuals can take to mitigate the health risks associated with mold:

  • Identify and Remove Mold Sources: Conduct regular inspections of your home or workplace to identify any areas of mold growth. Address moisture issues promptly and remove mold-infested materials to prevent further spread.
  • Improve Ventilation: Ensure adequate ventilation in indoor spaces to reduce humidity levels and discourage mold growth. Use exhaust fans in bathrooms and kitchens, and open windows whenever possible to improve air circulation.
  • Use Air Purifiers: Consider using air purifiers with HEPA filters to remove mold spores and other airborne contaminants from indoor air.
  • Maintain Cleanliness: Keep indoor spaces clean and free of clutter to prevent mold growth. Regularly clean and vacuum carpets, upholstery, and other surfaces to remove mold spores and prevent them from settling.
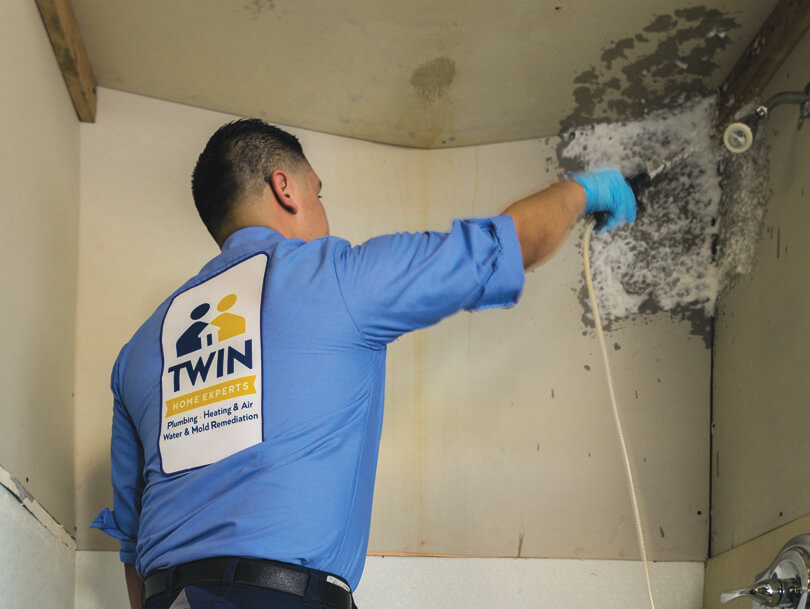
  • Seek Professional Help: If you suspect mold growth in your home or workplace, seek the assistance of professional mold remediation experts. They can conduct thorough inspections, identify mold sources, and safely remove mold-infested materials to ensure a healthy indoor environment.

Conclusion:

Mold exposure can have serious implications for health, particularly in humid climates like Houston. From respiratory issues and allergic reactions to sinus infections and asthma attacks, the health risks associated with mold exposure are varied and significant. It’s essential for individuals to be aware of these risks and take proactive measures to mitigate them, such as identifying and removing mold sources, improving ventilation, and seeking professional help when needed. By addressing mold issues promptly and effectively, individuals can create a safer and healthier indoor environment for themselves and their families.

Mold Testing Houston

5926 Dellfern Dr, Houston, TX 77035, United States

1-832-409-2125

How To Change Code On A Chamberlain Garage Door Opener – CCM Overhead Doors

Your Garage Door Repair Oklahoma City OK access code is a vital component of your home security system. Regularly changing the access code helps ensure the safety and security of your garage and home.

If you own a Chamberlain garage door opener and need to change the access code, you’ve come to the right place. In this detailed guide, we’ll walk you through each step of the process to ensure a successful code change and provide peace of mind for you and your family.

1. Importance of Changing the Access Code

Before we begin, let’s understand why it’s essential to change the access code regularly:

  • Enhanced security: Changing the access code prevents unauthorized entry into your garage and home.
  • Personalized security: By changing the code, you can create a unique combination that is easy for you to remember but difficult for others to guess.
  • Peace of mind: Knowing that your garage door opener’s access code is up-to-date provides peace of mind, especially when you’re away from home.

2. Locate the “Learn” Button

The first step in changing the access code for your Chamberlain garage door opener is to locate the “Learn” button:

  • The “Learn” button is typically located on the motor unit of the garage door opener.
  • It may be labeled as “Learn,” “Smart,” or “Program” and is usually near the antenna wire.

3. Choose a New Code

Before proceeding with the code change process, decide on a new access code:

  • Choose a combination that is easy for you to remember but difficult for others to guess.
  • Avoid using obvious combinations such as birthdates or sequential numbers.
  • Opt for a code that is at least four digits long for optimal security.

4. Put the Garage Door Opener into Programming Mode

Now, let’s put the garage door opener into programming mode:

  • Press and release the “Learn” button on the motor unit. You’ll notice that the indicator light next to the button will illuminate.
  • The garage door opener is now in programming mode and ready to learn the new access code.

5. Enter the New Code

With the garage door opener in programming mode, it’s time to enter the new access code:

  • Using the keypad on the wall control unit, enter the new access code that you’ve chosen.
  • Press the “Enter” button on the keypad to confirm the new code.

6. Test the New Code

Once you’ve entered the new code, it’s essential to test it to ensure that it has been programmed successfully:

  • Close the garage door using the existing code or remote control.
  • Wait for the garage door to close completely, then enter the new access code on the keypad.
  • Press the “Enter” button to confirm the code. If the code is accepted, the garage door should open.

7. Secure the Keypad

After successfully programming the new access code, it’s crucial to secure the keypad to prevent unauthorized access:

  • Ensure that the keypad is securely mounted to the wall and that there are no loose wires or connections.
  • If necessary, use a screwdriver to tighten any mounting screws or brackets.

8. Update Remote Controls

If you have remote controls for your Chamberlain garage door opener, it’s essential to update them with the new access code:

  • Press and hold the “Learn” button on the motor unit until the indicator light blinks.
  • Press the button on the remote control that you wish to program. The indicator light on the motor unit will flash to confirm that the remote control has been programmed successfully.

9. Test Remote Controls

After programming the remote controls, test them to ensure that they are working correctly with the new access code:

  • Stand at a reasonable distance from the garage door opener and press the button on the remote control.
  • The garage door should open or close in response to the remote control command.

10. Maintain Regular Code Changes

To maintain optimal security for your garage and home, consider changing the access code for your Chamberlain garage door opener regularly:

  • Set a schedule for changing the code, such as every few months or after any significant events, such as moving into a new home.
  • Keep a record of previous access codes and the dates they were changed for reference.

By following these steps and maintaining regular code changes, you can enhance the security of your Chamberlain garage door opener and enjoy peace of mind knowing that your home and belongings are protected.

CCM Overhead Doors

1000 NW 80th St, Oklahoma City, OK 73114, United States

1-405-563-8982

How To Change Battery On Craftsman Garage Door Remote – First Responder Garage Doors

Garage Door Repair Southlake TX is a simple yet crucial task to ensure the continued functionality of your garage door opener. By replacing the battery when it becomes weak or depleted, you can avoid the inconvenience of a non-responsive remote and maintain the security and convenience of your garage access.

In this comprehensive guide, we’ll walk you through the step-by-step process of changing the battery on your Craftsman garage door remote, including preparation, accessing the battery compartment, and replacing the battery.

Understanding Your Craftsman Garage Door Remote

Before you begin changing the battery on your Craftsman garage door remote, it’s essential to understand the basic components and functionality of the device.

Components of a Craftsman Garage Door Remote

A Craftsman garage door remote typically consists of a plastic housing with buttons for operating the opener and a battery compartment for housing the battery.

Functionality

The garage door remote allows you to open and close the garage door from a distance, eliminating the need to manually operate the opener. The battery provides the power necessary to transmit the signal to the opener.

Preparation for Battery Replacement

Before you start replacing the battery on your Craftsman garage door remote, take some preparatory steps to ensure a smooth process.

Gather Necessary Materials

You’ll need a new battery, a small screwdriver (if required), and the instruction manual for your Craftsman garage door remote.

Clear the Area

Ensure that the area where you’ll be working is well-lit and free from any obstructions. Position yourself comfortably near the garage door opener to access the remote.

Replacing the Battery

Now that you’re prepared, let’s walk through the process of replacing the battery on your Craftsman garage door remote step by step.

: Locate the Battery Compartment

Identify the battery compartment on your Craftsman garage door remote. This is typically located on the back of the device and may be secured with screws or a sliding cover.

: Open the Battery Compartment

If the battery compartment is secured with screws, use a small screwdriver to remove the screws and open the compartment. If it has a sliding cover, simply slide the cover open to access the battery compartment.

: Remove the Old Battery

Carefully remove the old battery from the compartment, taking note of its orientation. Most batteries can be easily popped out using your fingers or a small tool.

: Insert the New Battery

Insert the new battery into the compartment, ensuring that it is positioned correctly according to the markings inside the compartment. Press down firmly to secure the battery in place.

: Close the Battery Compartment

If the battery compartment has a sliding cover, slide the cover closed until it clicks into place. If it was secured with screws, reinsert the screws and tighten them securely to close the compartment.

: Test the Remote

After replacing the battery, test the Craftsman garage door remote to ensure that it operates correctly. Press the buttons to open and close the garage door, and verify that the signal is transmitted to the opener.

Tips for Maintenance and Troubleshooting

Replace Batteries Regularly

To ensure optimal performance, replace the battery in your Craftsman garage door remote regularly, such as once a year or whenever you notice a decrease in functionality.

Keep Spare Batteries on Hand

Keep spare batteries on hand so that you can quickly replace them when needed, avoiding interruptions in functionality.

Clean the Contacts

If you notice corrosion or buildup on the battery contacts, clean them using a soft cloth or a cotton swab dipped in rubbing alcohol. Clean contacts ensure a strong connection and reliable operation.

Consult the Instruction Manual

If you encounter any issues or have questions about replacing the battery on your Craftsman garage door remote, consult the instruction manual for your specific model. The manual contains detailed information and troubleshooting tips to help you resolve common problems.

Conclusion:

Changing the battery on your Craftsman garage door remote is a simple yet essential maintenance task that ensures continued functionality and convenience. By following the steps outlined in this guide and implementing maintenance best practices, you can keep your garage door remote operating smoothly for years to come.

First Responder Garage Doors

180 State St Suite 225, Southlake, TX 76092, United States

1-817-991-5551

How To Program Garage Door Keypad – Allgood Garage Doors Services LLC

Garage Door Repair Las Vegas NV  is a convenient way to provide secure access to your garage without the need for a remote control. Whether you’re setting up a new keypad or reprogramming an existing one, the process is relatively straightforward.

In this comprehensive guide, we’ll walk you through the step-by-step process of programming a garage door keypad, including preparation, entering the programming mode, setting the access code, and testing the keypad for functionality.

Understanding Your Garage Door Keypad

Before you begin the programming process, it’s essential to understand the basic components and functionality of your garage door keypad.

Components of a Garage Door Keypad

A typical garage door keypad consists of a numerical keypad with buttons for entering the access code and a control panel or motor unit connected to the garage door opener.

Functionality

The keypad allows authorized individuals to enter a security code to open and close the garage door without the need for a remote control. It provides convenient access while enhancing security.

Preparation for Programming

Before you start programming your garage door keypad, take some preparatory steps to ensure a smooth process.

Gather Necessary Materials

You’ll need fresh batteries for the keypad, a ladder if the keypad is mounted at a height, and a pen and paper to record the new access code.

Locate the Learn Button

Most garage door openers have a learn button on the motor unit, which is used to enter the programming mode for the keypad. Locate this button before starting the programming process.

Programming Your Garage Door Keypad

Now that you’re prepared, let’s walk through the programming process step by step.

Step 1: Enter Programming Mode

To enter programming mode, press and release the learn button on the motor unit of the garage door opener. The learn indicator light on the motor unit should illuminate or blink, indicating that the opener is ready to accept a new code.

Step 2: Enter Access Code

Using the keypad, enter your desired access code. The code can be any combination of numbers, typically between four and eight digits long. Avoid using easily guessable codes, such as birthdates or sequential numbers.

Step 3: Set Access Code

After entering the desired access code, press the “Enter” or “OK” button on the keypad to confirm the code. The learn indicator light on the motor unit should blink or turn off, indicating that the access code has been successfully set.

Step 4: Test the Keypad

Exit the programming mode according to the manufacturer’s instructions. Then, test the keypad by entering the newly programmed access code and pressing the “Enter” or “OK” button. The garage door should open or close in response to the code.

Troubleshooting Tips

If you encounter any issues during the programming process, try the following troubleshooting tips:

Check Battery

Ensure that the keypad batteries are fresh and properly installed. Weak or dead batteries can cause connectivity issues or keypad malfunctions.

Verify Keypad Placement

Make sure the keypad is securely mounted and free from obstructions that could interfere with button presses or wireless signals.

Consult Manufacturer’s Instructions

Refer to the user manual or manufacturer’s website for specific troubleshooting steps and solutions for your garage door keypad model.

Conclusion:

Programming your garage door keypad is a simple process that can be completed in just a few minutes. By following the steps outlined in this guide and implementing troubleshooting tips, you can ensure that your garage door keypad provides secure and convenient access to your garage.

Allgood Garage Doors Services LLC

494 Cape Alan Dr. Henderson, NV 89052

1-702-343-2252

How do I contact All Seasons Landcare to learn more about their services – All Seasons Landcare

If you’re considering landscaping services for your property, reaching out to All Seasons Landcare Alington US is a great place to start. With their expertise in landscaping, lawn maintenance, and seasonal services, they can help transform your outdoor space into a beautiful and functional oasis. In this guide, I’ll walk you through the various ways you can contact All Seasons Landcare to learn more about their services and get started on your landscaping project.

1. Phone Call

One of the most direct ways to contact All Seasons Landcare is by giving them a call. You can find their phone number on their website or through online directories. When you call, you’ll be connected with a friendly representative who can answer your questions, provide information about their services, and schedule a consultation if needed. Phone calls offer a personal touch and allow for immediate communication.

2. Email Inquiry

If you prefer written communication, you can send an email inquiry to All Seasons Landcare. You can find their email address on their website or social media profiles. In your email, be sure to introduce yourself, provide details about your landscaping needs, and ask any specific questions you may have. Email inquiries are convenient and allow you to keep a record of your communication for future reference.

3. Online Contact Form

Many landscaping companies, including All Seasons Landcare, have online contact forms on their websites. These forms typically require you to fill out your name, email address, phone number, and a brief message outlining your inquiry. Once you submit the form, a representative from All Seasons Landcare will reach out to you to discuss your landscaping needs further. Online contact forms are convenient and can be completed at any time of day.

4. Social Media Messaging

Another option for contacting All Seasons Landcare is through social media messaging. Many businesses have active social media profiles where they engage with customers and answer questions. You can send a direct message to All Seasons Landcare through platforms like Facebook, Instagram, or Twitter. Social media messaging is a quick and easy way to get in touch with the company and receive a prompt response.

5. In-Person Visit

If you prefer face-to-face interaction, you can visit the All Seasons Landcare office in person. Check their website or call ahead to confirm their office hours and location. When you visit, you can speak directly with a representative, discuss your landscaping needs, and even schedule a consultation on the spot. In-person visits allow you to get a feel for the company and build a personal connection with their team.

6. Attend a Local Event

All Seasons Landcare may also participate in local community events, home shows, or garden expos. Keep an eye out for these events in your area and stop by their booth to learn more about their services. You can speak with representatives, view examples of their work, and ask any questions you may have in person. Attending a local event is a fun and informative way to connect with All Seasons Landcare and explore your landscaping options.

Conclusion

Contacting All Seasons Land care to learn more about their landscaping services is easy and convenient. Whether you prefer to call, email, fill out an online form, or visit their office in person, there are multiple ways to get in touch with their team. By reaching out and exploring your options, you can take the first step towards creating the outdoor space of your dreams with All Seasons Land care.


How to Insulate a Garage Door – A 24 Hour Door Service

In this guide based from Garage Door Repair Madison MS , I’ll walk you through the steps of insulating a garage door, from choosing the right materials to installation techniques.

Step 1: Assessing the Situation

The first thing I did was take a good look at my garage door. I noted the material it was made of and any existing gaps or cracks. This helped me decide on the best insulation method for my door.

Step 2: Choosing the Right Insulation

After some research, I settled on foam board insulation. It’s lightweight, easy to work with, and offers excellent thermal insulation properties. Plus, it’s relatively affordable, which was a big plus for me.

Step 3: Measuring and Cutting

With my insulation material chosen, I measured each panel of my garage door carefully. I wanted to ensure a precise fit, so I double-checked my measurements before cutting the foam board to size.

Step 4: Installing the Insulation

Once I had all my pieces cut, I started installing them in the garage door panels. It was a simple process of sliding each piece into place and making sure it fit snugly. I took my time to ensure a tight seal and maximum insulation.

Step 5: Sealing Any Gaps

After installing the insulation, I inspected the edges of the garage door for any gaps or cracks. These areas can compromise the effectiveness of the insulation, so I used weatherstripping to seal them up. It was a quick and easy fix that made a big difference.

Step 6: Testing it Out

With everything in place, it was time to test my handiwork. I noticed an immediate difference in the temperature and noise levels inside the garage. It felt much more comfortable and quieter, even on the hottest or coldest days.

Step 7: Enjoying the Benefits

Now that my garage door was properly insulated, I could enjoy a more comfortable environment year-round. Whether I was working on projects, using the space for storage, or just coming and going from the house, it made a world of difference.

Conclusion

Insulating my garage door was one of the best home improvement projects I’ve tackled. It was relatively easy and affordable, yet it made a significant impact on the comfort and energy efficiency of my home. If you’re tired of dealing with a drafty or overheated garage, I highly recommend giving it a try.

A 24 Hour Door Service

417 Post Oak Cove, Madison, MS 39110, United States

1-601-664-8935

Customizing Your Garage Door for Curb Appeal – Circle B Overhead Door

As a homeowner who understands the importance of curb appeal, I’ve come to appreciate the significant impact that a well-designed garage door can have on the overall look and feel of a home. Gone are the days when garage doors were merely functional; today, they serve as a focal point of architectural design, contributing to the aesthetic appeal and value of the property.

I’ll share my insights into the art of customizing garage doors to enhance curb appeal, offering inspiration, tips, and considerations for homeowners looking to elevate the appearance of their homes according to Garage Door Repair Bryan TX.

Recognizing the Importance of Garage Doors in Curb Appeal

The garage door is one of the most prominent features of a home’s exterior, occupying a large portion of the facade and drawing attention from passersby and visitors. As such, it plays a significant role in shaping the overall aesthetic and curb appeal of the property. A well-designed garage door can enhance the architectural style, character, and charm of the home, making a lasting impression and adding value to the property.

Choosing the Right Style and Design

When customizing your garage door for curb appeal, it’s essential to consider the architectural style of your home and the surrounding neighborhood. Here are some popular garage door styles to consider:

  1. Traditional: Traditional garage doors feature classic designs and symmetrical panel configurations, making them suitable for a wide range of architectural styles, including colonial, ranch, and craftsman homes.
  2. Carriage House: Carriage house garage doors evoke the charm and character of historic carriage houses, with distinctive crossbeam details and decorative hardware. These doors are ideal for traditional and rustic-style homes.
  3. Contemporary: Contemporary garage doors feature sleek, minimalist designs and clean lines, complementing modern and mid-century modern architectural styles. Choose materials such as aluminum, glass, or steel for a sleek and contemporary look.
  4. Custom: For homeowners seeking a unique and personalized touch, custom garage doors offer endless design possibilities. Work with a reputable garage door manufacturer or designer to create a one-of-a-kind door that reflects your style and vision.

Exploring Material Options

The choice of materials for your garage door can have a significant impact on its appearance, durability, and maintenance requirements. Here are some popular garage door materials to consider:

  1. Wood: Wood garage doors exude warmth, elegance, and natural beauty, making them a popular choice for traditional and rustic-style homes. Opt for high-quality woods such as cedar, redwood, or mahogany for durability and longevity.
  2. Steel: Steel garage doors are known for their strength, durability, and low maintenance requirements. They are available in a wide range of styles, colors, and finishes, making them suitable for both traditional and contemporary homes.
  3. Aluminum: Aluminum garage doors are lightweight, corrosion-resistant, and highly customizable. They are ideal for modern and contemporary homes, offering sleek designs and a wide range of color options.
  4. Fiberglass: Fiberglass garage doors mimic the look of wood without the maintenance requirements. They are durable, lightweight, and resistant to dents, cracks, and warping, making them suitable for a variety of architectural styles.

Adding Decorative Elements

In addition to choosing the right style and material for your garage door, consider adding decorative elements to enhance its visual appeal:

  1. Hardware: Decorative hardware, such as handles, hinges, and straps, can add character and charm to your garage door. Choose hardware that complements the style and design of your home for a cohesive look.
  2. Windows: Windows can add architectural interest and natural light to your garage door. Choose window designs that complement the style of your home and provide visual balance to the overall design.
  3. Trim and Molding: Adding trim and molding details to your garage door can enhance its elegance and sophistication. Consider adding decorative trim around the panels or along the edges of the door for added visual interest.
  4. Paint or Stain: The color of your garage door can significantly impact its curb appeal. Choose a paint or stain color that complements the exterior color scheme of your home and enhances its architectural features.

Maintenance and Care

Once you’ve customized your garage door for curb appeal, it’s essential to maintain its appearance and functionality over time. Here are some maintenance tips to keep your garage door looking its best:

  1. Regular Cleaning: Clean your garage door regularly using mild soap and water to remove dirt, debris, and stains. Avoid using abrasive cleaners or harsh chemicals that could damage the finish.
  2. Inspect and Lubricate Moving Parts: Periodically inspect the moving parts of your garage door, including springs, rollers, and hinges, for signs of wear or damage. Lubricate moving parts with a silicone-based lubricant to keep them operating smoothly.
  3. Repair Damage Promptly: If you notice any signs of damage or deterioration, such as dents, scratches, or rust, repair them promptly to prevent further issues. Consult a professional garage door technician for complex repairs or replacements.
  4. Protect Against Weather: Protect your garage door from the elements by installing weather-stripping along the bottom and sides of the door to prevent drafts and moisture intrusion.

Conclusion: Elevate Your Home’s Exterior with Custom Garage Doors

In conclusion, based from Garage Door Repair Bryan TX, customizing your garage door for curb appeal is an excellent way to enhance the beauty, style, and value of your home. By choosing the right style, material, and decorative elements, you can create a garage door that complements your home’s architectural style and makes a memorable impression. Remember to prioritize maintenance and care to keep your garage door looking its best for years to come. With careful consideration and attention to detail, you can elevate your home’s exterior and create a welcoming and visually appealing entryway that reflects your personal style and taste.

Circle B Overhead Door

1818 Drillers Dr, Bryan, TX 77808, United States

979-324-6733

Signs It’s Time for a Garage Door Replacement – Garage Door Solutionz

As a homeowner who values both functionality and aesthetics, I understand the importance of keeping every aspect of my property in top condition. Among the various components that contribute to the overall safety and curb appeal of my home, the garage door holds a significant place. However, like any other part of the house, garage doors also undergo wear and tear over time and may eventually require replacement.

I’ll discuss the signs that indicate it’s time to consider replacing your garage door, along with the benefits of investing in a new one according to Garage Door Repair Sacramento CA.

1. Visible Damage and Wear

One of the most obvious signs that it’s time for a garage door replacement is visible damage and wear. Inspect your garage door regularly for signs of rust, corrosion, dents, cracks, or warping. These issues not only detract from the appearance of your home but also compromise the structural integrity and functionality of the door. If your garage door shows significant signs of wear and damage that cannot be repaired, it may be time to invest in a new one.

2. Difficulty Opening and Closing

Garage doors are designed to open and close smoothly and quietly. If you notice that your garage door is experiencing difficulty when operating, such as sticking, jerking, or making unusual noises, it could indicate underlying mechanical issues. While some problems can be resolved through repairs or maintenance, chronic issues with opening and closing may warrant a replacement, especially if the door is reaching the end of its lifespan.

3. High Energy Bills

Older garage doors may lack proper insulation, allowing cold air to seep in during the winter and hot air to infiltrate during the summer. As a result, your HVAC system may have to work harder to maintain a comfortable temperature in your home, leading to increased energy consumption and higher utility bills. Investing in a new, insulated garage door can help improve energy efficiency and reduce heating and cooling costs over time.

4. Outdated Design and Style

If your garage door looks outdated or no longer complements the architectural style of your home, it may be time for a refresh. Upgrading to a new garage door can enhance the curb appeal of your property and give your home a fresh, modern look. With a wide range of designs, materials, and finishes available, you can choose a garage door that reflects your personal taste and enhances the overall aesthetic of your home exterior.

5. Safety Concerns

Garage doors are heavy and can pose a safety hazard if they malfunction or fail to operate properly. Older garage doors may lack modern safety features, such as auto-reverse sensors, which are designed to detect obstructions in the door’s path and prevent accidents or injuries. If you have young children or pets, ensuring the safety of your garage door should be a top priority. Investing in a new garage door with updated safety features can provide peace of mind and protect your loved ones from harm.

6. Persistent Repairs

If you find yourself constantly repairing your garage door due to recurring issues, such as broken springs, damaged panels, or malfunctioning hardware, it may be more cost-effective in the long run to invest in a new door. While minor repairs are to be expected over time, frequent and costly repairs can add up quickly and may indicate that your garage door is nearing the end of its lifespan. By replacing your garage door with a newer model, you can avoid the hassle and expense of ongoing repairs and enjoy reliable performance for years to come.

7. Decreased Security

Garage doors are a primary entry point to many homes and serve as a crucial barrier against intruders and burglars. If your garage door is old or worn out, it may be more susceptible to forced entry or tampering. Investing in a new garage door with enhanced security features, such as reinforced panels, sturdy locks, and advanced locking mechanisms, can help deter potential intruders and protect your home and belongings.

8. Increased Property Value

Replacing your garage door is not only an investment in the safety and functionality of your home but also in its overall value. A new garage door can significantly boost the curb appeal and resale value of your property, making it more attractive to potential buyers. According to the Remodeling 2021 Cost vs. Value Report, garage door replacement offers a high return on investment, recouping an average of 94.5% of the cost at resale.

Conclusion: Investing in a New Garage Door

In conclusion, as stated in Garage Door Repair Anniston AL, there are several signs that indicate it may be time to consider replacing your garage door. Whether you’re dealing with visible damage, mechanical issues, energy inefficiency, outdated design, or safety concerns, investing in a new garage door can provide numerous benefits, including improved functionality, enhanced curb appeal, increased security, and higher property value. If you’re experiencing any of the signs mentioned above, consult with a reputable garage door specialist to explore your options and find the perfect replacement door for your home. By making the investment in a new garage door, you can enjoy peace of mind knowing that your home is safe, secure, and stylish for years to come.

Garage Door Solutionz

Anniston, Alabama

256-954-0264

How Much To Replace Tension Spring On Garage Door – Brothers Garage Door Service

Garage Door Repair Livonia MI play a crucial role in the smooth operation of your garage door, providing the necessary force to lift and lower it safely.

When a tension spring breaks or malfunctions, it can disrupt the functionality of the door, posing safety risks and requiring immediate replacement. In this detailed guide, we’ll explore all aspects of the cost of replacing a tension spring on a garage door, including factors affecting the cost, types of springs available, installation considerations, and tips for making informed decisions.

Factors Affecting the Cost

Several factors influence the cost of replacing a tension spring on a garage door:

  1. Type and Size of the Door: The size and weight of your garage door determine the size and strength of the tension spring needed. Larger and heavier doors require stronger springs, which may result in higher replacement costs.
  2. Type of Spring: Garage doors typically use two types of tension springs: torsion springs and extension springs. Torsion springs are mounted above the door and wind and unwind to store and release energy, while extension springs are located on either side of the door and stretch and contract to provide tension. The type of spring used affects the replacement cost.
  3. Quality of Spring: The quality of the replacement spring impacts its cost. High-quality springs made from durable materials may have a higher upfront cost but offer better performance and longevity, potentially reducing long-term maintenance expenses.
  4. Professional Labor: Hiring a professional garage door technician for spring replacement incurs labor costs, which vary based on factors such as the complexity of the job, local labor rates, and the technician’s expertise.

Cost Range of Replacing Tension Spring on Garage Door

The cost of replacing a tension spring on a garage door varies depending on several factors. Here’s a breakdown of the cost range based on different scenarios:

  1. Torsion Spring Replacement:
    • Single Torsion Spring Replacement: $150 to $300
    • Dual Torsion Spring Replacement: $250 to $500
  2. Extension Spring Replacement:
    • Single Extension Spring Replacement: $100 to $200
    • Dual Extension Spring Replacement: $150 to $300

Additional Considerations and Costs

In addition to the spring replacement cost, consider the following factors:

  1. Labor Costs: Professional installation typically incurs labor costs ranging from $100 to $200, depending on the complexity of the job and local labor rates.
  2. Emergency Service: If a tension spring breaks unexpectedly, you may require emergency service, incurring additional costs for immediate assistance or after-hours replacement.
  3. Additional Parts: Assess the condition of other garage door components, such as cables, rollers, and pulleys. Replacing worn or damaged parts during spring replacement ensures optimal door performance but may increase overall costs.
  4. Warranties and Guarantees: Inquire about warranties or guarantees on the replacement spring and labor to safeguard against defects or issues post-installation.

DIY vs. Professional Replacement

While some homeowners opt for DIY spring replacement to cut costs, it’s crucial to recognize the risks involved. Garage door springs are under significant tension and can cause serious injury or property damage if mishandled. Professional installation ensures safety, accuracy, and adherence to manufacturer guidelines, potentially preventing costly mistakes and ensuring long-term reliability.

Conclusion:

In summary, the cost of replacing a tension spring on a garage door depends on various factors, including the type of spring, size of the door, quality of the replacement part, and labor costs. By understanding these factors and working with a reputable garage door technician, you can ensure a safe and effective replacement process, restoring the functionality and reliability of your garage door system.

Brothers Garage Door Service

29522 Wentworth St, Livonia, MI 48154, United States

1-734-292-0971

How Much Does It Cost To Change Garage Door Springs – Veterans Garage Door

Garage Door Repair Villages FL play a crucial role in the operation of your garage door, counterbalancing its weight and helping it open and close smoothly.

However, like any mechanical component, garage door springs can wear out over time and require replacement. In this guide, we’ll explore the factors that influence the cost of changing garage door springs, including the type of springs, labor costs, and additional considerations.

Factors Affecting the Cost

Several factors can influence the cost of changing garage door springs, including:

  1. Type of Springs: Garage doors typically use two types of springs: torsion springs and extension springs. Torsion springs are located above the door and wind up as the door opens, while extension springs are located on the sides of the door and stretch as the door opens. Torsion springs are generally more expensive to replace than extension springs due to their complexity and higher load-bearing capacity.
  2. Size and Weight of the Door: The size and weight of your garage door will affect the size and strength of the springs required. Larger and heavier doors require stronger springs, which may be more expensive to purchase and install.
  3. Number of Springs: Some garage doors use multiple springs to provide additional support and balance. The number of springs required will impact the overall cost of replacement, as each spring will need to be replaced individually or in sets.
  4. Quality of Springs: The quality of the springs you choose will also affect the cost. Higher-quality springs made from durable materials may have a higher upfront cost but can offer better performance and longevity, potentially saving you money in the long run.
  5. Labor Costs: In addition to the cost of the springs themselves, you’ll also need to factor in labor costs for professional installation. Hiring a professional garage door technician ensures that the springs are installed correctly and safely, reducing the risk of accidents or injuries.

Cost Range of Changing Garage Door Springs

The cost of changing garage door springs can vary depending on the aforementioned factors and other considerations. Here’s a breakdown of the cost range based on different scenarios:

  1. Torsion Spring Replacement:
    • Basic Torsion Spring Replacement: $150 to $250
    • High-Quality Torsion Spring Replacement: $250 to $500
  2. Extension Spring Replacement:
    • Basic Extension Spring Replacement: $100 to $200
    • High-Quality Extension Spring Replacement: $200 to $400
  3. Additional Costs and Considerations:
    • Labor Costs: Professional installation typically costs between $50 and $100 per hour, depending on the complexity of the job and the technician’s experience.
    • Emergency Service: If your garage door springs break unexpectedly, you may need to pay extra for emergency service or after-hours repairs.
    • Warranty: Some garage door springs come with warranties that cover defects in materials and workmanship. Opting for springs with a warranty can provide added peace of mind and protection against premature failure.

DIY vs. Professional Installation

While some homeowners may attempt to replace garage door springs themselves to save money, this is not recommended unless you have experience and expertise in garage door repair. Garage door springs are under high tension and can be dangerous to work with, posing a risk of serious injury or property damage if mishandled. Hiring a professional garage door technician ensures that the job is done safely and correctly, reducing the risk of accidents and ensuring the longevity of your garage door system.

Conclusion:

In conclusion, the cost of changing garage door springs depends on factors such as the type of springs, size and weight of the door, number of springs, quality of springs, labor costs, and additional considerations. By understanding these factors and working with a reputable garage door technician, you can ensure that your garage door springs are replaced correctly and safely, maintaining the functionality and reliability of your garage door system.

Veterans Garage Door

6497 Parkland Dr F, Sarasota, FL 34243, United States

1-941-699-6198

Page 1 of 79

Powered by WordPress & Theme by Anders Norén