Local Businesses Blog in Texas

Tag: garage door repair Southlake TX Page 1 of 2

How To Change Battery On Craftsman Garage Door Remote – First Responder Garage Doors

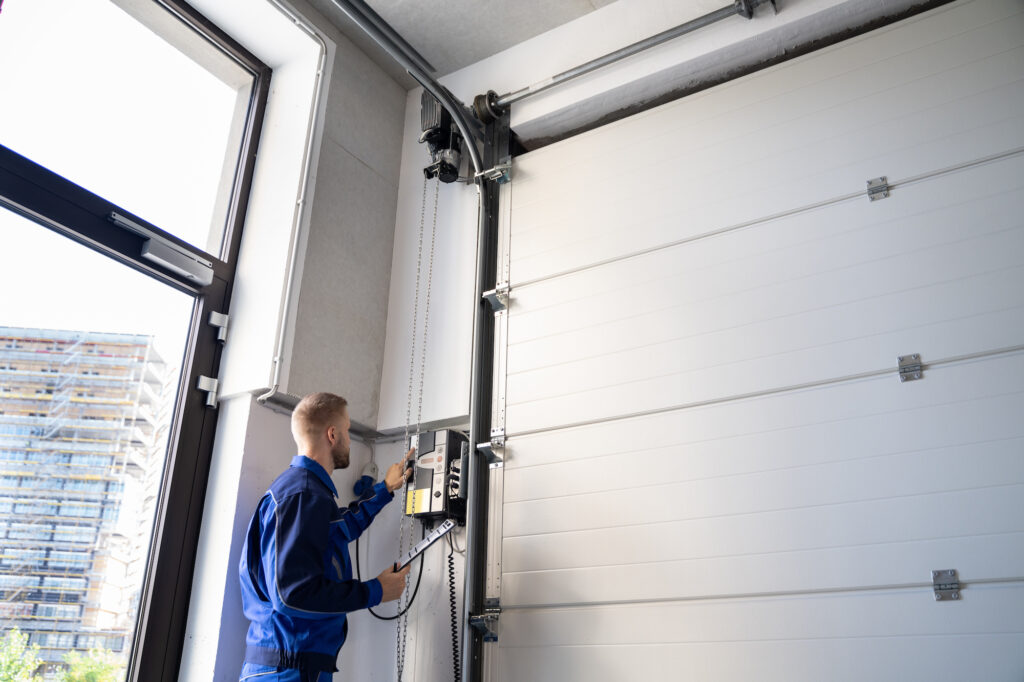
Garage Door Repair Southlake TX is a simple yet crucial task to ensure the continued functionality of your garage door opener. By replacing the battery when it becomes weak or depleted, you can avoid the inconvenience of a non-responsive remote and maintain the security and convenience of your garage access.

In this comprehensive guide, we’ll walk you through the step-by-step process of changing the battery on your Craftsman garage door remote, including preparation, accessing the battery compartment, and replacing the battery.

Understanding Your Craftsman Garage Door Remote

Before you begin changing the battery on your Craftsman garage door remote, it’s essential to understand the basic components and functionality of the device.

Components of a Craftsman Garage Door Remote

A Craftsman garage door remote typically consists of a plastic housing with buttons for operating the opener and a battery compartment for housing the battery.

Functionality

The garage door remote allows you to open and close the garage door from a distance, eliminating the need to manually operate the opener. The battery provides the power necessary to transmit the signal to the opener.

Preparation for Battery Replacement

Before you start replacing the battery on your Craftsman garage door remote, take some preparatory steps to ensure a smooth process.

Gather Necessary Materials

You’ll need a new battery, a small screwdriver (if required), and the instruction manual for your Craftsman garage door remote.

Clear the Area

Ensure that the area where you’ll be working is well-lit and free from any obstructions. Position yourself comfortably near the garage door opener to access the remote.

Replacing the Battery

Now that you’re prepared, let’s walk through the process of replacing the battery on your Craftsman garage door remote step by step.

: Locate the Battery Compartment

Identify the battery compartment on your Craftsman garage door remote. This is typically located on the back of the device and may be secured with screws or a sliding cover.

: Open the Battery Compartment

If the battery compartment is secured with screws, use a small screwdriver to remove the screws and open the compartment. If it has a sliding cover, simply slide the cover open to access the battery compartment.

: Remove the Old Battery

Carefully remove the old battery from the compartment, taking note of its orientation. Most batteries can be easily popped out using your fingers or a small tool.

: Insert the New Battery

Insert the new battery into the compartment, ensuring that it is positioned correctly according to the markings inside the compartment. Press down firmly to secure the battery in place.

: Close the Battery Compartment

If the battery compartment has a sliding cover, slide the cover closed until it clicks into place. If it was secured with screws, reinsert the screws and tighten them securely to close the compartment.

: Test the Remote

After replacing the battery, test the Craftsman garage door remote to ensure that it operates correctly. Press the buttons to open and close the garage door, and verify that the signal is transmitted to the opener.

Tips for Maintenance and Troubleshooting

Replace Batteries Regularly

To ensure optimal performance, replace the battery in your Craftsman garage door remote regularly, such as once a year or whenever you notice a decrease in functionality.

Keep Spare Batteries on Hand

Keep spare batteries on hand so that you can quickly replace them when needed, avoiding interruptions in functionality.

Clean the Contacts

If you notice corrosion or buildup on the battery contacts, clean them using a soft cloth or a cotton swab dipped in rubbing alcohol. Clean contacts ensure a strong connection and reliable operation.

Consult the Instruction Manual

If you encounter any issues or have questions about replacing the battery on your Craftsman garage door remote, consult the instruction manual for your specific model. The manual contains detailed information and troubleshooting tips to help you resolve common problems.

Conclusion:

Changing the battery on your Craftsman garage door remote is a simple yet essential maintenance task that ensures continued functionality and convenience. By following the steps outlined in this guide and implementing maintenance best practices, you can keep your garage door remote operating smoothly for years to come.

First Responder Garage Doors

180 State St Suite 225, Southlake, TX 76092, United States

1-817-991-5551

How To Open Garage Door Without Remote – First Responder Garage Doors


Opening a  Garage Door Repair Southlake TX without a remote can be accomplished using alternative methods such as a keypad, an emergency release cord, or manually operating the door.

Garage Door Installation And Repair At Home. Contractor Man In House

Below is a comprehensive guide on how to open a garage door without a remote:

Materials You’ll Need:

  1. Access to the garage
  2. Keypad (if installed)
  3. Step ladder (if needed)
  4. Emergency release cord (if available)
  5. Manual door opening tools (if needed)

Step-by-Step Guide:

Method 1: Using a Keypad (if installed):

  1. Locate the keypad mounted outside your garage door. It is typically positioned near the entrance or on the side of the door.
  2. Enter the access code on the keypad to open the garage door. The access code is a predetermined sequence of numbers programmed into the keypad.

Method 2: Using the Emergency Release Cord:

  1. Locate the emergency release cord hanging from the garage door opener track. It is usually a red cord with a handle at the end.
  2. Pull down on the emergency release cord to disengage the garage door opener from the door. This allows you to manually open the door without power.
  3. Lift the garage door manually by grasping the bottom edge of the door and lifting it upward. Use caution as the door may be heavy, especially if it’s a double garage door.
  4. Once the door is fully open, secure it in place by propping it up with a sturdy object such as a broom handle or by engaging the door lock if available.

Method 3: Manually Operating the Door (if needed):

  1. If your garage door does not have a keypad or an emergency release cord, you may need to manually open it using the door’s handles or lifting mechanism.
  2. Look for handles or grips located on the bottom panel or sides of the garage door. These are typically used for manually opening and closing the door.
  3. Grip the handles firmly and lift the door upward using your hands or a pry bar if necessary. Use caution as the door may be heavy and difficult to lift without assistance.
  4. Once the door is fully open, secure it in place using a prop or by engaging the door lock if available.

Step 4: Closing the Garage Door:

  1. To close the garage door, simply lower it back down manually until it reaches the fully closed position.
  2. If using the emergency release cord, pull it back toward the garage door opener to re-engage the opener mechanism.
  3. If using a keypad, enter the access code to close the garage door using the opener.

Step 5: Safety Precautions:

  1. Always exercise caution when manually operating a garage door, especially if it is heavy or difficult to lift.
  2. Keep hands and fingers away from moving parts of the door to avoid injury.
  3. Make sure the area around the garage door is clear before opening or closing it to prevent accidents.

If you encounter any difficulties or if your  Garage Door Repair Southlake TX does not have these features, consult the owner’s manual for your garage door opener or contact a professional for assistance.

First Responder Garage Doors

180 State St Suite 225, Southlake, TX 76092, United States

1-817-991-5551

https://maps.app.goo.gl/Mp1GYagzPQAJp2s8A

How To Repair a Garage Door Opener – First Responder Garage Doors

Garage Door Repair Southlake TX is a critical component of your garage door system, providing convenience, security, and ease of access to your home.

When your opener malfunctions, it’s essential to address the issue promptly to restore functionality and ensure the safety of your property. By following the steps outlined in this guide, you can troubleshoot and repair common problems with your garage door opener effectively.

: Identify the Problem

1. Visual Inspection

Begin by visually inspecting the garage door opener and its components for any signs of damage, wear, or misalignment. Look for loose hardware, frayed wires, worn gears, or obstructed sensors that may be causing the issue.

2. Test Operation

Attempt to operate the garage door opener using both the wall-mounted control panel and the remote control. Pay attention to any unusual noises, jerky movements, or failure to operate properly, as these may indicate specific issues.

: Common Garage Door Opener Problems and Solutions

1. No Response to Remote Control

  • Check the batteries in the remote control and replace them if necessary.
  • Verify that the opener is receiving power by checking the electrical outlet and circuit breaker.
  • Reprogram the remote control according to the manufacturer’s instructions to ensure proper communication with the opener.

2. Door Doesn’t Open or Close Completely

  • Inspect the safety sensors located near the bottom of the garage door tracks for alignment and obstructions. Clean the sensors and realign them if necessary to ensure proper operation.
  • Check the travel limits and adjust them as needed to ensure that the garage door opens and closes fully without stopping prematurely.

3. Loud or Grinding Noise

  • Lubricate the moving parts of the garage door opener, including the chain, gears, and rollers, with a silicone-based lubricant to reduce friction and noise.
  • Tighten any loose hardware, such as bolts, nuts, and screws, to minimize vibration and noise during operation.

4. Door Reverses Unexpectedly

  • Inspect the safety sensors for dirt, debris, or misalignment that may be triggering the reversal of the door. Clean the sensors and realign them if necessary to ensure proper operation.
  • Adjust the sensitivity settings of the opener according to the manufacturer’s instructions to prevent false reversals.

: Repair Techniques

1. Replace Worn Gears

If the gears inside the opener are worn or damaged, carefully remove the cover and replace them with new gears. Follow the manufacturer’s instructions and use caution when working with electrical components.

2. Adjust Chain Tension

If the chain is loose or sagging, adjust the tension by tightening the tension nuts or adjusting the chain tensioner according to the manufacturer’s instructions. Ensure that the chain is properly tensioned to prevent slippage or binding.

3. Clean and Align Sensors

Clean the lenses of the safety sensors with a soft, dry cloth to remove any dirt or debris that may be obstructing the signal. Use a level to ensure that the sensors are properly aligned and facing each other for reliable operation.

: Test and Verify

1. Test Operation

After completing the necessary repairs, test the operation of the garage door opener by operating it using both the wall-mounted control panel and the remote control. Ensure that the opener operates smoothly and without any issues.

2. Perform Safety Checks

Verify that the safety features of the garage door opener, including the auto-reverse mechanism and photoelectric sensors, are functioning correctly by testing them with an obstruction in the door’s path.

Conclusion:

Garage Door Repair Southlake TX doesn’t have to be a daunting task. By following the step-by-step instructions outlined in this guide and taking necessary safety precautions, you can troubleshoot and address common issues with your opener effectively. Remember to prioritize safety at all times and seek professional assistance if you encounter any difficulties or if repairs are beyond your DIY capabilities.

First Responder Garage Doors

180 State St Suite 225, Southlake, TX 76092, United States

1-817-991-5551

How Difficult Is It To Replace A Garage Door Opener – Southlake Automatic Gates LLC


Replacing a Garage Door Repair Southlake TX can range in difficulty depending on several factors, including your familiarity with home improvement projects, the type of garage door opener you’re installing, and any existing issues with your garage door system.

While some homeowners may find replacing a garage door opener to be a straightforward task, others may encounter challenges that require additional time and effort to overcome. Here’s a comprehensive guide on the factors that can influence the difficulty of replacing a garage door opener:

1. Skill Level and Experience: Your skill level and experience with home improvement projects play a significant role in determining the difficulty of replacing a garage door opener. If you have previous experience with mechanical systems, electrical wiring, and using power tools, you may find the replacement process easier to manage. However, if you’re less experienced or unfamiliar with these tasks, you may encounter more challenges along the way.

2. Type of Garage Door Opener: There are different types of garage door openers available on the market, including chain-drive, belt-drive, and screw-drive models. The type of opener you’re installing can impact the difficulty of the replacement process. For example, belt-drive openers are generally quieter and require less maintenance but may be slightly more challenging to install due to the tensioning and alignment of the belt. Chain-drive openers, on the other hand, are more straightforward to install but tend to be louder during operation.

3. Compatibility with Existing Garage Door: Before replacing a garage door opener, it’s essential to ensure compatibility with your existing garage door. Factors such as the weight, size, and type of door will influence the replacement process. Some garage door openers come with specific requirements regarding door height, clearance, and reinforcement, which may require additional modifications to your garage door or opener system.

4. Electrical Wiring and Safety Considerations: Replacing a garage door opener involves working with electrical wiring and components, which requires careful attention to safety guidelines and local building codes. If you’re not comfortable working with electricity or unsure about wiring procedures, it’s best to hire a professional installer to ensure proper replacement and compliance with safety standards.

5. Tools and Equipment: Replacing a garage door opener typically requires a variety of tools and equipment, including a drill, screwdriver, wrenches, pliers, and a ladder. If you already own these tools and are comfortable using them, you may find the replacement process more manageable. However, if you need to purchase or borrow tools, this can add to the overall difficulty and complexity of the project.

6. Instruction Manual and Guidance: Following the manufacturer’s instructions and guidance is crucial for a successful garage door opener replacement. The complexity of the instructions and the clarity of the illustrations can affect the overall difficulty of the project. Some homeowners may find the instructions easy to follow, while others may struggle with interpreting technical terminology or diagrams.

7. Time and Patience: Replacing a garage door opener requires time, patience, and attention to detail. Rushing through the replacement process can lead to mistakes or oversights that may affect the performance and safety of the opener. It’s essential to allocate enough time for the replacement and take breaks as needed to prevent fatigue or frustration.

In summary, the difficulty of replacing a Garage Door Repair Southlake TX can vary depending on factors such as your skill level, the type of opener, compatibility with your existing door, electrical wiring, tools and equipment, adherence to safety guidelines, and the clarity of the manufacturer’s instructions. While some homeowners may find the replacement process relatively straightforward, others may encounter challenges that require professional assistance. It’s essential to assess your comfort level and abilities before attempting the replacement and seek help if needed to ensure a safe and successful outcome.

Southlake Automatic Gates LLC

100 N Carroll Ave, Southlake, TX 76092, United States

1-817-631-4158

How Do I Program My Chamberlain Garage Door Opener Remote – First Responder Garage Doors

Programming your Chamberlain Garage Door Repair Southlake TX allows you to conveniently open and close your garage door from a distance. Chamberlain offers various models of garage door opener remotes, each with its specific programming process.

In this comprehensive guide, I’ll provide a general overview of how to program a Chamberlain garage door opener remote, covering the common steps and procedures applicable to most models.

1. Gather Necessary Materials: Before you begin programming the Chamberlain garage door opener remote, gather all the necessary materials:

  • Chamberlain garage door opener remote control (make and model specific)
  • Fresh batteries for the remote control
  • Access to the garage door opener motor unit
  • A ladder (if necessary)
  • Screwdriver (if needed)

2. Access the Garage Door Opener Motor Unit: Locate the motor unit of your Chamberlain garage door opener. This unit is typically mounted on the ceiling of the garage near the center of the door. Use a ladder if necessary to reach the motor unit safely.

3. Locate the “Learn” Button on the Motor Unit: On the garage door opener motor unit, locate the “Learn” button. This button is usually prominently labeled and may be colored differently from other buttons. Refer to the instruction manual for your specific Chamberlain garage door opener model if you’re unsure about the button’s location.

4. Enter Programming Mode on the Motor Unit: Press and release the “Learn” button on the motor unit to enter programming mode. The indicator light on the motor unit may flash or remain lit to indicate that it’s ready to receive programming signals.

5. Prepare the Remote Control: Before programming the remote control, ensure it has fresh batteries installed. Replace the batteries if necessary to ensure reliable signal transmission during the programming process.

6. Program the Remote Control: With the motor unit in programming mode, follow these steps to program the remote control:

  • Press and release the desired button on the remote control. The indicator light on the motor unit may flash or blink to indicate that it has received the signal from the remote.
  • If your Chamberlain garage door opener requires confirmation, such as pressing a button on the motor unit, follow the prompts provided by the instruction manual or the indicator lights on the motor unit.
  • Once the remote control is successfully programmed, the indicator light on the motor unit may flash again to confirm.

7. Test the Remote Control: After programming the remote control, it’s essential to test its functionality. Stand inside or outside the garage (depending on your preference) and use the remote control to open and close the garage door. Ensure that the door responds promptly and smoothly to each command.

8. Secure the Motor Unit and Remote Control: After programming is complete and the remote control is functioning correctly, ensure that the motor unit is securely mounted. Store the remote control in a safe and convenient location, away from children and pets, to prevent accidental operation.

9. Additional Considerations: If you have multiple garage doors or plan to add more in the future, you can program additional buttons on the remote control to accommodate them. Refer to the instruction manual for your Chamberlain garage door opener for guidance on programming additional remotes and managing multiple devices.

10. Troubleshooting: If you encounter any issues during the programming process or if the remote control does not function as expected, consider the following troubleshooting steps:

  • Verify that the batteries in the remote control are fresh and installed correctly.
  • Ensure that the programming steps were followed accurately, including pressing the correct button on the remote control and confirming any prompts from the motor unit.
  • Check for any obstructions or interference that may be affecting the signal transmission between the remote control and the motor unit.
  • Refer to the instruction manual for your specific Chamberlain garage door opener model for troubleshooting tips and additional guidance.

In conclusion, programming a Chamberlain Garage Door Repair Southlake TX is a straightforward process that enhances the convenience of accessing your garage. By following the instructions provided in this guide and referring to the instruction manual for your specific Chamberlain garage door opener model, you can successfully program the remote control and enjoy convenient access to your garage.

First Responder Garage Doors

180 State St Suite 225, Southlake, TX 76092, United States

1-817-991-5551

How To Adjust A Garage Door Sensor – Southlake Garage Door & Gate Repairs

Adjusting a Garage Door Repair Southlake TX is a crucial and often straightforward task that can enhance the functionality and safety of your garage door system.

In this comprehensive guide, we’ll walk through the step-by-step process to ensure your sensors are properly aligned and working optimally.

Understanding the Basics:

Before delving into adjustments, it’s essential to grasp the fundamental components of your garage door sensor system. Typically, this system consists of two sensors—one on each side of the garage door. These sensors transmit an invisible beam across the door opening.

Prioritize Safety:

Safety should always be the top priority when working with any garage door components. Start by disconnecting the power to the garage door opener. This can usually be done by unplugging it from the electrical outlet or turning off the circuit breaker associated with the garage door opener.

Check Alignment:

The alignment of the sensors is critical for their proper functioning. Ensure that both sensors are facing each other directly and are perfectly aligned. Any deviation from this alignment can interrupt the sensor beam and affect the door’s operation.

Clean the Sensors:

Over time, dust, dirt, or cobwebs can accumulate on the sensor lenses, hindering their effectiveness. Take a moment to gently clean the lenses with a soft, lint-free cloth to ensure a clear transmission of the sensor beam.

Tighten Mounting Brackets:

Inspect the mounting brackets that hold the sensors in place. Loose brackets can lead to misalignment. Use a screwdriver or wrench to tighten the mounting brackets securely to the wall.

Adjust Sensor Height:

Both sensors should be installed at the same height above the ground. Use a measuring tape to confirm the height and adjust as necessary. Even a slight deviation in height can impact the sensors’ performance.

Verify Wiring:

Examine the wiring that connects the sensors to the garage door opener. Look for any damaged wires or loose connections. If any issues are found, repair or replace the wiring to ensure proper functionality.

Test Sensor Range:

Activate the garage door opener and observe the sensor’s LED lights. In normal operation, both sensors should have lit LEDs, indicating that they are communicating effectively. If one sensor’s light is off or blinking, there may be an issue. Adjust the sensors until both lights are steady.

Sunlight Interference:

Keep in mind that bright sunlight can interfere with sensor signals. If your sensors are in direct sunlight, consider shading them with a small roof or using shields. This helps prevent false readings caused by sunlight.

Check for Obstacles:

Ensure that there are no obstructions in the sensor’s path. Even small objects or debris can trigger the safety feature and prevent the door from closing. Clear any obstacles to ensure unimpeded sensor communication.

Fine-Tune with Adjustment Screws:

Most garage door sensors come equipped with adjustment screws that allow for fine-tuning. Utilize these screws to make minor adjustments until the sensors are perfectly aligned. Consult your garage door opener’s manual for specific instructions on using these adjustment screws.

Reconnect Power:

Once you have completed the necessary adjustments and ensured that everything is in order, reconnect the power to the garage door opener. This prepares the system for testing.

Test the Garage Door:

Perform a test by closing and opening the garage door. Stand clear of the door’s path and observe for any interruptions in the sensor beam. The door should operate smoothly without any hesitations or issues.

Regular Maintenance:

To prevent future problems, schedule periodic checks to ensure that the sensors remain properly aligned and free from obstructions. Regular maintenance is key to the long-term health and efficiency of your garage door system.

In conclusion, adjusting your Garage Door Repair Southlake TX is a systematic process that involves checking and fine-tuning various components. Following these detailed steps ensures that your garage door system operates optimally, providing both convenience and safety for your home. Regular maintenance and attention to detail will contribute to the longevity of your garage door components and overall system.

Southlake Garage Door & Gate Repairs

817-587-0445

How To Reprogram Your Genie Garage Door Opener – First Responder Garage Doors

Reprogramming your Genie Garage Door Repair Southlake TX involves a series of steps to ensure that it operates securely and effectively.

Here’s a comprehensive guide with explanations for a successful reprogramming process.

Locate the “Learn” Button: Begin by finding the “Learn” button on your Genie garage door opener. This button is typically located on the motor unit and is crucial for programming new codes and remotes.

Clear Existing Codes: Before introducing a new code, clear the existing codes from the opener’s memory. Press and hold the “Learn” button until the indicator light turns off. This action erases all previously stored codes, providing a clean slate for the reprogramming process.

Choose a New Code: Select a new 4-digit PIN for your Genie garage door opener. Opt for a combination that is easy for you to remember but not easily guessable for enhanced security. Avoid common codes like “1234” or sequential patterns.

Press the Learn Button Again: After clearing existing codes, press the “Learn” button again and release it. The indicator light will start blinking, indicating that the garage door opener is now in programming mode and ready to accept a new access code.

Enter the New Code: Enter the chosen 4-digit PIN on the keypad or remote control. Press each digit deliberately, allowing the opener to register the code accurately. The indicator light should respond by either blinking or remaining solid, depending on your Genie model.

Test the New Code: Verify that the new code works as intended by testing it. Stand within the range of the garage door opener and input the PIN on the keypad or use the remote control. The garage door should respond by either opening or closing, confirming the successful programming of the new access code.

Programming Additional Devices (Optional): If you have multiple remotes or keypads, you may want to program them with the new code. Repeat the process for each additional device, ensuring that all your controllers are synchronized with the updated PIN.

Reprogramming Wireless Keypads: If you have a wireless keypad, follow the manufacturer’s instructions for reprogramming. Typically, this involves entering a specific code on the keypad and then pressing the “Learn” button on the opener.

Secure the New Code: Once you have successfully reprogrammed the Genie garage door opener, keep the new code secure. Avoid sharing the code with unauthorized individuals and periodically update it for added security.

Troubleshooting: If the reprogramming process is unsuccessful, consult the Genie garage door opener manual for specific troubleshooting steps. Ensure that you are following the correct procedure for your model.

Regular Maintenance: To ensure the ongoing functionality of your Genie garage door opener, perform regular maintenance checks. Inspect and lubricate moving parts, replace batteries in remotes and keypads, and address any issues promptly.

In conclusion, reprogramming a Genie Garage Door Repair Southlake TX involves locating the “Learn” button, clearing existing codes, choosing a new code, pressing the “Learn” button again, entering the new code, testing its functionality, optionally programming additional devices, securing the new code, troubleshooting if necessary, and performing regular maintenance checks. Following these detailed steps will help you achieve a secure and successful reprogramming of your Genie garage door opener.

First Responder Garage Doors

180 State St Suite 225, Southlake, TX 76092

1-817-991-5551

How Much For New Garage Door – Southlake Garage Door & Gate Repairs

Firstly, when considering a new Southlake Garage Door Repair you’ll encounter a variety of materials. The classic steel garage door is durable and low-maintenance, making it a popular choice.

Wood garage doors bring a touch of natural warmth but may require more upkeep. If you’re aiming for an eco-friendly option, consider aluminum or fiberglass doors.

Now, let’s talk about style. Garage doors come in a range of designs, from traditional raised panels to modern sleek looks. The style you choose can significantly impact your home’s curb appeal, so it’s worth exploring options that complement your house’s architecture.

The price of a new garage door varies based on factors like size, material, and design. On average, you might be looking at anywhere from $500 to $3000 or more. Custom designs and premium materials will push the cost higher, but they can also add a unique touch to your home.

Installation costs are another consideration. While some adventurous souls may attempt a DIY installation, it’s often best to leave this task to the professionals. Installation costs can range from a few hundred to over a thousand dollars, depending on the complexity of the job.

Now, let’s not forget about the garage door opener. If your current opener isn’t compatible with the new door, you might need a new one. Garage door openers range from $150 to $500, plus installation costs if you’re not tackling it yourself.

It’s essential to get quotes from different suppliers and installers to find the best deal. Don’t forget to inquire about warranties and maintenance plans; they can save you headaches down the road.

In conclusion, investing in a new Southlake Garage Door Repair is not just about functionality it’s an opportunity to enhance the overall look of your home. So, whether you opt for a classic steel door or a custom-crafted wooden masterpiece, make sure it reflects your style and fits your budget. Happy garage door hunting.

Southlake Garage Door & Gate Repairs

817-587-0445

How To Program A New Garage Door Opener – Southlake Garage Door & Gate Repairs

Programming a new Garage Door Repair Southlake TX may seem like a daunting task, but with the right guidance and a little patience, you can easily get it done. A garage door opener provides convenience and security to your home, allowing you to open and close the garage door with just a push of a button.

In this comprehensive guide, we will walk you through the step-by-step process of programming a new garage door opener. Whether you’re a seasoned DIY enthusiast or a beginner, our instructions will help you successfully set up your garage door opener.

  1. Gather Your Tools and Materials

Before you begin, make sure you have all the necessary tools and materials on hand. You’ll need:

  • A ladder
  • Your new garage door opener
  • A remote control or keypad (if not included)
  • Batteries for the remote control (if required)
  • A screwdriver (flathead and Phillips)
  • A wrench or pliers
  • Safety glasses
  • The garage door opener’s instruction manual
  1. Prepare Your Garage Door Opener

Before programming, ensure that the garage door opener is properly installed and securely mounted. Follow these steps:

  • Attach the opener to the ceiling, ensuring it’s centered above the garage door.
  • Connect the power source according to the manufacturer’s instructions.
  • Attach the emergency release cord.
  • Test the garage door opener to ensure it moves smoothly and without obstructions.
  1. Locate the Programming Buttons

Most garage door openers have two important buttons: a “Learn” or “Program” button on the opener unit itself and a corresponding button on the remote control. These buttons are usually labeled, but consult your instruction manual to identify them correctly. The “Learn” button is essential for programming.

  1. Clear Existing Codes

Before programming, it’s essential to clear any existing codes from your garage door opener to prevent interference. Follow these steps:

  • Press and hold the “Learn” button on the opener for about 10 seconds until the indicator light blinks or changes color.
  • Release the button. This clears all previous codes.
  1. Program the Remote Control

Now it’s time to program your remote control to work with the garage door opener:

  • Press and release the “Learn” button on the opener. The indicator light should start blinking.
  • Within 30 seconds, press and hold the button on the remote control that you want to program.
  • Keep holding the remote button until the opener’s indicator light stops blinking.
  • Release the remote button. The remote control is now programmed.
  1. Test the Remote Control

After programming, test the remote control to ensure it works correctly:

  • Stand at a reasonable distance from the garage door.
  • Press the button on the remote control. The door should open or close.
  • If it doesn’t work, repeat the programming process or check the batteries.
  1. Program Additional Remotes or Keypads

You can usually program multiple remotes or keypads for your garage door opener. Follow these steps:

  • Press and release the “Learn” button on the opener again.
  • Within 30 seconds, press and hold the button on the additional remote or keypad.
  • Keep holding until the opener’s indicator light stops blinking.
  • Release the button. The new remote or keypad is now programmed.
  1. Set Up Security Features

Many garage door openers offer security features such as rolling codes. Consult your instruction manual to set up these features, which help prevent unauthorized access.

Conclusion:

Programming a new Garage Door Repair Southlake TX may initially appear complex, but by following these step-by-step instructions and consulting your opener’s manual, you can complete the process efficiently. A properly programmed garage door opener enhances the convenience and safety of your home. Once you’ve completed these steps, you’ll be able to enjoy the ease of opening and closing your garage door with the push of a button. Remember to periodically check and maintain your opener to ensure it continues to operate smoothly and securely.

Southlake Garage Door & Gate Repairs

817-587-0445

How To Quiet A Chain Drive Garage Door Opener – Southlake Garage Door & Gate Repairs

A noisy chain drive Southlake Garage Door & Gate Repairs opener can be quite bothersome, especially if the noise is disrupting your household or neighboring areas. Fortunately, there are several steps you can take to quiet down a chain drive garage door opener and make it operate more smoothly.

Here’s a comprehensive guide to help you achieve a quieter and more peaceful garage door operation:

Tools and Materials Needed:

  • Safety glasses
  • Wrenches or pliers
  • Lubricant (silicone-based or garage door lubricant)
  • Rubber or foam insulation strips (optional)
  • Soundproofing materials (optional)

Step 1: Safety Precautions:
Before you begin, make sure to disconnect the power to the garage door opener to ensure your safety while working on it. Also, wear safety glasses to protect your eyes from any debris or lubricant splatters.

Step 2: Tighten Loose Hardware:
Noisy garage door openers can be caused by loose hardware that vibrates during operation. Inspect the chain, bolts, nuts, and other fasteners that hold the opener together. Use wrenches or pliers to tighten any loose hardware. Be careful not to overtighten, as this can lead to further issues.

Step 3: Lubricate the Chain and Moving Parts:
Lack of lubrication can lead to friction and noise in a chain drive opener. Apply a silicone-based or garage door-specific lubricant to the chain, rollers, hinges, and other moving parts. Lubricating the chain can significantly reduce the grinding noise as the chain moves along the track. Make sure to wipe off any excess lubricant to prevent accumulation of dust and debris.

Step 4: Insulate Against Vibration:
Use rubber or foam insulation strips to create a buffer between the chain and the metal surfaces it comes into contact with. Apply these strips to areas where the chain interacts with the trolley, rail, and other metal components. This can help absorb vibrations and reduce noise generated by metal-to-metal contact.

Step 5: Adjust Chain Tension:
A loose or overly tight chain can contribute to noise and vibration. Refer to your garage door opener’s manual to learn how to properly adjust the chain tension. Generally, there should be a small amount of sag in the chain when the door is in the closed position. Adjust the tension until it meets the manufacturer’s recommendations.

Step 6: Insulate the Garage Door:
If noise from the garage door opener is still a concern, consider insulating the garage door itself. Adding insulation panels to the inside of the garage door can help reduce both noise and temperature fluctuations. Look for insulation kits designed specifically for garage doors at home improvement stores.

Step 7: Soundproofing Measures:
For additional noise reduction, consider implementing soundproofing measures in your garage. You can apply acoustic panels, soundproof curtains, or foam panels to the walls and ceiling of the garage. These materials can help absorb sound waves and minimize noise transmission.

Step 8: Replace Worn Parts:
If you’ve tried the above steps and your chain drive opener is still noisy, it’s possible that certain components, such as the chain, rollers, or sprockets, have worn out and need replacement. Worn parts can contribute to increased noise levels. Consult your opener’s manual or contact the manufacturer for guidance on replacement parts.

Step 9: Professional Inspection and Maintenance:
If you’re not comfortable performing maintenance tasks yourself or if the noise issue persists, it’s a good idea to consult a professional garage door technician. They can perform a thorough inspection, identify the source of the noise, and recommend appropriate solutions.

Step 10: Regular Maintenance Routine:
To maintain a quieter garage door opener in the long term, establish a regular maintenance routine. Lubricate moving parts, inspect hardware, and make any necessary adjustments at least once a year, or more frequently if you use the garage door frequently.

In conclusion, quieting a chain drive Southlake Garage Door & Gate Repairs opener involves a combination of maintenance tasks, adjustments, and potentially adding soundproofing measures. Regular maintenance, lubrication, adjusting chain tension, and insulating against vibration can significantly reduce noise levels. If the noise persists, consider soundproofing your garage and seeking professional assistance to ensure your opener is functioning optimally and quietly.

Southlake Garage Door & Gate Repairs

2106 E State Hwy 114 #105, Southlake, TX 76092, United States

1-817-587-0445

Page 1 of 2

Powered by WordPress & Theme by Anders Norén