Local Businesses Blog in Texas

Tag: garage door repair service

Do Garage Doors Increase Home Value – First Call Garage Doors


Garage Door Repair Richmond TX  can indeed increase the value of a home in several ways.

Here’s a detailed explanation of how garage doors can positively impact home value:

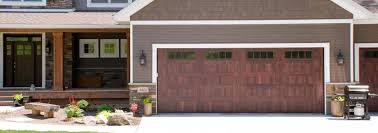
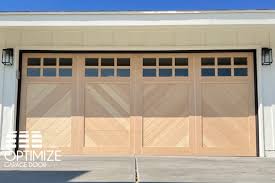
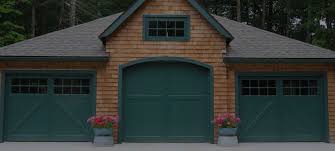
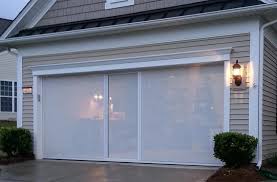
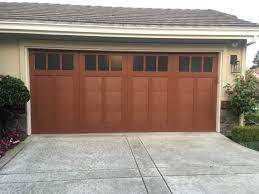
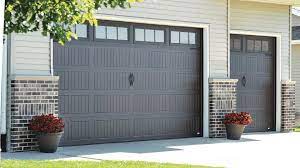
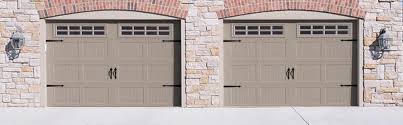
  1. Enhanced Curb Appeal: Garage doors are prominent features of a home’s exterior, contributing significantly to its overall curb appeal. An attractive and well-maintained garage door can instantly boost the aesthetic appeal of a property, making it more appealing to potential buyers. Conversely, an old, worn-out, or poorly maintained garage door can detract from the home’s curb appeal and potentially reduce its value.
  2. Improved Security and Safety: A sturdy and secure garage door provides an additional layer of security for homeowners, protecting their vehicles, belongings, and the interior of their homes from unauthorized access and intruders. Modern garage doors often come equipped with advanced security features such as automatic locking mechanisms, rolling code technology, and smartphone connectivity, enhancing home security and safety. The presence of a secure garage door can be a significant selling point for prospective buyers and may increase the perceived value of the property.
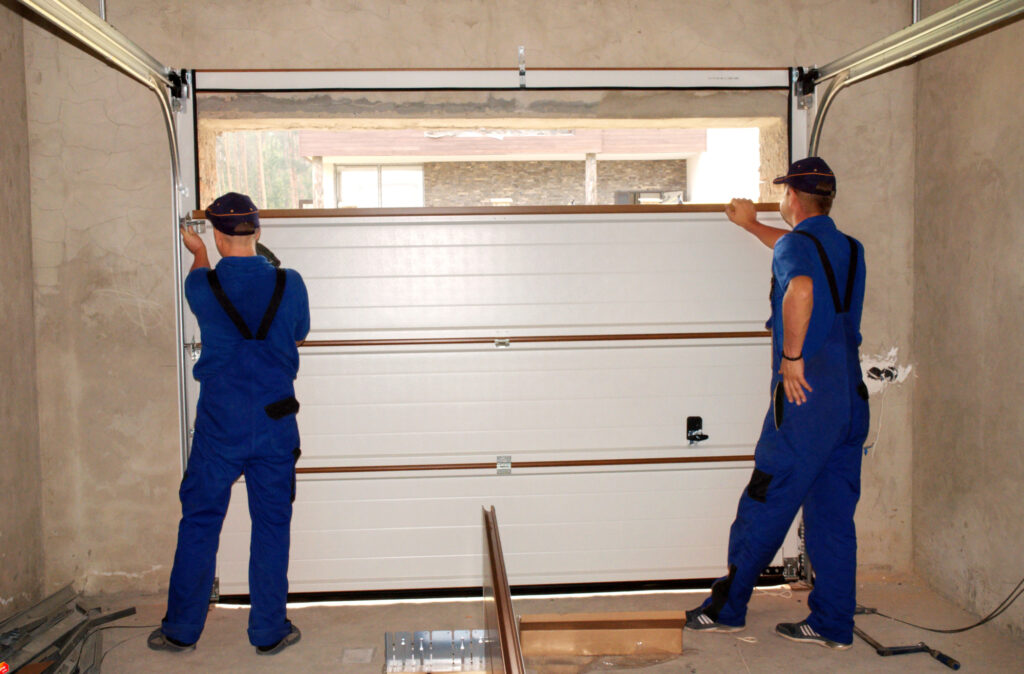
  3. Functionality and Convenience: A functional and well-designed garage door enhances the convenience and usability of a home’s garage space. Modern garage doors offer various features and options, such as remote-controlled operation, keyless entry systems, insulated panels, and energy-efficient materials. These features enhance the usability of the garage and make it easier for homeowners to access and use the space for parking, storage, and other purposes. The convenience and functionality provided by a high-quality garage door can contribute to the overall desirability and value of the property.
  4. Energy Efficiency: Energy-efficient garage doors with proper insulation can help regulate the temperature inside the garage, reducing heat loss in the winter and heat gain in the summer. By minimizing energy waste and improving thermal efficiency, insulated garage doors can lower utility costs and enhance the overall energy efficiency of the home. Homebuyers increasingly prioritize energy-efficient features when searching for properties, so the presence of an energy-efficient garage door can add value to a home and appeal to eco-conscious buyers.
  5. Return on Investment (ROI): Installing a new garage door or upgrading an existing one is considered a high-ROI home improvement project. According to Remodeling magazine’s Cost vs. Value report, garage door replacement consistently ranks among the top home improvement projects with the highest return on investment. A well-executed garage door replacement project can recoup a significant portion of its cost at resale, making it a worthwhile investment for homeowners looking to increase their home’s value.

Investing in a high-quality Garage Door Repair Richmond TX  can yield numerous benefits for homeowners, both in terms of enjoyment and potential resale value.

First Call Garage Doors

20527 FM 1093 Rd Unit B205 Richmond, TX 77407

713-248-2684

https://maps.app.goo.gl/t63qb9AmNfom8KU87

How To Replace Garage Door Wall Control – 20527 Farm to Market 1093 a2


Garage Door Repair Richmond TX If your existing wall control is malfunctioning, damaged, or outdated, replacing it with a new unit can restore reliable operation and convenience.

Here’s a detailed guide on how to replace a garage door wall control:

  1. Gather Necessary Tools and Materials: Before starting the replacement process, gather the tools and materials you’ll need for the job. You’ll likely need a flathead screwdriver, Phillips screwdriver, wire stripper/cutter, voltage tester or multimeter, and the replacement wall control unit compatible with your garage door opener model. Ensure that you have a suitable replacement unit that matches the specifications and wiring configuration of your existing wall control.
  2. Disconnect Power to the Garage Door Opener: Before working on the wall control, disconnect power to the garage door opener to prevent electrical shock or damage. Locate the power source for the opener, typically a dedicated circuit breaker or power outlet near the opener motor unit. Turn off the power supply to the opener by switching off the corresponding circuit breaker or unplugging the power cord.
  3. Remove the Old Wall Control: Start by removing the old wall control unit from the wall. Use a flathead screwdriver to carefully pry off the cover plate surrounding the wall control, exposing the mounting screws underneath. Depending on the design of the wall control, you may need to remove screws, clips, or mounting brackets securing it to the wall.
  4. Disconnect Wiring Connections: Once the mounting screws or brackets are removed, carefully pull the old wall control away from the wall to expose the wiring connections behind it. Take note of the wiring configuration and label or photograph the wires for reference before disconnecting them. Use a wire stripper/cutter to remove the wire nuts or terminals securing the wires to the back of the wall control.
  5. Test Voltage: Before proceeding with the replacement, use a voltage tester or multimeter to verify that there is no electrical power present at the wiring connections. Place the voltage tester probes or multimeter leads on the exposed wires to check for voltage. If voltage is detected, return to the circuit breaker or power source and ensure that the power is turned off before continuing.
  6. Prepare New Wall Control Unit: Prepare the replacement wall control unit for installation by removing any protective packaging or covers. Check the wiring terminals or connection points on the back of the unit to ensure they match the configuration of the existing wiring. If necessary, consult the installation instructions provided with the replacement unit for guidance on wiring connections and compatibility.
  7. Connect Wiring to New Wall Control: Once you’ve verified that there is no electrical power present, connect the wiring from the garage door opener to the corresponding terminals on the back of the new wall control unit. Match the wire colors or labels with the appropriate terminals (e.g., red wire to R terminal, white wire to W terminal). Use wire nuts or terminals to secure the connections, ensuring they are tight and secure.
  8. Mount New Wall Control Unit: After wiring the new wall control, carefully position it on the wall in the desired location. Align the mounting screw holes or brackets with the corresponding holes or mounting points on the wall. Use screws, clips, or brackets to secure the new wall control unit to the wall, ensuring it is level and flush with the surface.
  9. Test Operation: Once the new wall control unit is securely mounted and wired, restore power to the garage door opener by turning on the circuit breaker or plugging in the power cord. Test the operation of the wall control by pressing the buttons to open and close the garage door. Verify that the wall control operates the opener smoothly and without any issues.
  10. Replace Cover Plate: After testing the wall control operation, replace the cover plate over the unit to conceal the mounting screws or brackets and provide a finished appearance. Snap or screw the cover plate into place securely, ensuring it is flush with the wall surface and properly aligned with the wall control unit.
  11. Perform Final Inspection: Once the replacement wall control is installed and operational, perform a final inspection of the unit and surrounding area. Check for proper alignment, secure mounting, and correct wiring connections. Ensure that the wall control buttons function as intended and that there are no signs of damage or defects.
  12. Dispose of Old Wall Control: Dispose of the old wall control unit according to local regulations and guidelines for electronic waste recycling or disposal. If the old unit contains any hazardous materials or components, take appropriate precautions to handle and dispose of it safely and responsibly.

Garage Door Repair Richmond TX If you encounter any difficulties or are unsure about the replacement process, consult the manufacturer’s instructions or seek assistance from a professional garage door technician for expert guidance and support.

20527 Farm to Market 1093 a2

713-248-2684

https://maps.app.goo.gl/t63qb9AmNfom8KU87

How to Reset Toyota Garage Door Opener-Camco Commercial Door Company

Resetting the Garage Door Repair opener in a Toyota vehicle can be done in a few simple steps. The process may vary slightly depending on the model and year of your Toyota, but the following general instructions should help you reset the opener.

Please note that the instructions provided here are based on the information available up to September 2021, and there may be some variations in newer models.

  1. Start by sitting in the driver’s seat of your Toyota vehicle. Make sure all the doors are closed and the ignition is in the “Off” position.
  2. Locate the garage door opener buttons on the overhead console. These buttons are typically positioned near the rearview mirror. There should be three buttons labeled “1,” “2,” and “3” or “A,” “B,” and “C.”
  3. Press and hold down the “1” or “A” button and the button you want to program (for example, “2” or “B”) simultaneously. Hold both buttons down until the indicator light on the overhead console starts flashing rapidly (usually after around 20 seconds). Release the buttons once the light begins flashing.
  4. Next, go to your garage door opener motor unit, usually mounted on the ceiling near the garage door. On the motor unit, you’ll find a “Learn” or “Smart” button. This button is usually small and located near the antenna wire or the control panel.
  5. Press the “Learn” or “Smart” button on the garage door opener motor unit. The indicator light on the motor unit should turn on, indicating that the unit is ready to learn a new code.
  6. Within 30 seconds of pressing the “Learn” or “Smart” button, return to your Toyota and press and hold the button you programmed earlier (e.g., “2” or “B”). Hold the button until the indicator light on the overhead console stops flashing and remains lit.
  7. Once the light stops flashing, release the button. The indicator light should stay on, indicating that the programming was successful.
  8. To test the programming, stand outside your garage and press the programmed button (e.g., “2” or “B”) in your Toyota. The garage door should start moving, either opening or closing, depending on its previous position. If the door doesn’t respond, repeat the process from step 1.
  9. If you have multiple garage doors or gates, you can program additional buttons following the same procedure. Just choose a different button (e.g., “3” or “C”) and repeat steps 3 to 7.
  10. After successfully programming the opener, make sure to retest it periodically to ensure it continues to function correctly.

It’s important to note that these instructions may not cover all Toyota models or garage door opener systems. If you encounter any difficulties or your vehicle’s setup is different, consult your Toyota owner’s manual or contact the manufacturer or a professional for specific instructions tailored to your vehicle and Garage Door Repair opener system.

Camco Commercial Door Company

853 East Wolf Valley Rd. Heiskell, TN 37754

1-865-776-9455

How to Rewind Garage Door Cable-Acclaim Garage Doors

Rewinding a Garage Door Repair cable is a task that requires careful attention and precision to ensure proper functioning of the door. It’s important to follow the necessary steps to avoid any accidents or damage.

Here is a step-by-step guide on how to rewind a garage door cable:

  1. Safety First: Before starting any work on the garage door, make sure to disconnect the power supply to the door opener. This will prevent any accidental activation of the door while you are working on it.
  2. Prepare the Tools: Gather the necessary tools for the job, which typically include a pair of locking pliers, winding bars, a ladder, and gloves for hand protection.
  3. Identify the Problem: Determine the reason for rewinding the garage door cable. Common reasons include cable slippage, fraying, or if the cable has come off the drum.
  4. Release Tension: To begin the rewinding process, release the tension on the garage door spring. Start by clamping a pair of locking pliers onto the door track, just below the lowest roller. This will prevent the door from moving while you release the tension.
  5. Unwind the Cable: Locate the cable drum on the torsion spring shaft. It will be either on the left or right side, depending on the type of garage door setup. Use the winding bars to unwind the cable from the drum, turning it counterclockwise. Continue unwinding until the cable is completely loose.
  6. Inspect and Replace: While the cable is off the drum, inspect it thoroughly for any signs of damage or wear. If the cable is frayed, kinked, or showing signs of significant wear, it’s best to replace it with a new one to ensure safe and reliable operation.
  7. Wind the Cable: Once you have replaced the cable or determined it’s in good condition, it’s time to wind it back onto the drum. Start by inserting one end of the cable into the slot on the drum. Then, using the winding bars, begin turning the drum clockwise. Continue winding until the cable is tightly wrapped around the drum.
  8. Check Tension: After winding the cable, check the tension to ensure it is properly balanced. This is crucial for smooth door operation. Slowly release the pliers from the door track, allowing the door to close. If the door closes evenly and remains balanced, the tension is correct. If not, you may need to adjust the tension by winding or unwinding the cable slightly.
  9. Test the Door: Once you are satisfied with the tension, reconnect the power supply to the door opener. Test the garage door by opening and closing it a few times to ensure smooth operation. Pay close attention to any unusual noises or jerky movements that may indicate further adjustments are required.
  10. Regular Maintenance: To prevent future issues, it’s important to perform regular maintenance on your garage door. Lubricate all moving parts, including the cable, springs, hinges, and rollers, to keep them functioning properly.

Remember, if you are uncertain about any aspect of rewinding the garage door cable or if the job seems too complex, it is recommended to seek assistance from a professional Garage Door Repair technician. Your safety should always be the top priority when working with garage doors.

Acclaim Garage Doors

14148 N 80th Ln, Peoria, AZ 85381

1-602-699-5012

How to Close Garage Door With Keypad-Southern Home Creations

Closing a Garage Door Repair with a keypad typically involves entering a specific code or sequence of numbers to activate the door’s closing mechanism. The process may vary slightly depending on the specific keypad model and garage door opener you have.

Here’s a step-by-step guide to closing a garage door using a keypad:

  1. Familiarize yourself with the keypad: Take a moment to examine the keypad and locate the buttons. Most keypads have a numerical keypad with digits 0-9, along with additional buttons such as “Enter,” “Open/Close,” and “Code Reset.”
  2. Determine the correct code: If you’re unsure of the code required to close the garage door, refer to the manufacturer’s manual or any documentation that came with your keypad. If you don’t have the manual, try common default codes such as 1234 or 0000. If none of these work, you may need to reset the code (refer to step 5).
  3. Enter the code: Once you have the correct code, enter it on the keypad in the specified order. Press each digit firmly and accurately to ensure the code is registered correctly. Some keypads may have a “Code” button that needs to be pressed before entering the digits.
  4. Press the “Enter” or “Open/Close” button: After entering the code, locate the “Enter” or “Open/Close” button on the keypad. Press it firmly to activate the garage door opener. The opener will receive the code from the keypad and initiate the closing process.
  5. Resetting the code (if necessary): If you’ve forgotten the code or want to change it for security reasons, you may need to reset the keypad. Look for a “Code Reset” or “Reset” button on the keypad. Press and hold this button until the keypad’s indicator light starts blinking or the display shows signs of resetting. Follow the specific instructions in your keypad’s manual to complete the reset process.
  6. Troubleshooting: If the garage door doesn’t close after entering the code and pressing the “Enter” or “Open/Close” button, there might be an issue with the keypad, the garage door opener, or the connection between them. Ensure that the keypad has power and is within range of the opener. Check if the garage door opener’s antenna is properly extended and positioned. If the problem persists, consult the manufacturer’s manual or contact customer support for further assistance.
  7. Security precautions: It’s essential to keep your garage door code confidential to prevent unauthorized access. Avoid using easily guessable codes such as sequential numbers or personal information. Regularly update your code for added security. If you suspect that your code has been compromised, change it immediately.

Remember, these steps provide a general guideline for closing a Garage Door Repair using a keypad. It’s important to consult your specific keypad and garage door opener’s manual for detailed instructions and any unique features or settings.

Southern Home Creations

4110 Tench Rd Suite D, Suwanee, GA 30024, United States

1-770-831-0301

How Wide is a Garage Door-LMS Garage Doors

A Garage Door Repair width can vary depending on factors such as the type of garage, the purpose it serves, and local building codes.

However, I understand that you need a detailed response, so I’ll provide you with a comprehensive explanation about garage door widths.

Garage doors are designed to accommodate vehicles and provide access to the garage space. They are typically available in standard sizes, but custom sizes can also be made to fit specific requirements. The width of a garage door is crucial in determining whether it can accommodate certain vehicles and provide adequate clearance for easy entry and exit.

Standard residential garage doors often come in widths ranging from 8 to 18 feet (2.4 to 5.5 meters). The most common widths for single-car garage doors are 8 feet (2.4 meters) and 9 feet (2.7 meters). These sizes can comfortably accommodate most cars, SUVs, and smaller trucks. However, if you have a larger vehicle or need extra clearance, you might consider a wider door.

Double-car garage doors, also known as two-car garage doors, are typically wider to accommodate two vehicles side by side. They commonly come in widths of 16 feet (4.9 meters) and 18 feet (5.5 meters). These sizes provide enough space for two standard-sized cars or vehicles of similar dimensions. Double-car garage doors are more common in suburban areas where households have multiple vehicles or require additional space for storage.

In commercial settings or larger residential properties, garage doors can be even wider to accommodate larger vehicles like vans, trucks, or recreational vehicles (RVs). Commercial garage doors can have widths ranging from 20 feet (6 meters) to 30 feet (9.1 meters) or more, depending on the specific needs of the business or property owner.

It’s important to note that the height of a garage door is also a crucial factor. Standard residential garage doors are commonly 7 feet (2.1 meters) high, but taller options are available, such as 8 feet (2.4 meters) or even 9 feet (2.7 meters) for accommodating larger vehicles or for providing additional headroom if desired.

When determining the appropriate width for a garage door, it’s advisable to consider the size of your vehicle(s), any potential future vehicle purchases, and the available space in your garage. Additionally, local building codes and regulations may impose restrictions on the width and height of garage doors, especially in areas with specific architectural guidelines or for safety reasons.

If you require a garage door with non-standard dimensions, many manufacturers offer customized solutions. It’s best to consult with a garage door specialist or contractor who can assess your specific needs, provide accurate measurements, and offer suitable options based on your requirements and budget.

In conclusion, the width of a Garage Door Repair can vary depending on the type of garage, with standard residential doors typically ranging from 8 to 18 feet. Double-car garage doors are wider to accommodate two vehicles side by side, while commercial doors can be even wider to accommodate larger vehicles. Consider the size of your vehicles, available space, and local regulations when determining the appropriate width for a garage door. Consulting with a professional can help you make an informed decision and find the best solution for your needs.

LMS Garage Doors

1-916-899-2333

How to Install a Garage Door-Don and Son’s Garage Doors

Installing a Garage Door Repair Services can be a complex task, but with the right tools and knowledge, it is possible to do it yourself.

This guide will provide you with step-by-step instructions on how to install a garage door. Please note that these instructions are general and may vary depending on the specific type and model of garage door you have. It’s always a good idea to consult the manufacturer’s instructions for your particular garage door before proceeding.

Before You Begin:

  1. Gather the necessary tools and materials. This may include a ladder, tape measure, level, drill, socket set, wrench, screwdriver, pliers, and safety equipment such as gloves and safety glasses.
  2. Ensure that you have a helper available to assist you during the installation process, as some steps may require an extra pair of hands.

Step 1: Prepare the Opening

  1. Start by measuring the width and height of the garage door opening. Follow the manufacturer’s instructions for the specific dimensions required for your garage door.
  2. Clear the area around the garage door opening, removing any debris or obstructions that may interfere with the installation process.

Step 2: Install the Tracks

  1. Attach the vertical track to both sides of the garage door opening using the provided hardware. Ensure that the track is plumb and level using a level.
  2. Install the horizontal track sections along the ceiling, connecting them to the vertical tracks. Again, use the provided hardware and make sure the tracks are level.

Step 3: Install the Springs and Hardware

  1. Install the torsion springs or extension springs according to the manufacturer’s instructions. This step can be dangerous, so exercise caution or consider hiring a professional for this part of the installation.
  2. Attach the brackets to the door sections and connect the rollers to the brackets. Make sure the rollers are properly aligned with the track.
  3. Install the lift cables and attach them to the bottom brackets on each side of the door.

Step 4: Hang the Door Panels

  1. With the help of your assistant, carefully lift the first door panel into place, making sure it is aligned with the tracks and rollers. Use shims if necessary to level the panel.
  2. Secure the panel to the track by attaching the hinges and rollers.
  3. Repeat the process for the remaining door panels, ensuring that each one is properly aligned and secured to the track.

Step 5: Install the Opener (if applicable)

  1. Follow the manufacturer’s instructions to install the garage door opener if you have one.
  2. This typically involves mounting the opener to the ceiling and attaching it to the door with a reinforcement bracket. Connect the opener to the power source and test its functionality.

Step 6: Test and Adjust

  1. Open and close the garage door several times to ensure smooth operation.
  2. Make any necessary adjustments to the tracks, springs, or other components to ensure proper alignment and functionality.
  3. Lubricate all moving parts of the garage door to reduce friction and prolong its lifespan.

Congratulations! You have successfully installed a Garage Door Repair Services. Remember to consult the manufacturer’s instructions for specific details and safety precautions for your particular garage door model. If you are unsure about any step of the installation process, it is always recommended to seek professional assistance.

Don and Son’s Garage Doors

Lewisville, TX

1-214-415-4109

How to Hide Garage Door Opener Wires-Brother’s Garage Door

Hiding Garage Door Repair opener wires can be a good way to maintain a clean and organized look in your garage. It not only improves the aesthetics but also helps to prevent accidental damage to the wires.

Here are some steps you can follow to hide your garage door opener wires effectively:

  1. Plan the Wire Route: Before starting the hiding process, plan the route for the wires. Determine the best path from the garage door opener unit to the power source, making sure to avoid any potential obstacles or hazards.
  2. Measure and Cut Wire Channels: Purchase wire channels or raceways that match the color and style of your garage walls. Measure the length needed for the wire channels and cut them accordingly using a saw or a utility knife.
  3. Clean the Wall Surface: Clean the wall surface where you plan to install the wire channels. Remove any dust, dirt, or debris using a damp cloth or a mild cleaning solution. Allow the wall to dry completely before proceeding.
  4. Install Wire Channels: Apply adhesive or use screws to securely attach the wire channels to the wall surface. Make sure the channels are level and straight. Follow the manufacturer’s instructions for proper installation.
  5. Run the Wires: Carefully run the garage door opener wires through the wire channels, ensuring they are neatly organized and not twisted or tangled. Use zip ties or cable clips to secure the wires to the channels, preventing them from shifting or falling out.
  6. Conceal the Channels: Once the wires are in place, conceal the wire channels for a seamless look. Paint the wire channels to match the color of your garage walls. Alternatively, you can use adhesive-backed cable concealers that blend with your wall color or texture.
  7. Test the Garage Door Opener: Before completing the process, test the garage door opener to ensure it is functioning correctly. Open and close the garage door several times to verify that the wires are not obstructing its movement or causing any issues.
  8. Final Touches: Once you are satisfied with the wire hiding, tidy up any remaining loose cables by bundling them together with zip ties or cable organizers. Keep them secured and out of sight.
  9. Safety Considerations: Ensure that all wire connections are secure and protected. Avoid running the wires near any heat sources, sharp objects, or areas with excessive moisture.
  10. Regular Maintenance: Periodically inspect the wire channels and cables to ensure they are in good condition. Check for any signs of wear or damage, and make repairs or replacements as needed.

By following these steps, you can effectively hide your Garage Door Repair opener wires, giving your garage a clean and organized appearance while also protecting the wires from potential damage. Remember to prioritize safety and consult a professional if you are unsure about any aspect of the process.

Brother’s Garage Door

29522 Wentworth St. Livonia, MI 48154

734-292-0971

How to Fix a Garage Door-A 24 Hours Door Service

A malfunctioning Garage Door Repair can be a frustrating problem for homeowners. Fortunately, many common garage door issues can be resolved with some basic troubleshooting and repairs. In this guide, we will walk you through the steps to fix a garage door, ensuring its smooth operation and restoring the security and convenience it provides.

Please note: Before attempting any repairs, always prioritize safety. If you are uncomfortable or unsure about performing the tasks outlined in this guide, it is recommended to contact a professional garage door technician.

Tools and Materials Needed:

Safety glasses
Work gloves
Adjustable wrench
Screwdriver set (including flathead and Phillips head)
Pliers
Lubricant (silicone-based spray or garage door lubricant)
Replacement parts (if necessary)
Stepladder or sturdy platform (if required)
Step 1: Identify the Problem:

Observe the garage door’s behavior: Does it make unusual noises? Does it fail to open or close completely?
Check for physical damage, such as bent tracks, broken cables, or loose hardware.
Determine whether the problem lies with the garage door opener or the door itself.
Step 2: Basic Maintenance:

Inspect and tighten all loose bolts, screws, and nuts on the door and its hardware.
Lubricate all moving parts, including hinges, rollers, tracks, and springs, using a silicone-based spray or garage door lubricant.
Remove any debris or obstructions from the tracks.
Step 3: Adjusting the Garage Door Springs:

Caution: Adjusting garage door springs can be dangerous. If you are unsure, it is advised to seek professional assistance.
Identify the type of springs your garage door has: torsion springs or extension springs.
Torsion springs: Consult the manufacturer’s instructions for adjusting tension or seek professional help.
Extension springs: Use an adjustable wrench to adjust the tension by moving the spring hook to a different hole on the track hanger.
Step 4: Fixing Misaligned Tracks:

Ensure the garage door is closed.
Examine the tracks for any misalignment or gaps.
Loosen the screws or bolts holding the track in place.
Gently tap the track with a rubber mallet to realign it.
Tighten the screws or bolts.
Step 5: Repairing or Replacing Rollers:

Disconnect the power to the garage door opener.
Raise the garage door manually, using a stepladder or sturdy platform if needed.
Remove the damaged roller from the track and replace it with a new one.
Repeat the process for all damaged rollers.
Step 6: Replacing Broken Cables:

Disconnect the power to the garage door opener.
Raise the garage door manually and secure it in place.
Detach the broken cable from the bottom bracket and drum.
Install the new cable by reversing the removal process.
Repeat the process for the other cable.
Step 7: Troubleshooting the Garage Door Opener:

Ensure the power to the opener is disconnected.
Check the batteries in the remote control and replace if necessary.
Inspect the wiring for any loose or damaged connections.
Reset the garage door opener by following the manufacturer’s instructions.
Conclusion:
By following this step-by-step guide, you can tackle many common issues that may arise with your Garage Door Repair. Regular maintenance and prompt repairs will help ensure its smooth operation and extend its lifespan. Remember, if you encounter complex issues or feel uncomfortable with any of the tasks involved, it is always recommended to seek the assistance of a professional garage door technician for a safe and effective resolution.

A 24 Hours Door Service

417 Post Oak Cove, Madison, MS 39110

1-601-664-8935

Powered by WordPress & Theme by Anders Norén