
As a dedicated DIY enthusiast, I’ve always been eager to take on home improvement projects, both big and small. One of the most satisfying tasks I’ve tackled is installing an undermount sink. If you’re looking to upgrade your kitchen or bathroom, an undermount sink is a stylish and practical choice.
I’ll share my step-by-step guide to help you successfully install an undermount sink as a DIY project according to Plumbing Corinth TX.
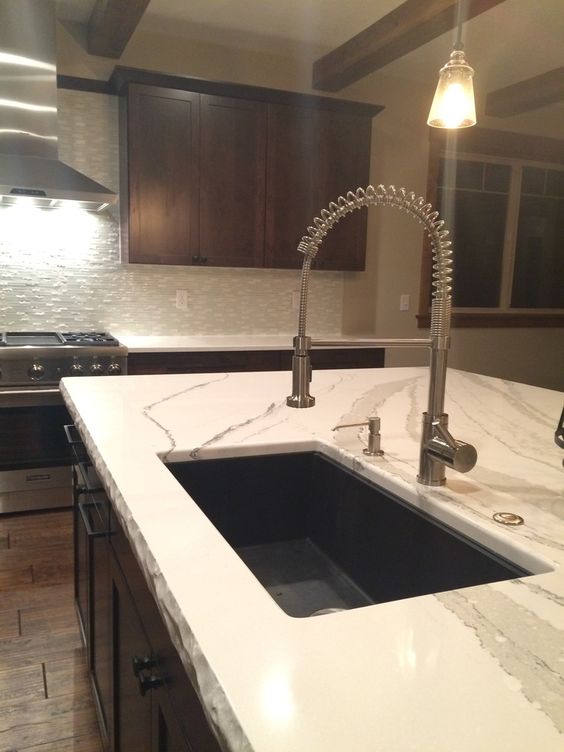
Why Choose an Undermount Sink?
Before we dive into the installation process, it’s essential to understand the benefits of choosing an undermount sink for your home:
- Sleek and Seamless Look: Undermount sinks are installed beneath the countertop, creating a smooth, sleek, and uninterrupted surface. This modern design not only enhances the aesthetics of your space but also makes cleaning easier.
- Enhanced Countertop Space: Since there is no sink lip or rim, you have more usable countertop space, making it easier to wipe down and keep your kitchen or bathroom tidy.
- Durability: Undermount sinks are known for their durability and longevity. They are less prone to chipping and damage than drop-in sinks.
- Easy Maintenance: Cleaning is a breeze with an undermount sink. You can wipe crumbs and spills directly into the sink without dealing with the obstacle of a sink rim.
Tools and Materials You’ll Need
Before you get started, it’s crucial to gather the necessary tools and materials for the project. Here’s what you’ll need:
Tools:
- Screwdriver
- Adjustable wrench
- Plumber’s putty
- Silicone caulk
- Jigsaw
- Clamps
- Drill
- Hacksaw
Materials:
- Undermount sink
- Plywood or support brackets (if needed)
- Countertop cutout template (provided with the sink or purchased separately)
- Mounting hardware (typically provided with the sink)
- Pipe fittings (if applicable)
- Sealant tape
Step 1: Prepare the Work Area
Start by clearing out the area under your countertop where the sink will be installed. Ensure there’s enough space to maneuver and work comfortably. Also, turn off the water supply to the existing sink if you’re replacing it.
Step 2: Measure and Mark
Measure the dimensions of your undermount sink and use the provided countertop cutout template to mark the exact position of the sink on your countertop. Ensure the template is centered and level.
Step 3: Create the Sink Cutout
Using a jigsaw, carefully cut out the marked area for the sink. It’s essential to follow the manufacturer’s guidelines for cutout size and placement. Be patient and precise during this step, as any errors can affect the sink’s fit.
Step 4: Support the Sink
Undermount sinks typically come with mounting hardware to secure them in place. Some sinks may also require additional support, such as plywood or support brackets, beneath the countertop. Follow the manufacturer’s instructions for your specific sink to determine if additional support is necessary.
Step 5: Mount the Sink
Place the sink into the cutout area and secure it in place using the provided mounting hardware. Typically, you’ll use clamps to hold the sink in position while attaching it to the countertop. Be sure to tighten the mounting clips or brackets evenly to ensure a secure fit.
Step 6: Connect the Plumbing
If you’re replacing an existing sink, connect the plumbing to the new undermount sink. Use pipe fittings as needed and ensure a watertight connection. If you’re installing a sink in a new location, you’ll need to set up the plumbing from scratch. It’s a good idea to consult a plumbing guide or professional for this step if you’re not experienced in plumbing work.
Step 7: Seal the Sink
Apply plumber’s putty or silicone caulk to seal the area between the sink and the countertop. This not only creates a watertight seal but also prevents moisture from damaging the countertop. Smooth the sealant to achieve a neat, finished look.
Step 8: Test for Leaks
Before you start using the sink regularly, turn on the water supply and test for any leaks. Inspect the connections and the area around the sink to ensure there’s no moisture escaping.
Step 9: Final Adjustments
Make any final adjustments to the sink’s position or the plumbing connections as needed. Once you’re satisfied with the installation and everything is working correctly, you’ve successfully installed your undermount sink.
Maintenance and Care
Now that your undermount sink is installed, it’s essential to take proper care of it to ensure it remains in top condition:
- Regular Cleaning: Clean your undermount sink with a mild detergent or a solution of water and vinegar. Avoid abrasive cleaners that can scratch the surface.
- Prevent Clogs: Use a drain strainer to prevent food scraps and debris from clogging your sink’s drain.
- Avoid Heavy Impact: Be mindful of heavy pots and pans that could cause dents or chips. Place a protective mat or towel in the sink to minimize potential damage.
- Silicone Re-Sealing: Over time, the sealant between the sink and countertop may wear out. If you notice any gaps or water leakage, reapply silicone caulk or plumber’s putty to reseal the sink.
Conclusion
As stated in Plumbing Corinth TX, installing an undermount sink can be a rewarding DIY project that enhances the functionality and aesthetics of your kitchen or bathroom. With the right tools, materials, and a step-by-step guide, you can successfully complete this project and enjoy the benefits of your new undermount sink. Whether you’re replacing an old sink or upgrading your space, this DIY endeavor is sure to make a positive impact on your home.
Corinth’s Best Plumbing & Hydro Jetting
2705 Meadowview Dr, Corinth, TX 76210, United States
940-286-3137v