In this guide based from Garage Door Repair Madison MS , I’ll walk you through the steps of insulating a garage door, from choosing the right materials to installation techniques.
Step 1: Assessing the Situation
The first thing I did was take a good look at my garage door. I noted the material it was made of and any existing gaps or cracks. This helped me decide on the best insulation method for my door.
Step 2: Choosing the Right Insulation
After some research, I settled on foam board insulation. It’s lightweight, easy to work with, and offers excellent thermal insulation properties. Plus, it’s relatively affordable, which was a big plus for me.
Step 3: Measuring and Cutting
With my insulation material chosen, I measured each panel of my garage door carefully. I wanted to ensure a precise fit, so I double-checked my measurements before cutting the foam board to size.
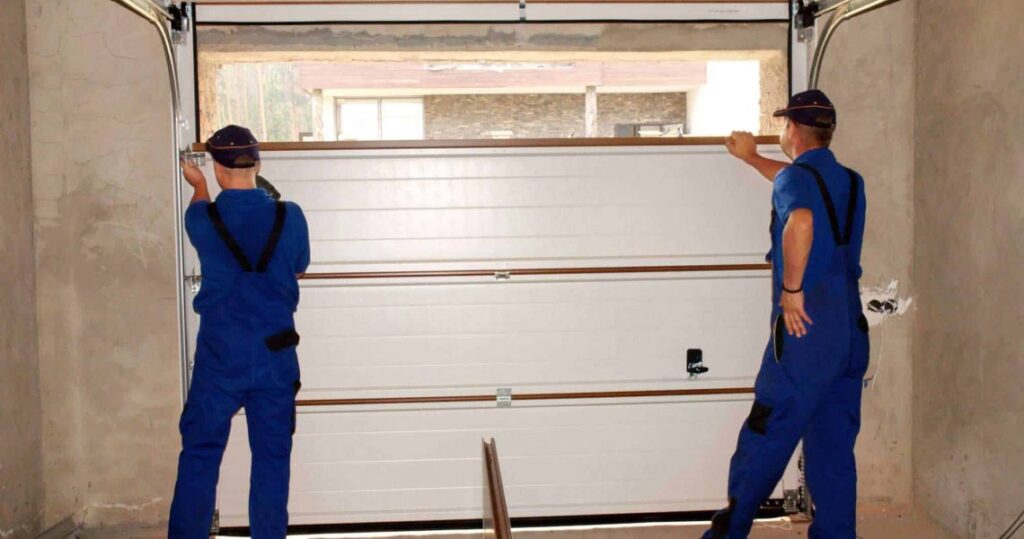
Step 4: Installing the Insulation
Once I had all my pieces cut, I started installing them in the garage door panels. It was a simple process of sliding each piece into place and making sure it fit snugly. I took my time to ensure a tight seal and maximum insulation.
Step 5: Sealing Any Gaps
After installing the insulation, I inspected the edges of the garage door for any gaps or cracks. These areas can compromise the effectiveness of the insulation, so I used weatherstripping to seal them up. It was a quick and easy fix that made a big difference.
Step 6: Testing it Out
With everything in place, it was time to test my handiwork. I noticed an immediate difference in the temperature and noise levels inside the garage. It felt much more comfortable and quieter, even on the hottest or coldest days.
Step 7: Enjoying the Benefits
Now that my garage door was properly insulated, I could enjoy a more comfortable environment year-round. Whether I was working on projects, using the space for storage, or just coming and going from the house, it made a world of difference.
Conclusion
Insulating my garage door was one of the best home improvement projects I’ve tackled. It was relatively easy and affordable, yet it made a significant impact on the comfort and energy efficiency of my home. If you’re tired of dealing with a drafty or overheated garage, I highly recommend giving it a try.
A 24 Hour Door Service
417 Post Oak Cove, Madison, MS 39110, United States
While replacing a broken spring is a challenging job that may be best left to professionals, some homeowners may choose to tackle it themselves. Here’s a detailed guide on how to repair a broken spring on a garage door:
Assess the Damage:Before beginning the repair, assess the extent of the damage to the garage door spring. Identify whether it’s a torsion spring or extension spring system, as the repair process may vary depending on the type of spring.
Gather the Necessary Tools and Materials:Ensure you have the following tools and materials before starting the repair:
Safety glasses
Work gloves
Adjustable wrench or socket wrench set
Vice grips or locking pliers
Ladder or step stool
C-clamps
Replacement garage door spring (matching the size and type of the broken spring)
Steel winding bars (for torsion spring replacement)
Disconnect the Garage Door Opener:Before working on the garage door, disconnect the power to the automatic garage door opener to prevent accidental operation. This can typically be done by unplugging the opener from the power outlet or turning off the circuit breaker that controls the opener.
Release Tension on Torsion Springs:If you have a torsion spring system, it’s crucial to release the tension on the spring before attempting to remove it. Follow these steps to release tension safely:
Use C-clamps or locking pliers to secure the door in the open position.
Insert steel winding bars into the winding cone of the broken spring, one on each side.
Slowly and carefully unwind the spring by turning the winding bars counterclockwise, releasing tension from the spring.
Remove the Broken Spring:Once the tension is released, follow these steps to remove the broken spring:
Use an adjustable wrench or socket wrench set to loosen and remove the bolts or screws securing the spring to the center bracket or end bearing plates.
Slide the broken spring out of the brackets or plates and carefully lower it to the ground.
Install the Replacement Spring:Follow these steps to install the replacement spring:
Slide the new spring into the brackets or end bearing plates, ensuring it is positioned correctly and securely.
Use an adjustable wrench or socket wrench set to tighten the bolts or screws, securing the spring in place.
If replacing a torsion spring, wind the new spring using steel winding bars, following the manufacturer’s instructions for the number of turns and direction of winding.
Reconnect the Garage Door Opener:After installing the new spring, reconnect the power to the automatic garage door opener and test the door’s operation. Ensure that the door opens and closes smoothly without any issues.
Test and Adjust the Door:Once the repair is complete, test the garage door’s operation by opening and closing it manually. Check for smooth, even movement and listen for any unusual noises or vibrations. If necessary, adjust the spring tension or track alignment to ensure proper operation.
Perform Regular Maintenance:To prolong the life of your garage door springs and prevent future issues, perform regular maintenance tasks such as lubricating moving parts, inspecting for wear or damage, and testing the door’s balance and alignment.
Consider Professional Assistance:If you’re unsure about tackling the repair yourself or if you encounter difficulties during the process, consider seeking professional assistance from a qualified garage door technician. Working with garage door springs can be dangerous, and professional technicians have the training, experience, and equipment to perform repairs safely and effectively.
Garage Door Repair Suwanee GA Take your time, work carefully, and don’t hesitate to seek professional help if needed to ensure the job is done correctly.
Southern Home Creations Garage Doors & Openers
4110 Tench Rd Suite D, Suwanee, GA 30024, United States
Understand the Risks: Garage door springs are under high tension and can cause serious injury or even death if mishandled. It’s crucial to understand the risks involved and proceed with caution.
Gather Necessary Tools and Equipment: Before you begin, gather all the tools and equipment you’ll need for the job. This typically includes a pair of winding bars, a socket wrench or adjustable wrench, safety glasses, and gloves.
Identify the Type of Spring: Garage doors typically have either torsion springs or extension springs. Torsion springs are mounted above the door, while extension springs are located on either side of the door tracks. The method for adjusting each type of spring differs, so it’s important to know which type you have.
Release Tension from the Spring: If the spring is currently under tension, you’ll need to release it before you can adjust it. For torsion springs, use winding bars to slowly unwind the spring tension. For extension springs, carefully disconnect them from the door track and release the tension.
Measure the Existing Tension: Before making any adjustments, it’s a good idea to measure the existing tension on the spring. This can help ensure that you apply the correct amount of tension when re-tensioning the spring.
Determine the Desired Tension: The tension required for your garage door spring will depend on factors such as the weight of the door and the type of spring system. Consult the manufacturer’s instructions or seek guidance from a professional to determine the appropriate tension for your door.
Adjust the Tension: To increase the tension on a torsion spring, use winding bars to turn the spring in the direction specified by the manufacturer. Be sure to apply equal tension to both sides of the spring to keep it balanced. For extension springs, you may need to adjust the tension by moving the spring hooks to different holes on the door track.
Test the Door: Once you’ve adjusted the tension on the spring, test the garage door to ensure that it operates smoothly and closes securely. If the door doesn’t close properly or exhibits any unusual behavior, stop immediately and reevaluate the tension adjustments.
Make Fine Adjustments: Fine-tuning the tension may be necessary to achieve optimal performance. Repeat the adjustment process as needed, making small changes until the door operates smoothly and evenly.
Secure the Hardware: Once you’re satisfied with the tension adjustments, make sure all hardware and fasteners are securely tightened to prevent any accidents or malfunctions.
Perform Regular Maintenance: Regular maintenance is essential for keeping your garage door springs in good condition and preventing future problems. Inspect the springs periodically for signs of wear or damage, and lubricate them as needed to ensure smooth operation.
Seek Professional Help if Needed: If you’re unsure about how to adjust the tension on your garage door spring or if you encounter any difficulties during the process, don’t hesitate to seek help from a qualified professional. Attempting to work on garage door springs without the necessary knowledge and experience can be extremely dangerous.
Here’s a detailed guide on how to install a keypad for a garage door opener:
1. Choose the Right Location: Before you begin, choose a suitable location for the keypad near the garage door. Ideally, it should be installed at eye level and within easy reach of anyone entering the garage. Consider mounting it on the side of the garage door frame or on a nearby wall, away from direct exposure to the elements.
2. Gather Materials and Tools: Gather all the materials and tools you’ll need for the installation. This typically includes the keypad unit, mounting screws or bolts, a drill with screwdriver bits, a level, and a tape measure.
3. Prepare the Mounting Surface: Clean the mounting surface where you plan to install the keypad to remove any dirt, dust, or debris. Use a damp cloth or mild detergent and water solution to clean the surface, and allow it to dry completely before proceeding.
4. Mark the Mounting Holes: Hold the keypad unit in the desired location and use a pencil to mark the positions of the mounting holes on the mounting surface. Use a level to ensure that the keypad is mounted evenly and straight.
5. Drill Pilot Holes: Use a drill with an appropriate size drill bit to drill pilot holes at the marked positions on the mounting surface. This will make it easier to install the mounting screws or bolts and prevent the surface from splitting or cracking.
6. Attach the Keypad: Secure the keypad unit to the mounting surface using the provided mounting screws or bolts. Use a screwdriver or drill to tighten the screws or bolts securely, ensuring that the keypad is firmly attached and does not wobble or move when pressed.
7. Install Batteries (If Required): If the keypad unit requires batteries for operation, install them according to the manufacturer’s instructions. Typically, the battery compartment is located on the back or underside of the keypad unit and can be accessed by removing a cover or panel.
8. Program the Access Code: Once the keypad is installed, follow the manufacturer’s instructions to program a personal access code for the garage door opener. This usually involves pressing a sequence of buttons on the keypad and entering a desired code, followed by pressing a button on the garage door opener unit to sync the keypad with the opener.
9. Test the Keypad: After programming the access code, test the keypad to ensure that it operates the garage door opener correctly. Stand outside the garage door and enter the access code on the keypad, then listen for the sound of the garage door opener activating and observe the door as it opens.
10. Adjust and Fine-Tune (If Necessary): If the keypad does not operate the garage door opener correctly or if you encounter any issues during testing, refer to the manufacturer’s instructions for troubleshooting tips and solutions. You may need to adjust the positioning of the keypad, reprogram the access code, or replace the batteries if they are low or depleted.
11. Maintain and Monitor: To keep your keypad for the garage door opener working smoothly and reliably, perform regular maintenance tasks such as cleaning the keypad surface, checking for signs of wear or damage, and replacing the batteries as needed. Follow the manufacturer’s recommendations for maintenance and care to ensure optimal performance and longevity of your keypad.
Garage Door Repair Oklahoma City OK By following these steps and taking the necessary precautions, you can install a keypad securely and effectively, providing convenient access to your garage while enhancing security and peace of mind. If you encounter any issues or need assistance during the installation process, consult the manufacturer’s instructions or contact a professional garage door technician for help.
CCM Overhead Doors
1000 NW 80th St, Oklahoma City, OK 73114, United States
Garage Door Repair Livonia MI Whether it’s a cracked pane, broken frame, or damaged seal, fixing a garage door window typically involves a few straightforward steps.
Here’s a detailed guide on how to fix a garage door window:
1. Assess the Damage: Begin by carefully examining the garage door window to assess the extent of the damage. Identify any cracks, chips, or breaks in the glass pane, as well as any damage to the window frame or seal. Determine whether the damage is repairable or if the window needs to be replaced entirely.
2. Gather Materials and Tools: Depending on the type of repair needed, you may require the following materials and tools:
Replacement glass pane or window kit
Putty knife or scraper
Glass cleaner
Silicone sealant or caulk
Window frame repair kit (if applicable)
Safety gloves and goggles
3. Replace the Glass Pane: If the window pane is cracked or broken, you’ll need to replace it with a new one. Measure the dimensions of the existing pane to ensure you purchase the correct size replacement. Carefully remove any remaining shards of glass from the frame using a putty knife or scraper. Install the new glass pane into the frame, ensuring it fits snugly and securely. Use silicone sealant or caulk to seal the edges of the pane to prevent drafts and moisture intrusion.
4. Repair the Frame: If the window frame is damaged, you may need to repair or reinforce it to ensure structural integrity. Use a window frame repair kit or wood filler to fill in any cracks, chips, or holes in the frame. Sand the repaired areas smooth and apply a fresh coat of paint or sealant to match the rest of the frame. Allow the paint or sealant to dry completely before reattaching the window to the garage door.
5. Seal the Window: To prevent drafts, moisture, and debris from entering the garage through the window, it’s essential to seal the edges of the window frame properly. Apply silicone sealant or caulk along the perimeter of the frame where it meets the garage door, ensuring a tight seal. Use a caulking gun to apply an even bead of sealant and smooth it out with a damp cloth or finger for a neat finish.
6. Clean and Maintain: Once the repair is complete, clean the window glass and frame using glass cleaner and a soft cloth to remove any dirt, dust, or residue. Regularly inspect the window for signs of damage or wear and address any issues promptly to prevent further damage. Consider applying a protective film or coating to the glass to enhance durability and resistance to impact and UV rays.
7. Schedule Professional Inspection: If you’re unsure about how to repair the garage door window or if the damage is extensive, it’s best to seek professional assistance. A qualified garage door technician can assess the damage, recommend the appropriate repairs or replacements, and ensure that the window is safe and functional.
Garage Door Repair Livonia MI By following these steps and taking the necessary precautions, you can repair the window and restore the appearance and performance of your garage door.
Brothers Garage Door Service
29522 Wentworth St, Livonia, MI 48154, United States
Garage Door Repair Rockwall TX Clicker is a popular brand of universal garage door remotes that can be programmed to work with a variety of garage door opener models.
Here’s a comprehensive guide on how to connect a Clicker garage door opener:
1. Gather Necessary Materials: Before you begin, make sure you have the following:
Clicker garage door opener remote
Step ladder (if needed)
Garage door opener instruction manual (for reference)
Assistant (optional, but helpful for testing)
2. Determine Compatibility: Ensure that your Clicker garage door opener remote is compatible with your garage door opener model. Most Clicker remotes are designed to work with a wide range of garage door opener brands and models, but it’s always best to check compatibility to avoid any issues.
3. Locate the “Learn” Button: On your garage door opener motor unit, locate the “Learn” or “Program” button. This button is typically found near the antenna wire hanging from the motor unit. It may also be located on the back or side of the motor unit, depending on the model.
4. Put Your Opener into Programming Mode: Press and release the “Learn” button on your garage door opener motor unit. The indicator light on the motor unit will usually begin flashing, indicating that it’s ready to receive signals from the remote.
5. Program Your Clicker Remote: Follow these steps to program your Clicker remote: a. Press and hold the button on the Clicker remote that you want to program. b. While holding the remote button, press and release the “Learn” button on the garage door opener motor unit. c. Release the button on the Clicker remote. The indicator light on the motor unit should stop flashing and remain lit, indicating that the remote has been successfully programmed.
6. Test the Remote: With the programming complete, it’s time to test the remote. Stand clear of the garage door and press the button on the Clicker remote that you programmed. The garage door should respond by opening or closing, depending on its current position.
7. Fine-Tuning (if necessary): If the garage door doesn’t respond correctly to the Clicker remote, you may need to fine-tune the programming. Repeat the programming process, ensuring that you’re following the steps correctly and holding the buttons for the appropriate amount of time.
8. Program Additional Buttons (if needed): If your Clicker remote has multiple buttons and you want to control more than one garage door, you can program additional buttons using the same process outlined above.
9. Optional: Erase Existing Codes (if needed): If you’re replacing an old remote or encountering issues with multiple remotes interfering with each other, you may need to erase the existing codes from your garage door opener before programming the Clicker remote. Refer to your garage door opener’s instruction manual for specific instructions on how to do this.
10. Secure and Store Your Remote: Once your Clicker remote is programmed and working correctly, securely store it in a convenient location, such as your car’s visor or a keychain remote holder, to ensure easy access when needed.
11. Troubleshooting: If you encounter any issues during the programming process or if the remote doesn’t work as expected, refer to the troubleshooting section of your Clicker remote’s instruction manual or contact the manufacturer for assistance.
If you’re looking to improve the energy efficiency of your home while also making your Temple Garage Door & Gate Repairs more comfortable, installing reflective insulation on your garage door is an excellent idea. Reflective insulation not only helps regulate the temperature in your garage but also prevents heat from escaping during the winter and keeps it cooler in the summer. In this detailed guide, we will walk you through the process of installing reflective insulation on your garage door, step by step.
Why Install Reflective Insulation?
Before we get into the installation process, let’s understand why reflective insulation is a worthwhile investment:
Energy Efficiency: Reflective insulation reflects radiant heat, making it an effective barrier against temperature extremes. This means you’ll spend less on heating and cooling your garage.
Temperature Control: Reflective insulation helps maintain a comfortable temperature in your garage year-round, making it a more pleasant space to work in.
Cost Savings: By reducing the need for heating and cooling, reflective insulation can lead to significant cost savings on your energy bills.
Tools and Materials You’ll Need
To get started, gather the necessary tools and materials:
Tools:
Tape Measure
Utility Knife
Straight Edge
Staple Gun
Safety Glasses
Materials:
Reflective Insulation Roll or Panels
Adhesive Tape
Foil Tape
Garage Door Insulation Kit (optional)
Scissors
Step Ladder
Step 1: Measure Your Garage Door
Before purchasing your reflective insulation, measure the dimensions of your garage door. Be precise in your measurements to ensure you have enough material to cover the entire door surface.
Step 2: Prepare Your Workspace
Clear the area around your garage door to ensure you have enough space to work comfortably. Place your tools and materials nearby for easy access.
Step 3: Cut the Reflective Insulation
Using your tape measure, straight edge, and utility knife, cut the reflective insulation to match the dimensions of your garage door. Make sure to leave a bit of excess material around the edges for a snug fit.
Step 4: Attach the Reflective Insulation
Now it’s time to attach the reflective insulation to your garage door:
Start at the top of your garage door. If you’re using a roll of reflective insulation, unroll it slowly as you go.
Use a staple gun to secure the insulation to the frame of the garage door. Place staples approximately every 12 inches along the edges.
Ensure that the insulation lies flat against the door surface, without any wrinkles or gaps.
Repeat this process for each section of the garage door, working your way down.
Step 5: Seal the Seams
To maximize the effectiveness of your reflective insulation, seal any seams or gaps between pieces of insulation with foil tape. This will prevent air from getting in and out, maintaining the insulation’s performance.
Step 6: Trim Excess Material
After you’ve attached the reflective insulation to the entire garage door, use scissors to trim any excess material along the edges. This will give your installation a clean and finished appearance.
Step 7: Test the Garage Door
Open and close your garage door to ensure that the reflective insulation does not interfere with its operation. Make any necessary adjustments if the insulation is impeding the door’s movement.
Conclusion
By following these steps, you can successfully install reflective insulation on your Temple Garage Door & Gate Repairs, creating a more energy-efficient and comfortable space. Enjoy the benefits of reduced energy costs and a more pleasant garage environment throughout the year.
FAQs
1. Can I install reflective insulation on any type of garage door?
Reflective insulation can be installed on most types of garage doors, including sectional and one-piece doors. However, the installation process may vary slightly depending on the door’s design.
2. How much will installing reflective insulation on my garage door save me on energy bills?
The amount you’ll save on energy bills can vary depending on factors like your location, garage size, and insulation quality. On average, homeowners report savings of 10-20% on heating and cooling costs.
3. Can I install reflective insulation on an already insulated garage door?
Yes, you can install reflective insulation on top of existing insulation for added energy efficiency. Ensure that the existing insulation is in good condition before proceeding.
4. Will reflective insulation make my garage too hot in the summer?
Reflective insulation is designed to regulate temperature, so it should help keep your garage cooler in the summer by reflecting radiant heat. It won’t make your garage excessively hot.
5. Is it necessary to hire a professional for reflective insulation installation?
Reflective insulation installation is a DIY-friendly project. However, if you’re unsure about your DIY skills or the insulation’s compatibility with your garage door, consulting a professional is advisable.