Local Businesses Blog in Texas

Author: Chris Pearson Page 2 of 79

Signs It’s Time for a Garage Door Replacement – Garage Door Solutionz

As a homeowner who values both functionality and aesthetics, I understand the importance of keeping every aspect of my property in top condition. Among the various components that contribute to the overall safety and curb appeal of my home, the garage door holds a significant place. However, like any other part of the house, garage doors also undergo wear and tear over time and may eventually require replacement.

I’ll discuss the signs that indicate it’s time to consider replacing your garage door, along with the benefits of investing in a new one according to Garage Door Repair Sacramento CA.

1. Visible Damage and Wear

One of the most obvious signs that it’s time for a garage door replacement is visible damage and wear. Inspect your garage door regularly for signs of rust, corrosion, dents, cracks, or warping. These issues not only detract from the appearance of your home but also compromise the structural integrity and functionality of the door. If your garage door shows significant signs of wear and damage that cannot be repaired, it may be time to invest in a new one.

2. Difficulty Opening and Closing

Garage doors are designed to open and close smoothly and quietly. If you notice that your garage door is experiencing difficulty when operating, such as sticking, jerking, or making unusual noises, it could indicate underlying mechanical issues. While some problems can be resolved through repairs or maintenance, chronic issues with opening and closing may warrant a replacement, especially if the door is reaching the end of its lifespan.

3. High Energy Bills

Older garage doors may lack proper insulation, allowing cold air to seep in during the winter and hot air to infiltrate during the summer. As a result, your HVAC system may have to work harder to maintain a comfortable temperature in your home, leading to increased energy consumption and higher utility bills. Investing in a new, insulated garage door can help improve energy efficiency and reduce heating and cooling costs over time.

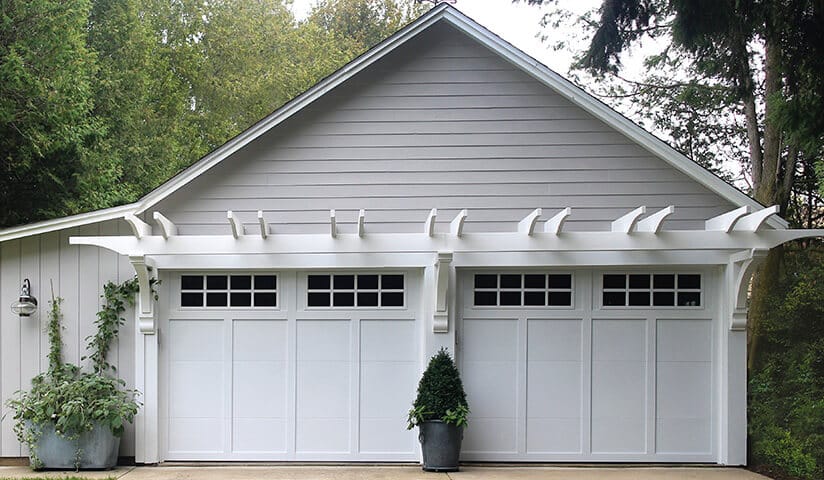
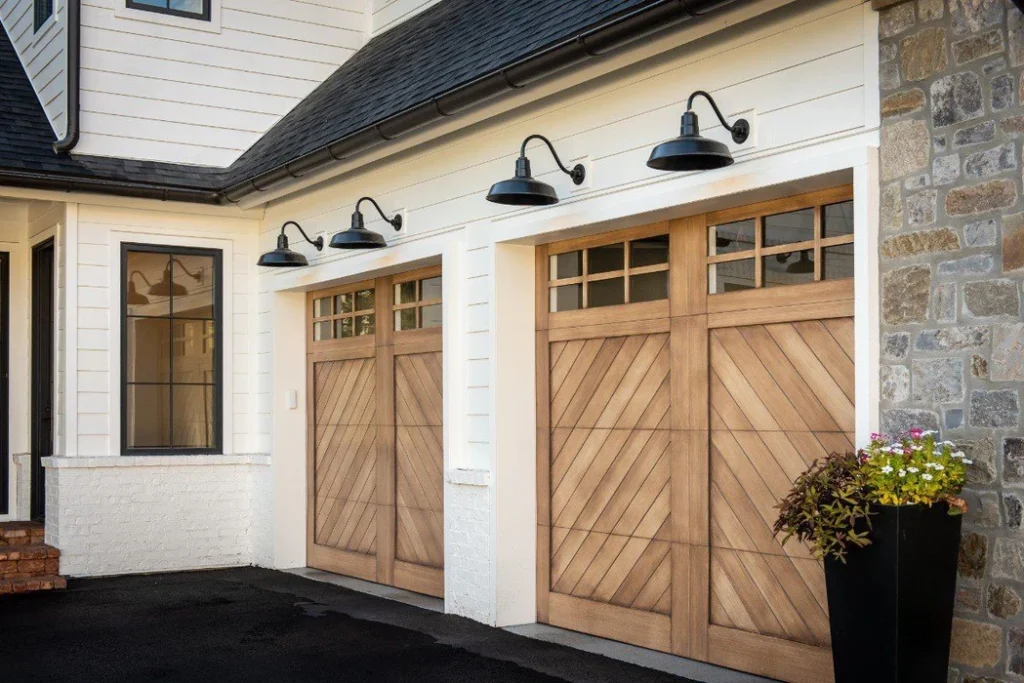
4. Outdated Design and Style

If your garage door looks outdated or no longer complements the architectural style of your home, it may be time for a refresh. Upgrading to a new garage door can enhance the curb appeal of your property and give your home a fresh, modern look. With a wide range of designs, materials, and finishes available, you can choose a garage door that reflects your personal taste and enhances the overall aesthetic of your home exterior.

5. Safety Concerns

Garage doors are heavy and can pose a safety hazard if they malfunction or fail to operate properly. Older garage doors may lack modern safety features, such as auto-reverse sensors, which are designed to detect obstructions in the door’s path and prevent accidents or injuries. If you have young children or pets, ensuring the safety of your garage door should be a top priority. Investing in a new garage door with updated safety features can provide peace of mind and protect your loved ones from harm.

6. Persistent Repairs

If you find yourself constantly repairing your garage door due to recurring issues, such as broken springs, damaged panels, or malfunctioning hardware, it may be more cost-effective in the long run to invest in a new door. While minor repairs are to be expected over time, frequent and costly repairs can add up quickly and may indicate that your garage door is nearing the end of its lifespan. By replacing your garage door with a newer model, you can avoid the hassle and expense of ongoing repairs and enjoy reliable performance for years to come.

7. Decreased Security

Garage doors are a primary entry point to many homes and serve as a crucial barrier against intruders and burglars. If your garage door is old or worn out, it may be more susceptible to forced entry or tampering. Investing in a new garage door with enhanced security features, such as reinforced panels, sturdy locks, and advanced locking mechanisms, can help deter potential intruders and protect your home and belongings.

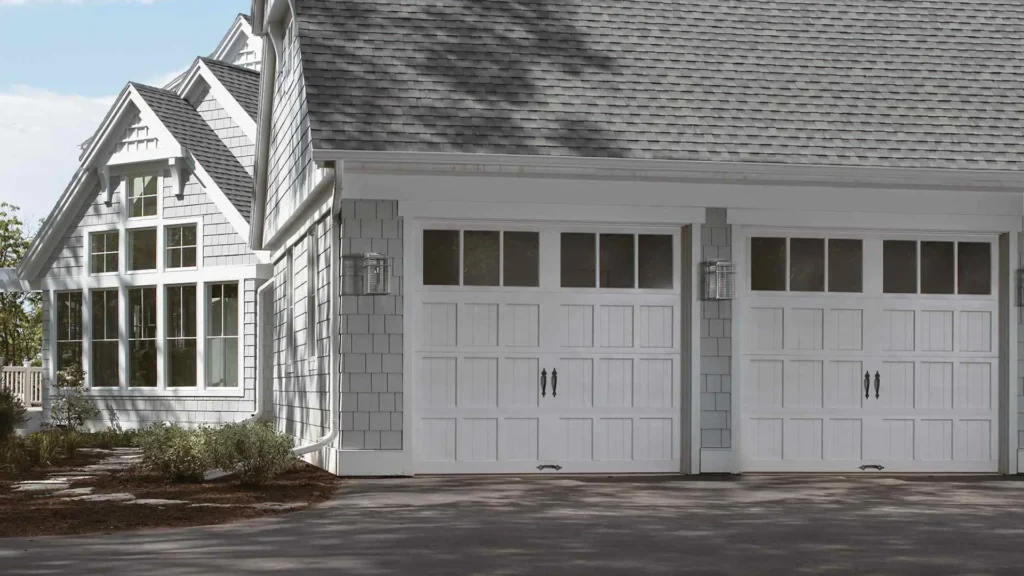
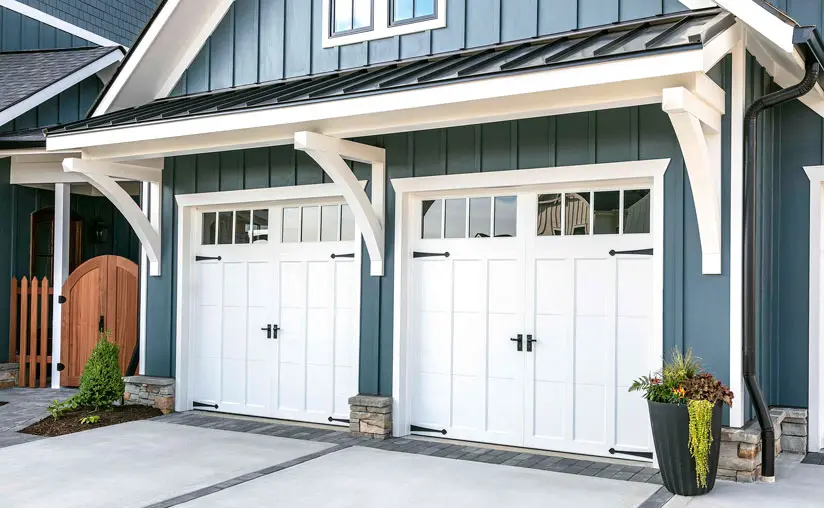
8. Increased Property Value

Replacing your garage door is not only an investment in the safety and functionality of your home but also in its overall value. A new garage door can significantly boost the curb appeal and resale value of your property, making it more attractive to potential buyers. According to the Remodeling 2021 Cost vs. Value Report, garage door replacement offers a high return on investment, recouping an average of 94.5% of the cost at resale.

Conclusion: Investing in a New Garage Door

In conclusion, as stated in Garage Door Repair Anniston AL, there are several signs that indicate it may be time to consider replacing your garage door. Whether you’re dealing with visible damage, mechanical issues, energy inefficiency, outdated design, or safety concerns, investing in a new garage door can provide numerous benefits, including improved functionality, enhanced curb appeal, increased security, and higher property value. If you’re experiencing any of the signs mentioned above, consult with a reputable garage door specialist to explore your options and find the perfect replacement door for your home. By making the investment in a new garage door, you can enjoy peace of mind knowing that your home is safe, secure, and stylish for years to come.

Garage Door Solutionz

Anniston, Alabama

256-954-0264

How Much To Replace Tension Spring On Garage Door – Brothers Garage Door Service

Garage Door Repair Livonia MI play a crucial role in the smooth operation of your garage door, providing the necessary force to lift and lower it safely.

When a tension spring breaks or malfunctions, it can disrupt the functionality of the door, posing safety risks and requiring immediate replacement. In this detailed guide, we’ll explore all aspects of the cost of replacing a tension spring on a garage door, including factors affecting the cost, types of springs available, installation considerations, and tips for making informed decisions.

Factors Affecting the Cost

Several factors influence the cost of replacing a tension spring on a garage door:

  1. Type and Size of the Door: The size and weight of your garage door determine the size and strength of the tension spring needed. Larger and heavier doors require stronger springs, which may result in higher replacement costs.
  2. Type of Spring: Garage doors typically use two types of tension springs: torsion springs and extension springs. Torsion springs are mounted above the door and wind and unwind to store and release energy, while extension springs are located on either side of the door and stretch and contract to provide tension. The type of spring used affects the replacement cost.
  3. Quality of Spring: The quality of the replacement spring impacts its cost. High-quality springs made from durable materials may have a higher upfront cost but offer better performance and longevity, potentially reducing long-term maintenance expenses.
  4. Professional Labor: Hiring a professional garage door technician for spring replacement incurs labor costs, which vary based on factors such as the complexity of the job, local labor rates, and the technician’s expertise.

Cost Range of Replacing Tension Spring on Garage Door

The cost of replacing a tension spring on a garage door varies depending on several factors. Here’s a breakdown of the cost range based on different scenarios:

  1. Torsion Spring Replacement:
    • Single Torsion Spring Replacement: $150 to $300
    • Dual Torsion Spring Replacement: $250 to $500
  2. Extension Spring Replacement:
    • Single Extension Spring Replacement: $100 to $200
    • Dual Extension Spring Replacement: $150 to $300

Additional Considerations and Costs

In addition to the spring replacement cost, consider the following factors:

  1. Labor Costs: Professional installation typically incurs labor costs ranging from $100 to $200, depending on the complexity of the job and local labor rates.
  2. Emergency Service: If a tension spring breaks unexpectedly, you may require emergency service, incurring additional costs for immediate assistance or after-hours replacement.
  3. Additional Parts: Assess the condition of other garage door components, such as cables, rollers, and pulleys. Replacing worn or damaged parts during spring replacement ensures optimal door performance but may increase overall costs.
  4. Warranties and Guarantees: Inquire about warranties or guarantees on the replacement spring and labor to safeguard against defects or issues post-installation.

DIY vs. Professional Replacement

While some homeowners opt for DIY spring replacement to cut costs, it’s crucial to recognize the risks involved. Garage door springs are under significant tension and can cause serious injury or property damage if mishandled. Professional installation ensures safety, accuracy, and adherence to manufacturer guidelines, potentially preventing costly mistakes and ensuring long-term reliability.

Conclusion:

In summary, the cost of replacing a tension spring on a garage door depends on various factors, including the type of spring, size of the door, quality of the replacement part, and labor costs. By understanding these factors and working with a reputable garage door technician, you can ensure a safe and effective replacement process, restoring the functionality and reliability of your garage door system.

Brothers Garage Door Service

29522 Wentworth St, Livonia, MI 48154, United States

1-734-292-0971

How Much Does It Cost To Change Garage Door Springs – Veterans Garage Door

Garage Door Repair Villages FL play a crucial role in the operation of your garage door, counterbalancing its weight and helping it open and close smoothly.

However, like any mechanical component, garage door springs can wear out over time and require replacement. In this guide, we’ll explore the factors that influence the cost of changing garage door springs, including the type of springs, labor costs, and additional considerations.

Factors Affecting the Cost

Several factors can influence the cost of changing garage door springs, including:

  1. Type of Springs: Garage doors typically use two types of springs: torsion springs and extension springs. Torsion springs are located above the door and wind up as the door opens, while extension springs are located on the sides of the door and stretch as the door opens. Torsion springs are generally more expensive to replace than extension springs due to their complexity and higher load-bearing capacity.
  2. Size and Weight of the Door: The size and weight of your garage door will affect the size and strength of the springs required. Larger and heavier doors require stronger springs, which may be more expensive to purchase and install.
  3. Number of Springs: Some garage doors use multiple springs to provide additional support and balance. The number of springs required will impact the overall cost of replacement, as each spring will need to be replaced individually or in sets.
  4. Quality of Springs: The quality of the springs you choose will also affect the cost. Higher-quality springs made from durable materials may have a higher upfront cost but can offer better performance and longevity, potentially saving you money in the long run.
  5. Labor Costs: In addition to the cost of the springs themselves, you’ll also need to factor in labor costs for professional installation. Hiring a professional garage door technician ensures that the springs are installed correctly and safely, reducing the risk of accidents or injuries.

Cost Range of Changing Garage Door Springs

The cost of changing garage door springs can vary depending on the aforementioned factors and other considerations. Here’s a breakdown of the cost range based on different scenarios:

  1. Torsion Spring Replacement:
    • Basic Torsion Spring Replacement: $150 to $250
    • High-Quality Torsion Spring Replacement: $250 to $500
  2. Extension Spring Replacement:
    • Basic Extension Spring Replacement: $100 to $200
    • High-Quality Extension Spring Replacement: $200 to $400
  3. Additional Costs and Considerations:
    • Labor Costs: Professional installation typically costs between $50 and $100 per hour, depending on the complexity of the job and the technician’s experience.
    • Emergency Service: If your garage door springs break unexpectedly, you may need to pay extra for emergency service or after-hours repairs.
    • Warranty: Some garage door springs come with warranties that cover defects in materials and workmanship. Opting for springs with a warranty can provide added peace of mind and protection against premature failure.

DIY vs. Professional Installation

While some homeowners may attempt to replace garage door springs themselves to save money, this is not recommended unless you have experience and expertise in garage door repair. Garage door springs are under high tension and can be dangerous to work with, posing a risk of serious injury or property damage if mishandled. Hiring a professional garage door technician ensures that the job is done safely and correctly, reducing the risk of accidents and ensuring the longevity of your garage door system.

Conclusion:

In conclusion, the cost of changing garage door springs depends on factors such as the type of springs, size and weight of the door, number of springs, quality of springs, labor costs, and additional considerations. By understanding these factors and working with a reputable garage door technician, you can ensure that your garage door springs are replaced correctly and safely, maintaining the functionality and reliability of your garage door system.

Veterans Garage Door

6497 Parkland Dr F, Sarasota, FL 34243, United States

1-941-699-6198

How Do I Schedule An Appointment With Smile Life Orthodontics? – Smiles for Life Orthodontics

Are you ready to take the first step towards achieving a Smile Life Orthodontics Flower Mound TX is quick and easy. Whether you’re considering traditional braces, Invisalign treatment, or any other orthodontic services, our team is here to help you every step of the way.

In this comprehensive guide, we’ll walk you through the process of scheduling your appointment with Smile Life Orthodontics, ensuring that you receive the personalized care you deserve.

: Contact Us

The first step in scheduling an appointment with Smile Life Orthodontics is to reach out to our office. You can do this by phone, email, or through our convenient online contact form. Our friendly reception staff will be happy to assist you in finding a convenient appointment time that fits your schedule.

: Provide Information

When you contact our office to schedule your appointment, be prepared to provide some basic information, including your name, contact information, and reason for seeking orthodontic treatment. This will help us ensure that we schedule the appropriate type of appointment and allocate the necessary time for your consultation.

: Schedule Your Consultation

Once we have gathered the necessary information, we will work with you to schedule your initial consultation with one of our experienced orthodontists. During this appointment, you will have the opportunity to discuss your treatment goals, undergo a comprehensive examination, and learn more about the orthodontic services we offer.

: Complete Patient Forms

To streamline the check-in process and ensure that we have all the information we need, we encourage patients to complete any necessary patient forms prior to their appointment. These forms may include medical history, insurance information, and consent for treatment. You can typically find these forms on our website or request them to be sent to you electronically.

: Confirm Your Appointment

A day or two before your scheduled appointment, our office will reach out to you to confirm the date, time, and location of your visit. This confirmation ensures that you are aware of your appointment and gives you the opportunity to ask any last-minute questions or make any necessary adjustments to your schedule.

: Arrive for Your Appointment

On the day of your appointment, be sure to arrive at our office a few minutes early to complete any final paperwork and ensure a smooth check-in process. Our reception staff will greet you warmly and guide you through the necessary steps before you meet with your orthodontist.

: Meet with Your Orthodontist

During your appointment, you will have the opportunity to meet with one of our experienced orthodontists to discuss your treatment options in detail. Your orthodontist will perform a thorough examination of your teeth, gums, and jaw, and may recommend additional diagnostic tests, such as X-rays or digital scans, to gather more information about your oral health.

: Discuss Treatment Plan and Next Steps

After evaluating your oral health and discussing your treatment goals, your orthodontist will work with you to develop a personalized treatment plan tailored to your unique needs. This may include recommendations for specific orthodontic appliances, estimated treatment duration, and an overview of the associated costs.

: Schedule Follow-Up Appointments

Depending on the complexity of your case and the type of treatment recommended, you may need to schedule follow-up appointments to monitor your progress and make any necessary adjustments to your treatment plan. Our team will work with you to schedule these appointments at convenient intervals throughout your treatment.

: Enjoy Your Journey to a Beautiful Smile

You’ve taken the first step towards achieving the smile of your dreams. Now it’s time to sit back, relax, and enjoy the journey to a straighter, healthier smile with Smile Life Orthodontics. Our team is here to support you every step of the way, and we can’t wait to see the incredible transformation that awaits you.

In conclusion, scheduling an appointment with Smile Life Orthodontics is a simple and straightforward process. By following the steps outlined in this guide, you can take the first step towards achieving the smile you’ve always wanted. Don’t wait any longer – contact us today to schedule your consultation and start your journey to a more confident, beautiful smile!

Smiles for Life Orthodontics

4030 Justin Rd #100, Flower Mound, TX 75077

1-940-295-4188

Can Best Roofing Solution Help With Insurance Claims For Roof Damage In Irvine? –

Roofing Contractor Irvine CA can be a stressful experience for homeowners in Irvine, California. Whether it’s due to severe weather, fallen debris, or aging materials, roof damage can compromise the integrity of your home and lead to costly repairs if left unaddressed.

Fortunately, homeowners who are facing roof damage may be eligible to file an insurance claim to help cover the cost of repairs or replacement. In this comprehensive guide, we’ll explore how Best Roofing Solution can assist homeowners in Irvine with insurance claims for roof damage, providing valuable support and guidance throughout the process.

1. Initial Inspection and Assessment

The first step in the insurance claims process is to conduct an initial inspection and assessment of the roof damage. Best Roofing Solution will dispatch a team of experienced roofing professionals to evaluate the extent of the damage, document any visible issues, and assess the overall condition of the roof. This inspection is crucial for gathering evidence to support the insurance claim and ensuring that all damage is properly documented for reimbursement.

2. Documentation and Photographs

After the inspection, Best Roofing Solution will provide detailed documentation and photographs of the roof damage to support the insurance claim. This documentation includes written reports outlining the nature and extent of the damage, as well as high-resolution photographs that clearly depict the affected areas of the roof. By providing thorough documentation and evidence of the damage, Best Roofing Solution helps strengthen the insurance claim and increases the likelihood of a successful outcome.

3. Communication with Insurance Company

Best Roofing Solution acts as an advocate for homeowners throughout the insurance claims process, serving as a liaison between the homeowner and the insurance company. Our team will communicate directly with the insurance adjuster to provide additional information, answer any questions, and facilitate the claims process. We understand the complexities of insurance claims and will work diligently to ensure that the homeowner receives fair and prompt resolution.

4. Estimation and Cost Analysis

Once the insurance claim has been filed and approved, Best Roofing Solution will provide a detailed estimation and cost analysis for the roof repair or replacement project. Our experienced estimators will assess the scope of work required, including materials, labor, and any additional services, to provide an accurate estimate of the total cost. We strive to provide transparent pricing and ensure that homeowners understand the scope of work and associated costs before proceeding with the project.

5. Repair or Replacement Services

With the insurance claim approved and the scope of work defined, Best Roofing Solution will proceed with the repair or replacement of the damaged roof. Our team of skilled roofing professionals is trained to handle a wide range of roofing materials and systems, ensuring quality workmanship and attention to detail throughout the project. We use high-quality materials and adhere to industry best practices to deliver durable, long-lasting solutions that restore the integrity and functionality of the roof.

6. Final Inspection and Documentation

After completing the roof repair or replacement, Best Roofing Solution conducts a final inspection to ensure that the work meets our high standards of quality and craftsmanship. We verify that all repairs have been completed satisfactorily, address any outstanding issues, and provide the homeowner with comprehensive documentation of the work performed. This documentation serves as proof of completion and can be submitted to the insurance company for reimbursement.

7. Follow-Up and Customer Satisfaction

At Best Roofing Solution, our commitment to customer satisfaction extends beyond the completion of the project. We follow up with homeowners to ensure that they are satisfied with the work performed and address any remaining concerns or questions. Our goal is to exceed our customers’ expectations and provide peace of mind knowing that their roof has been restored to optimal condition.

Conclusion:

Dealing with roof damage can be a daunting task for homeowners, but Best Roofing Solution is here to help. From initial inspection and documentation to communication with the insurance company and completion of repairs, our experienced team is dedicated to providing expert assistance and guidance throughout the insurance claims process. If you’re facing roof damage in Irvine, trust Best Roofing Solution to help you navigate the insurance claims process and restore your roof to its former glory.

Best Roofing Solution – Irvine

17482 Luther Ave, Irvine, CA 92614, United States

1-949-990-6180

How Do I Clean Oil Stains From My Garage Floor? – The Garage Floor Company Omaha

Garage Floor Omaha NE can be unsightly and difficult to remove, but with the right tools and techniques, you can effectively clean and restore the appearance of your floor.

Whether you’re dealing with fresh spills or stubborn stains that have been sitting for a while, this comprehensive guide will walk you through the step-by-step process of cleaning oil stains from your garage floor, leaving it looking clean and pristine once again.

1. Act Quickly

If you notice a fresh oil spill on your garage floor, it’s essential to act quickly to prevent the oil from penetrating the surface and causing a stubborn stain. Grab some absorbent materials such as cat litter, sawdust, or baking soda, and sprinkle them generously over the spill. Allow the absorbent material to sit on the stain for at least 15-30 minutes to soak up as much oil as possible.

2. Absorb the Oil

After the absorbent material has had time to work its magic, use a stiff-bristled brush or broom to sweep it up along with the absorbed oil. Dispose of the soiled material properly according to local regulations. If any oil residue remains on the floor, repeat the process with fresh absorbent material until the spill is fully absorbed.

3. Apply a Degreaser

Once the majority of the oil has been absorbed, it’s time to tackle the remaining residue with a degreaser. Choose a high-quality degreasing product specifically designed for use on concrete surfaces. Follow the manufacturer’s instructions for diluting the degreaser with water, then apply it generously to the stained area.

4. Scrub the Stain

Using a stiff-bristled brush or scrubbing pad, scrub the degreaser into the stain, working it in a circular motion to loosen the oil residue. Pay particular attention to any stubborn spots or deeply embedded stains, applying extra pressure as needed to break up the oil and lift it from the surface of the concrete.

5. Allow Dwell Time

After scrubbing the stain thoroughly, allow the degreaser to sit on the surface of the concrete for the recommended dwell time specified by the manufacturer. This allows the degreaser to penetrate the pores of the concrete and break down any remaining oil residue, making it easier to remove during the rinsing process.

6. Rinse the Floor

Once the dwell time has elapsed, rinse the floor thoroughly with clean water to remove the degreaser and any loosened oil residue. Use a garden hose or pressure washer to ensure thorough coverage and effective rinsing. Be sure to rinse the floor in sections, working from one end to the other, to prevent the degreaser from drying on the surface of the concrete.

7. Repeat if Necessary

For stubborn or heavily stained areas, you may need to repeat the cleaning process with additional applications of degreaser and scrubbing. Be patient and persistent, taking the time to thoroughly clean each section of the floor until the oil stains are completely removed.

8. Dry the Floor

After rinsing the floor, allow it to dry completely before assessing the results. Use a squeegee or mop to remove any excess water, then allow the floor to air dry naturally. Avoid walking or driving on the wet concrete to prevent recontamination with oil or dirt.

9. Evaluate the Results

Once the floor is dry, inspect the cleaned area to ensure that the oil stains have been effectively removed. If any stubborn stains persist, you may need to repeat the cleaning process or try alternative methods such as using a stronger degreaser or applying a poultice.

10. Prevent Future Stains

To prevent future oil stains on your garage floor, consider taking proactive measures such as using drip pans or trays under vehicles to catch any leaks or spills. You can also apply a concrete sealer or epoxy coating to the floor to create a barrier that repels oil and other liquids, making them easier to clean up.

By following these steps and using the right tools and techniques, you can effectively clean oil stains from your garage floor and restore its appearance. With regular maintenance and preventive measures, you can keep your garage floor looking clean and pristine for years to come.

The Garage Floor Company Omaha

15125 Industrial Rd, Omaha, NE 68144, United States

1-402-576-5599

How Do I Maintain And Clean My Natural Stone Flooring? – Floor N More

Flooring Southlake TX adds elegance, sophistication, and timeless beauty to any home, making it a popular choice for homeowners seeking to create a luxurious and inviting atmosphere.

However, to preserve the natural beauty and durability of stone flooring, proper maintenance and cleaning are essential. In this comprehensive guide, we’ll explore the best practices for maintaining and cleaning natural stone flooring, ensuring that it remains pristine and lustrous for years to come.

1. Understand the Characteristics of Natural Stone

Before diving into maintenance and cleaning techniques, it’s essential to understand the characteristics of natural stone and how they influence care and maintenance. Natural stone comes in a variety of types, including marble, granite, travertine, limestone, slate, and sandstone, each with its unique properties and maintenance requirements.

  • Porosity: Natural stone is porous, meaning it can absorb liquids and stains if not properly sealed.
  • Durability: While natural stone is durable and long-lasting, it can be susceptible to scratching, etching, and chipping if exposed to harsh chemicals or abrasive materials.
  • Variability: Natural stone exhibits natural variations in color, veining, and texture, adding to its beauty and uniqueness.

2. Implement Preventative Maintenance Practices

Preventative maintenance is key to preserving the appearance and integrity of natural stone flooring. By following these preventative measures, you can minimize wear and tear and prolong the lifespan of your stone flooring:

  • Sealing: Properly seal your natural stone flooring to protect it from moisture penetration, stains, and damage. Sealants help create a protective barrier that repels liquids and prevents absorption into the stone.
  • Use Coasters and Mats: Place coasters under glasses and mats or rugs in high-traffic areas to protect the stone surface from scratches, spills, and abrasive particles.
  • Regular Sweeping or Vacuuming: Remove dust, dirt, and debris from the surface of the stone flooring regularly using a soft-bristle broom or vacuum cleaner with a brush attachment. This prevents abrasive particles from scratching the surface.

3. Clean Spills Promptly

Promptly clean up spills and stains to prevent them from penetrating the porous surface of the natural stone and causing permanent damage. Use a soft, absorbent cloth or paper towel to blot up spills immediately, taking care not to spread the liquid or rub it into the stone.

  • pH-Neutral Cleaner: For routine cleaning of natural stone flooring, use a pH-neutral stone cleaner diluted with water. Avoid using acidic or abrasive cleaners, as they can etch the surface of the stone and dull its appearance.
  • Gentle Scrubbing: For stubborn stains or dried spills, gently scrub the affected area with a soft brush or sponge dipped in the diluted stone cleaner solution. Avoid using abrasive scrubbing pads or harsh chemicals, as they can damage the stone.

4. Deep Clean Periodically

In addition to regular maintenance, deep clean your natural stone flooring periodically to remove embedded dirt, grime, and residues that can dull the surface and detract from its natural beauty. Follow these steps for a thorough deep cleaning:

  • Remove Furniture: Clear the area of furniture and obstacles to access the entire surface of the stone flooring.
  • Pre-Wet the Surface: Thoroughly wet the stone flooring with clean water to loosen dirt and debris and prepare it for cleaning.
  • Use a Stone Cleaner: Apply a pH-neutral stone cleaner diluted with water to the surface of the stone flooring. Use a soft-bristle scrub brush or mop to agitate the cleaner and lift dirt and stains from the surface.
  • Rinse Thoroughly: Rinse the stone flooring with clean water to remove any remaining cleaner and residues. Ensure that all traces of cleaner are thoroughly rinsed away to prevent streaking or film buildup.

5. Address Stains and Etching

Despite your best efforts, natural stone flooring may occasionally develop stains or etching from spills, acidic substances, or abrasive materials. Here’s how to address common issues:

  • Stain Removal: For organic stains such as food, beverage, or pet stains, create a poultice using a mixture of baking soda and water or a commercial stone stain remover. Apply the poultice to the stain, cover it with plastic wrap, and allow it to dry completely before gently removing and rinsing.
  • Etch Removal: If your stone flooring has developed etch marks from acidic substances, such as lemon juice or vinegar, use a marble polishing powder or limestone etch remover to restore the surface. Follow the manufacturer’s instructions carefully and buff the affected area with a soft cloth to restore shine.

6. Perform Regular Sealing

Regularly check the sealant on your natural stone flooring and reapply it as needed to maintain optimal protection against moisture, stains, and damage. The frequency of sealing depends on factors such as the type of stone, level of foot traffic, and exposure to moisture.

  • Water Test: Perform a simple water test to determine if your stone flooring requires resealing. Sprinkle a few drops of water onto the surface of the stone and observe how it reacts. If the water beads up and does not absorb into the stone, the sealant is still effective. If the water absorbs into the stone and leaves a dark spot, it’s time to reseal.

7. Seek Professional Assistance if Needed

If you’re unsure how to properly maintain or clean your natural stone flooring or if you encounter stubborn stains, etching, or damage that requires professional attention, don’t hesitate to seek assistance from a reputable stone care professional or flooring specialist. They can assess the condition of your stone flooring, recommend appropriate cleaning products and techniques, and provide expert guidance on maintenance and care.

Conclusion:

Maintaining and cleaning natural stone flooring requires careful attention to detail, proper techniques, and the use of appropriate cleaning products and materials. By implementing preventative maintenance practices, promptly addressing spills and stains, deep cleaning periodically, and performing regular sealing, you can ensure that your natural stone flooring remains pristine, lustrous, and beautiful for years to come.

Floor N More

1621 E Southlake Blvd, Southlake, TX 76092, United States

1-817-310-6331

How To Program BMW Garage Door Opener – JT’s Overhead Doors

Garage Door Repair Mesa AZ can provide convenient access to your home’s garage without the need for a separate remote control. BMW vehicles equipped with a universal garage door opener feature can be programmed to work with most garage door opener systems, allowing you to open and close your garage door with just the push of a button.

In this guide, we’ll walk you through the step-by-step process of programming a BMW garage door opener, ensuring that you can enjoy seamless integration between your vehicle and your home’s garage door.

1. Identify the Garage Door Opener System

Before you begin programming your BMW’s garage door opener, it’s essential to identify the type of garage door opener system installed in your home. Most modern garage door openers use either a rolling code or a fixed code system. Rolling code systems generate a new code each time the garage door is operated, while fixed code systems use a static code that remains the same over time.

2. Locate the Garage Door Opener Buttons

In your BMW vehicle, locate the garage door opener buttons typically located on the rearview mirror or overhead console. These buttons may be labeled with icons representing a garage door or a house, depending on the vehicle model and trim level.

3. Clear Existing Programming (If Needed)

If your BMW’s garage door opener buttons are already programmed to work with a different garage door opener system, you may need to clear the existing programming before proceeding with the new programming. Consult your vehicle’s owner’s manual or contact BMW customer service for instructions on clearing existing programming.

4. Put the Garage Door Opener System into Programming Mode

To program your BMW’s garage door opener, you’ll need to put the garage door opener system into programming mode. This typically involves pressing and holding a button on the garage door opener system itself until the indicator lights flash or a beep is heard, indicating that the system is ready to receive programming signals.

5. Program the BMW’s Garage Door Opener Buttons

Once the garage door opener system is in programming mode, press and hold the desired garage door opener button in your BMW vehicle. While holding the button, press the corresponding button on the garage door opener system itself. You may need to repeat this step multiple times to ensure successful programming.

6. Test the Garage Door Opener

After programming the BMW’s garage door opener buttons, test the system to ensure that it operates correctly. Park your vehicle within range of the garage door opener system and press the programmed button on the rearview mirror or overhead console. The garage door should open or close in response to the signal from the vehicle, indicating that the programming was successful.

7. Repeat the Programming Process (If Needed)

If you have multiple garage doors or if you’re programming additional vehicles to work with the same garage door opener system, repeat the programming process for each door or vehicle individually. Ensure that each button is programmed to the correct garage door opener system to avoid confusion and ensure seamless operation.

8. Perform Regular Maintenance

To ensure continued reliable operation of your BMW’s garage door opener, perform regular maintenance and inspections. Check the buttons for signs of wear or damage, and clean the contacts as needed to maintain optimal connectivity. Additionally, test the system periodically to verify that it operates correctly.

9. Seek Professional Assistance if Needed

If you encounter difficulties or have concerns about programming your BMW’s garage door opener, don’t hesitate to seek professional assistance. Contact a reputable BMW dealership or automotive technician to inspect the vehicle and provide guidance on programming the garage door opener system safely and effectively.

By following these steps and exercising proper caution, you can successfully program your BMW’s garage door opener and enjoy convenient access to your home’s garage with just the push of a button. Whether you’re programming a new vehicle or adding additional garage doors to your existing system, knowing how to program your BMW’s garage door opener provides invaluable convenience and peace of mind.

JT’s Overhead Doors

307 N Sandal, Mesa, AZ 85205, United States

1-480-662-3315

How Much Does It Cost To Replace A Garage Door – Circle B Garage Door of College Station

Garage Door Repair College Station TX is a significant investment that can enhance the curb appeal, functionality, and security of your home.

However, the cost of replacement can vary widely depending on several factors. In this comprehensive guide, we’ll explore the various factors that influence the cost of replacing a garage door and provide you with valuable insights to help you make informed decisions.

Understanding the Importance of Garage Doors

Before delving into the cost considerations, it’s essential to recognize the vital role that garage doors play in your home.

Functionality and Security

Garage doors provide convenient access to your home and serve as a crucial barrier against intruders and the elements.

Curb Appeal and Property Value

A well-maintained and aesthetically pleasing garage door can significantly enhance the curb appeal and overall value of your property.

Factors Affecting the Cost of Garage Door Replacement

Several factors influence the cost of replacing a garage door, including the following:

Type and Material

Garage doors come in various types, including sectional, roll-up, and swing-out, each with its unique characteristics and price points. Additionally, the material of the door, such as steel, aluminum, wood, or composite, can significantly impact the cost.

Size and Style

The size of the garage door, as well as its design and style elements, such as windows, decorative hardware, and custom finishes, can affect the overall cost of replacement.

Insulation and Energy Efficiency

Opting for an insulated garage door can improve energy efficiency and reduce heating and cooling costs. However, insulated doors typically come at a higher price point than non-insulated ones.

Additional Features and Accessories

Optional features and accessories, such as automatic openers, keyless entry systems, security cameras, and smart home integration, can add to the total cost of replacement.

Average Cost of Garage Door Replacement

While the cost of replacing a garage door can vary depending on the factors mentioned above, here are some average estimates to provide you with a general idea:

National Averages

According to industry data, the average cost of garage door replacement in the United States ranges from $1,000 to $3,000, including materials and installation.

Regional Variances

Costs may vary depending on your location, with urban areas and regions with higher living expenses typically commanding higher prices.

Cost Breakdown by Material and Type

  • Steel Garage Doors: $750 to $3,500
  • Aluminum Garage Doors: $1,500 to $2,500
  • Wood Garage Doors: $1,200 to $4,000
  • Composite Garage Doors: $1,500 to $3,000

Cost-Saving Tips and Considerations

While replacing a garage door can be a significant investment, there are several strategies you can employ to minimize costs:

DIY vs. Professional Installation

While professional installation ensures quality workmanship and warranties, DIY installation can save you on labor costs if you have the necessary skills and tools.

Timing and Seasonal Discounts

Timing your replacement during off-peak seasons or taking advantage of seasonal promotions and discounts can help you save money on materials and installation.

Financing Options and Rebates

Exploring financing options, such as home improvement loans or credit programs, can make garage door replacement more affordable. Additionally, rebates and incentives may be available for energy-efficient doors.

Conclusion:

Replacing a garage door is a significant investment that offers numerous benefits in terms of functionality, security, and aesthetics. By understanding the factors that influence the cost of replacement and exploring cost-saving strategies, you can make informed decisions to enhance your home while staying within your budget.

Circle B Garage Door of College Station

1212 Baywood Ct, College Station, TX 77845, United States

1-979-212-8699

How Do Automatic Garage Door Openers Work – Affordable Garage Door Repairs of Kokomo

Garage Door Repair Kokomo IN provide convenience and security by allowing homeowners to operate their garage doors remotely. These devices utilize a combination of mechanical components, sensors, and electrical systems to automate the process of opening and closing garage doors.

In this detailed guide, we’ll explore how automatic garage door openers work, including the key components involved and the technology behind their operation.

Key Components of Automatic Garage Door Openers

Automatic garage door openers consist of several essential components, each playing a crucial role in the overall functionality of the system:

1. Motor:

The motor is the heart of the garage door opener, providing the power necessary to operate the door. Most garage door opener motors are equipped with a horsepower rating that determines their lifting capacity, with options ranging from 1/3 horsepower for lightweight doors to 1 horsepower for heavier doors.

2. Drive Mechanism:

The drive mechanism is responsible for transferring power from the motor to the garage door, allowing it to open and close smoothly. Common types of drive mechanisms include chain drive, belt drive, and screw drive systems, each offering varying levels of performance, noise, and durability.

3. Remote Control:

Remote controls allow users to operate their garage doors from a distance, typically from inside their vehicles. These handheld devices transmit signals to the garage door opener, triggering the opening or closing action. Remote controls may use radio frequency (RF) signals or infrared (IR) technology to communicate with the opener.

4. Wall Control Panel:

Wall control panels are installed inside the garage and provide a convenient way to operate the garage door opener from within the garage. These panels feature buttons or switches for opening and closing the door, as well as additional controls for activating lights or adjusting settings.

5. Safety Sensors:

Safety sensors are essential safety features designed to prevent accidents and injuries by detecting obstacles in the path of the closing garage door. These sensors typically consist of a transmitter and receiver mounted near the bottom of the door tracks, emitting an invisible beam of light. If an object or person interrupts the beam while the door is closing, the sensors signal the opener to stop and reverse the door’s movement.

6. Control Circuitry:

The control circuitry of the garage door opener manages the operation of the motor, interprets signals from remote controls and sensors, and regulates the opening and closing functions. Advanced models may feature programmable logic controllers (PLCs) or microprocessors for enhanced functionality and customization options.

How Automatic Garage Door Openers Work

The operation of an automatic garage door opener can be summarized in the following steps:

1. Activation:

The user activates the garage door opener by pressing a button on the remote control or wall control panel. The transmitter sends a signal to the receiver in the opener, instructing it to initiate the opening or closing action.

2. Motor Operation:

Upon receiving the signal, the opener’s motor springs into action, generating the necessary power to lift or lower the garage door. The drive mechanism transfers this power to the door via a chain, belt, or screw drive, depending on the type of opener.

3. Door Movement:

As the motor operates, the garage door begins to move along its tracks, guided by rollers attached to the door edges. The door moves smoothly and steadily, opening or closing to allow access to the garage space.

4. Safety Sensor Monitoring:

Throughout the opening or closing process, the safety sensors continuously monitor the area beneath the garage door. If an obstruction is detected, such as a vehicle, person, or object, the sensors immediately halt the door’s movement and trigger a reversal to prevent injury or damage.

5. Completion:

Once the garage door reaches its fully open or closed position, the motor stops automatically, and the door remains in place until further action is initiated. The opener is designed to provide reliable and efficient operation, ensuring the security and convenience of the garage space.

Technology Behind Automatic Garage Door Openers

Automatic garage door openers rely on advanced technology to deliver seamless operation and enhanced security features. Some of the key technologies used in modern garage door openers include:

1. Rolling Code Encryption:

Many remote controls and garage door openers utilize rolling code encryption technology to prevent unauthorized access. This technology generates a unique code each time the remote control is used, making it virtually impossible for hackers to intercept and replicate the signal.

2. Smartphone Connectivity:

Some garage door openers offer smartphone connectivity features, allowing users to control their garage doors remotely via a mobile app. This technology enables users to monitor the status of their garage doors, receive alerts and notifications, and operate the door from anywhere with an internet connection.

3. Battery Backup:

To ensure continued operation during power outages, some garage door openers are equipped with battery backup systems. These systems provide temporary power to the opener, allowing users to open and close their garage doors even when the main power source is unavailable.

4. Home Automation Integration:

Many garage door openers are compatible with home automation systems, enabling seamless integration with other smart devices and platforms. Users can incorporate their garage doors into automated routines, schedules, and voice-controlled commands for added convenience and functionality.

Conclusion:

Automatic garage door openers offer convenience, security, and peace of mind for homeowners, allowing them to operate their garage doors remotely with the push of a button. By understanding the key components, operation principles, and technologies behind automatic garage door openers, users can make informed decisions when selecting and installing these essential home devices. Whether you’re upgrading an existing opener or installing a new system, automatic garage door openers provide reliable performance and enhanced functionality for modern living.

Affordable Garage Door Repairs of Kokomo

1206 Peace Pipe Dr, Kokomo, IN 46902, United States

1-765-441-4637

Page 2 of 79

Powered by WordPress & Theme by Anders Norén